Translations:Installation/6/en
From Pixelmon Wiki
Pixelmon installation
- Download the latest version of Pixelmon here.
- Make sure that the downloaded JAR file's size is around 380 MB. If it is significantly smaller (e.g., 0 B), then the download was corrupted, and you should try re-downloading the file.
- Open the Minecraft launcher.
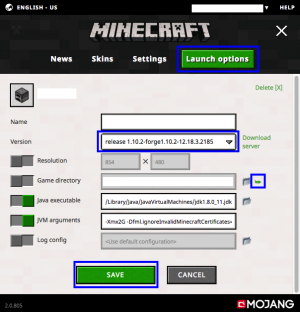
- Edit the profile that you installed Forge with.
- Find the text box labeled "Game directory". To the right of this text box is a folder and a green arrow. Click on the green arrow to open the Minecraft game directory folder.
- Alternatively, use your system's file browser (e.g., File Explorer, Finder) to navigate to the file path listed in the "Game directory" text box.
- In the game directory folder, look for a folder named
mods. If you do not see a folder with this name, create amodsfolder. - Place the downloaded Pixelmon file inside the
modsfolder.- Do not extract or unzip the file. Place the JAR file directly into the folder.
- Save your profile.
- Navigate to any other tab and start Minecraft.
- If Minecraft loads without crashing, check the "Mods" section on the main menu. If Pixelmon is listed among the mods that are installed, you have installed Pixelmon correctly.

 NodeCraft
