Guía visual para asignar RAM
Por defecto, Minecraft se inicia con sólo 1 GB de memoria para trabajar. Aunque Pixelmon puede funcionar con la RAM asignada por defecto, a menudo asignar más ayuda a mejorar el rendimiento y la estabilidad. Esto es aún más importante en el caso de que también se tengan otros mods funcionando. Esta guía rápida te orientará a través de todo el proceso.
¿No puedes asignar más de 1GB? Se requiere una instalación de Java de 64 bits para poder asignar más de 1 GB de memoria RAM. Puedes descargar la versión adecuada de Java de 64 bits para tu sistema operativo en este link. Si usas Windows, ¡asegúrate de descargar específicamente la versión Windows Offline 64 bit! Reinicia tu launcher después de actualizarla.
AT Launcher
| Paso | Ejemplo |
|---|---|
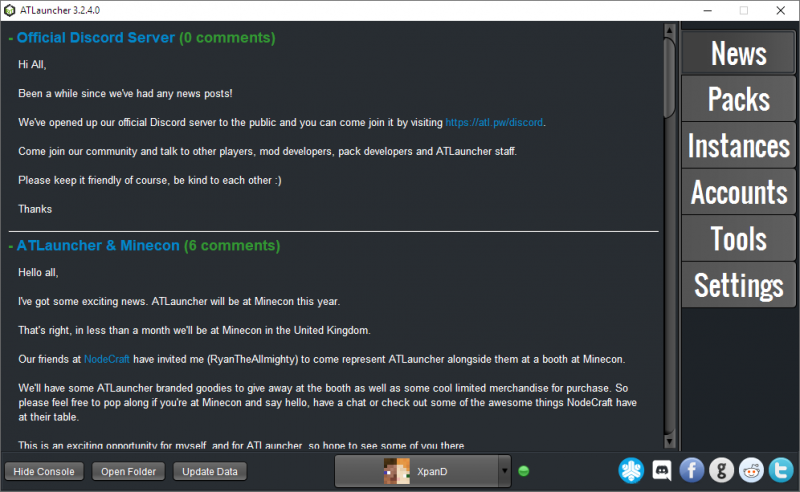
| Inicia el AT Launcher. | |
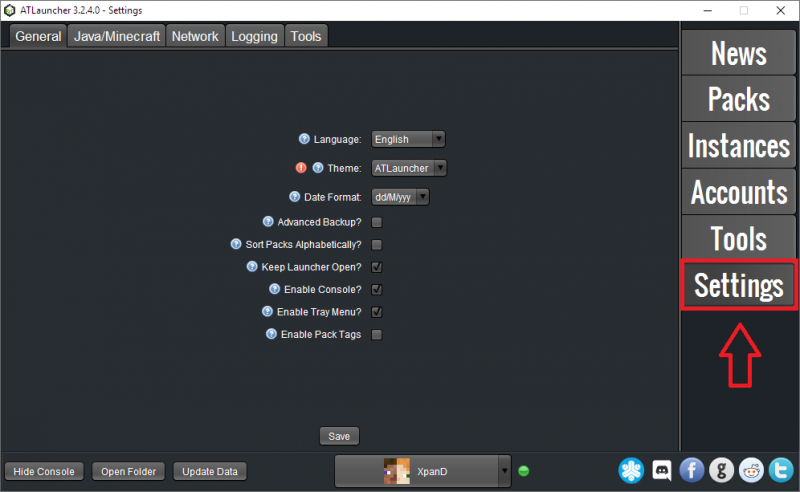
| Haz clic en "Settings" (Configuración). | |
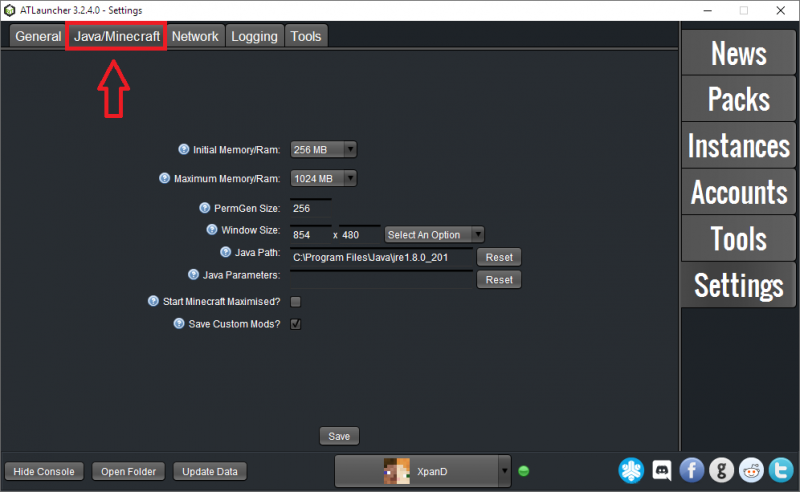
| Haz clic en la lengüeta de arriba que dice "Java/Minecraft". | |
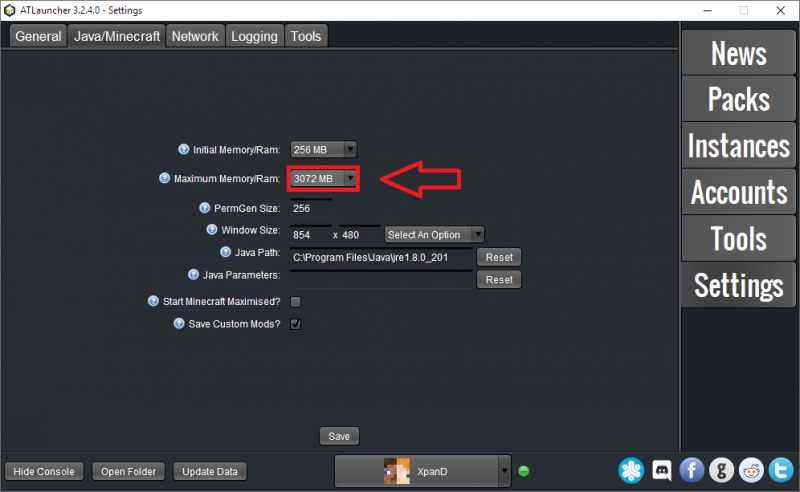
| Haz clic en la caja que dice "Maximum Memory/Ram" y selecciona una cantidad mayor. Revisa la nota al principio de esta página si no puedes asignar más de 1 GB. |
Technic launcher
| Step | Example |
|---|---|
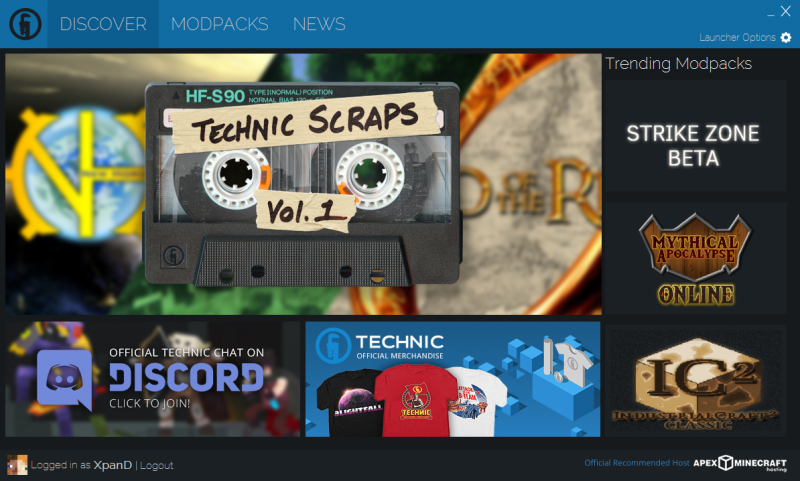
| Start the Technic launcher. | |
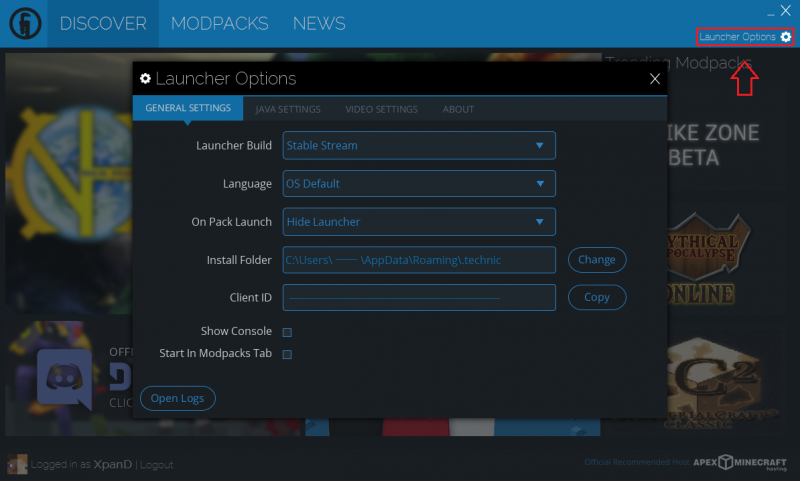
| Click on "Launcher Options". | |
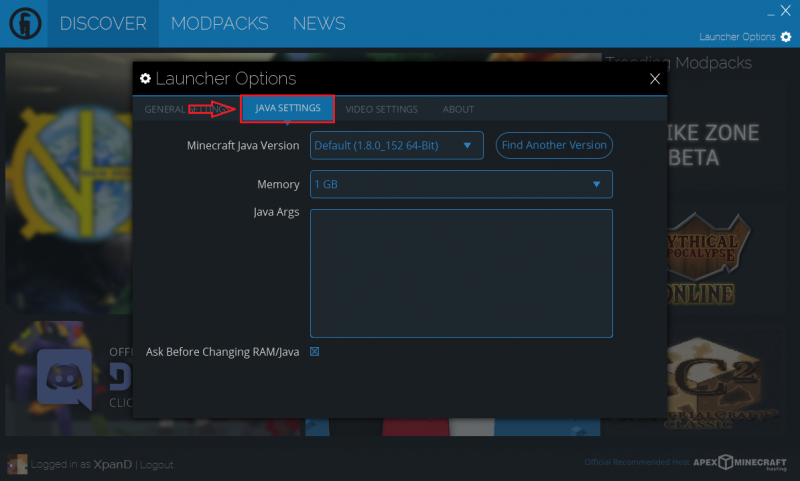
| Click into the "JAVA SETTINGS" tab. | |
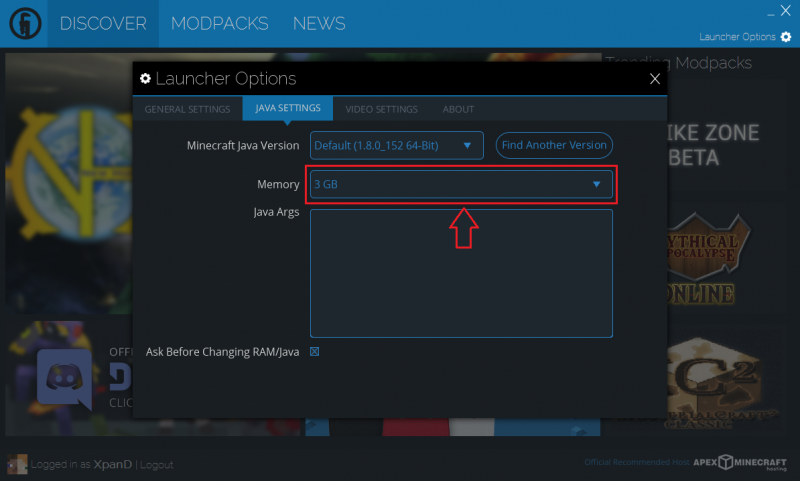
| Click the "Memory" box and pick a higher setting. Check the note at the top of this page if you're unable to allocate more than 1GB. |
Minecraft launcher
| Step | Example |
|---|---|
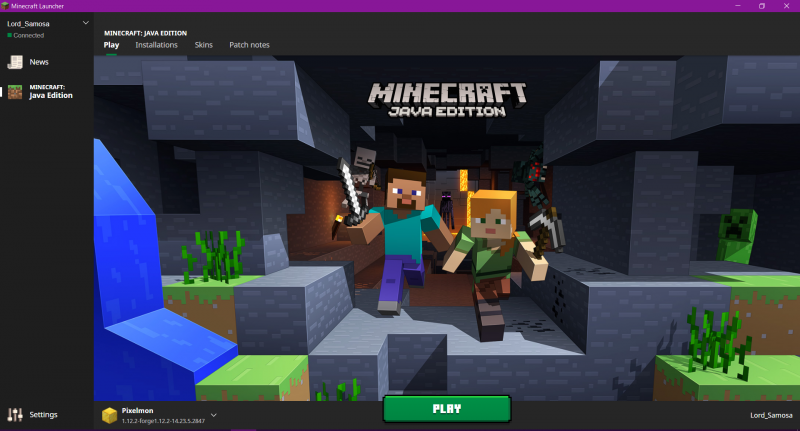
| Start the Minecraft launcher. | |
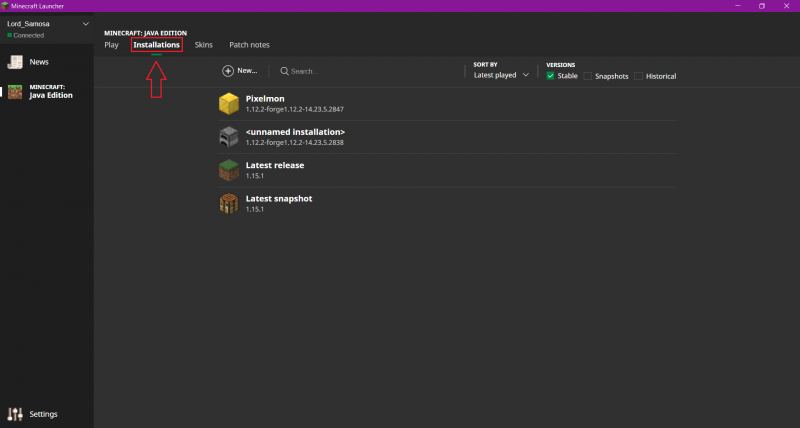
| Click on "Installations". | |
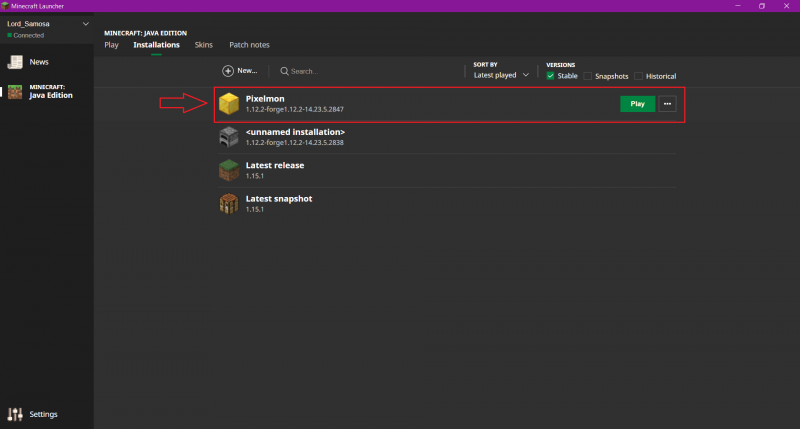
| Click on your Pixelmon Forge profile. | |
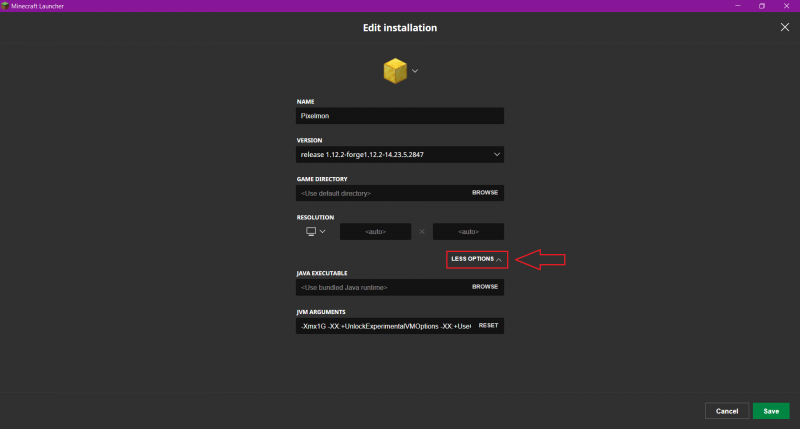
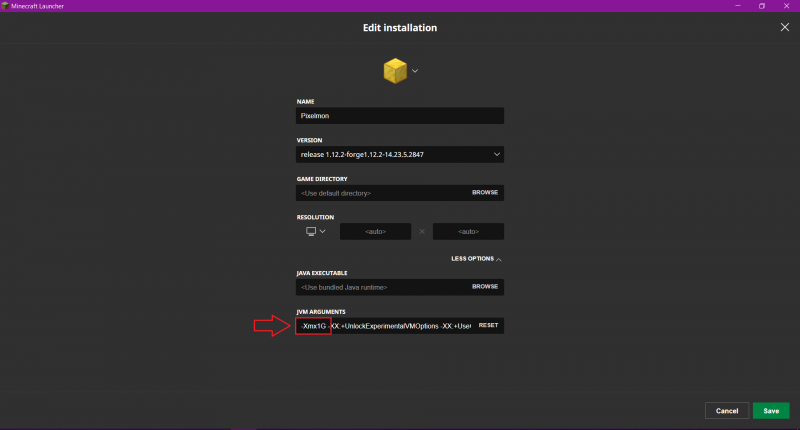
| Click More options. | |
| Replace "-Xmx1G" with a higher amount,
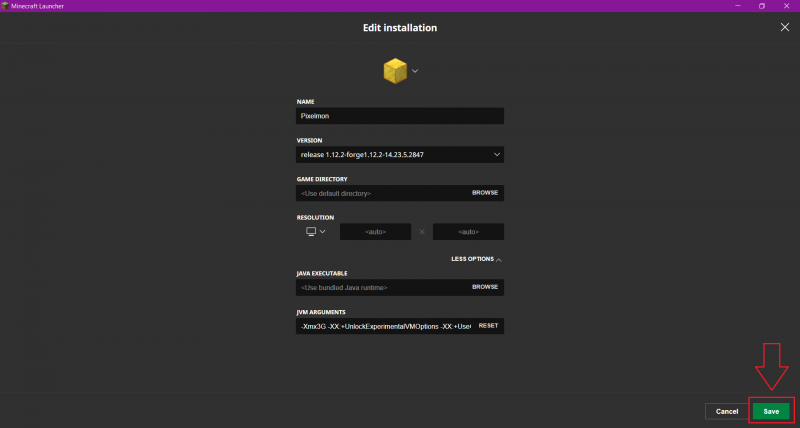
such as "-Xmx3G" (or "-Xmx3000M"). |
|
| Click "SAVE" to save your settings |
If you get stuck on any of these steps, or are having trouble finding the right amount to allocate or getting the game to run smoothly, check out the Fixing memory issues page or ask for help in the official Pixelmon Discord.

 NodeCraft
