Difference between revisions of "Installation/ATLauncher"
From Pixelmon Wiki
(First proper draft with some text and picture updates over the original visual guide steps. Should work for now.) |
(Marked this version for translation) |
||
| (One intermediate revision by the same user not shown) | |||
| Line 7: | Line 7: | ||
<languages/> | <languages/> | ||
<translate> | <translate> | ||
| + | <!--T:1--> | ||
This part of the [[Installation|installation guide]] covers installing [https://atlauncher.com the AT Launcher], and [[Pixelmon|the Pixelmon modpack]] with it. | This part of the [[Installation|installation guide]] covers installing [https://atlauncher.com the AT Launcher], and [[Pixelmon|the Pixelmon modpack]] with it. | ||
| − | ==Installation== | + | ==Installation== <!--T:2--> |
{|class="wikitable" | {|class="wikitable" | ||
|- | |- | ||
| Line 21: | Line 22: | ||
| [[File:Installing2.png|none]] | | [[File:Installing2.png|none]] | ||
|- | |- | ||
| − | |style="text-align:center"|If | + | |style="text-align:center"|If running Windows, a warning may pop up. Click "More info" and then "Run anyway". |
| [[File:ATInstall3.png|none|400px]] | | [[File:ATInstall3.png|none|400px]] | ||
|- | |- | ||
Latest revision as of 17:33, 3 March 2021
This part of the installation guide covers installing the AT Launcher, and the Pixelmon modpack with it.
Installation
| Steps | |
|---|---|
| Download the AT Launcher for your platform at this link. On Windows, pick the Setup option. | |
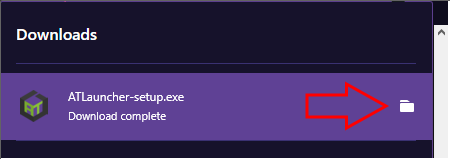
| Find the downloaded file and run it. In most browsers the folder button will show where the file went. | |
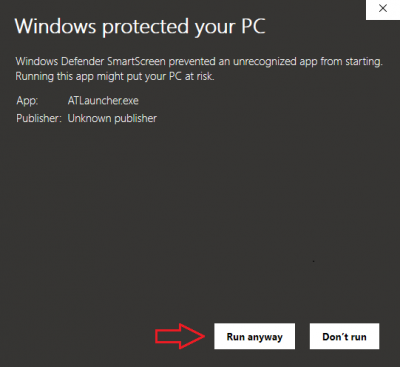
| If running Windows, a warning may pop up. Click "More info" and then "Run anyway". | |
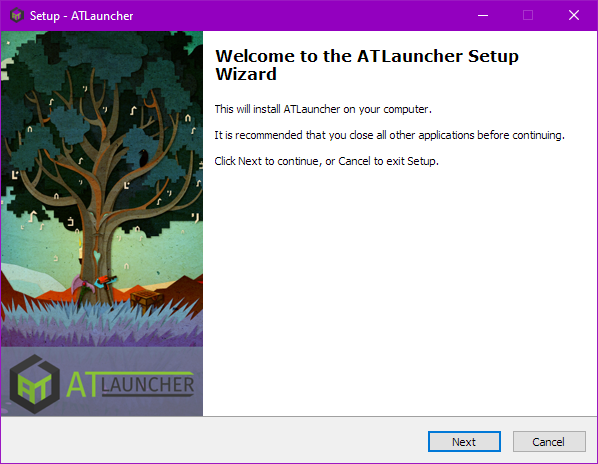
| If using the Windows Setup method, proceed with the installation. Follow this link if you need specific instructions. | |
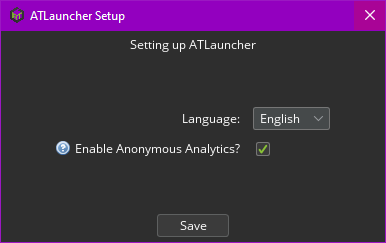
| Open the AT Launcher. Select your language, and then hit "Save". | |
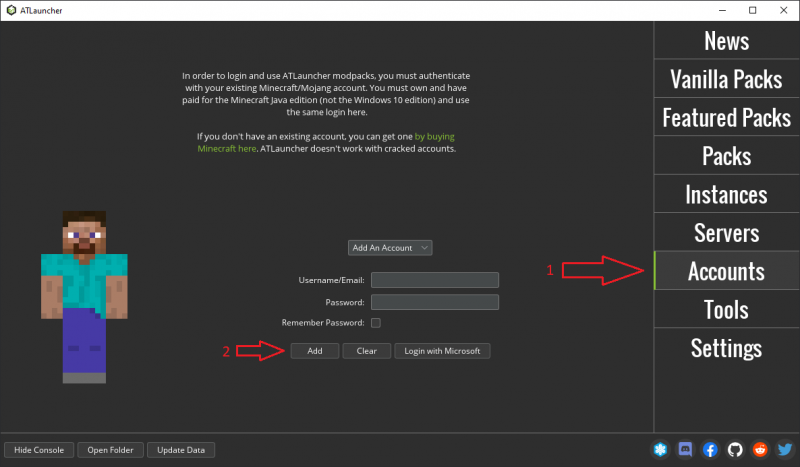
| Click "Accounts". If using a Mojang account, enter your details and then click "Add". If not, click the Microsoft button. | |
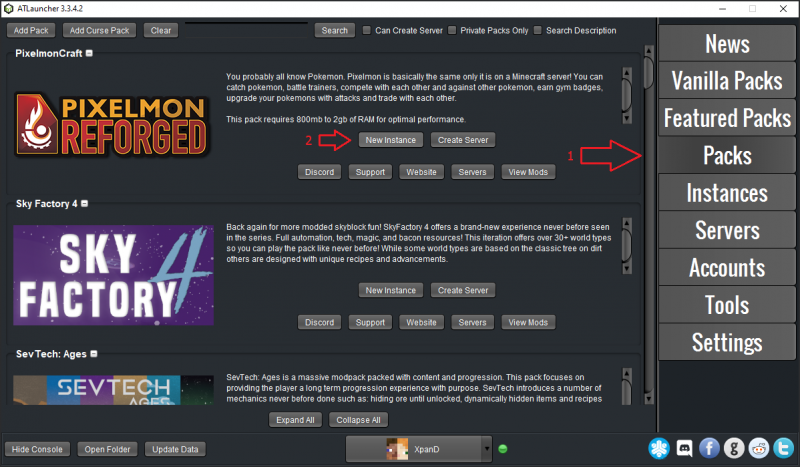
| Click "Packs", find the Reforged pack and click "New Instance". | |
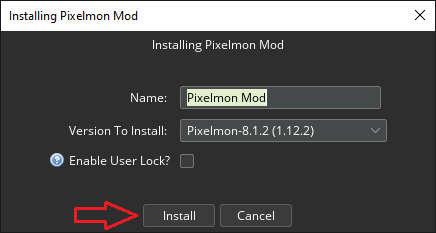
| Select your preferred version, then click "Install". | |
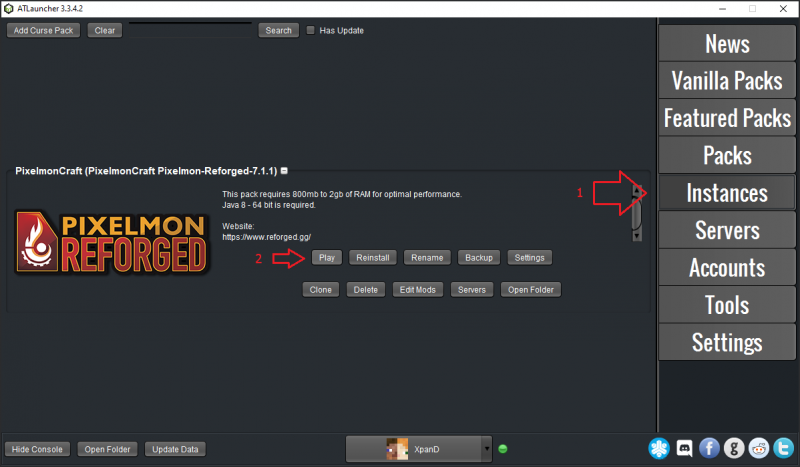
| Click "Instances" and then click "Play" on the Reforged instance! |

 NodeCraft

