
 NodeCraft
Difference between revisions of "Diamond"
m (Remove vanilla recipes from the wiki pt1.) Tag: Undo |
m (→Fishing: Updated format) |
||
| (10 intermediate revisions by 2 users not shown) | |||
| Line 1: | Line 1: | ||
{{VanillaRedirect|Diamond|Diamonds}} | {{VanillaRedirect|Diamond|Diamonds}} | ||
| − | + | [[File:Grid_Diamond.png|32px|right]] | |
| − | [[File:Grid_Diamond.png|right]] | + | [[Diamond|Diamonds]] are used to craft a [[healer]], [[Itemfinder]], [[diamond hammer]], [[new running boots]], and [[Gems]]. Also, [[move tutors]] sometimes require diamonds as payment for their services. Diamonds can be found rarely in caves like in vanilla ''Minecraft'', but they can also be found as [[drops]] from certain wild Pokémon. |
| − | Diamonds are used to craft a [[healer]], [[Itemfinder]], [[diamond hammer]], [[new running boots]], and [[Gems]]. Also, [[move tutors]] sometimes require diamonds as payment for their services. Diamonds can be found rarely in caves like in vanilla ''Minecraft'', but they can also be found as [[drops]] from certain wild Pokémon. | ||
| − | |||
| − | |||
==Obtaining== | ==Obtaining== | ||
| − | ===Pokémon drops=== | + | ===Pokémon [[drops]]=== |
{{main|Drops|Drops}} | {{main|Drops|Drops}} | ||
{{DropPokémonH}} | {{DropPokémonH}} | ||
| − | {{DropPokémon|Tyranitar| | + | {{DropPokémon|Tyranitar|10|1}} |
| − | {{DropPokémon| | + | {{DropPokémon|Sableye|10|1}} |
| − | {{DropPokémon|Diancie| | + | {{DropPokémon|Garchomp|30|1-2}} |
| + | {{DropPokémon|Diancie|30|1-3}} | ||
| + | {{DropPokémon|Coalossal|30|1}} | ||
| + | {{DropPokémon|Duraludon|30|1-2}} | ||
{{DropPokémonF}} | {{DropPokémonF}} | ||
| − | |||
| − | |||
| − | |||
| − | |||
| − | |||
| − | |||
| − | |||
| − | |||
| − | |||
| − | |||
| − | |||
| − | |||
| − | |||
| − | |||
| − | |||
===Fishing=== | ===Fishing=== | ||
{{main|Fishing|Fishing}} | {{main|Fishing|Fishing}} | ||
| − | { | + | {| class="wikitable" |
| − | + | |- | |
| − | + | !class="unsortable" |Fluid | |
| − | + | !Rod | |
| − | + | !class="unsortable" |Biome | |
| − | = | + | !class="unsortable" |ModID |
| − | + | !class="unsortable" |Time | |
| + | !Rarity | ||
|- | |- | ||
| − | + | |rowspan="2" style="text-align:center"|{{i|Water|mc=Water}} | |
| − | + | |{{i|Good Rod}} | |
| − | + | |rowspan="2" style="text-align:center"|[[Oceanic]] | |
| + | |rowspan="2" style="text-align:center"|[[Supported Biome Mods|—]] | ||
| + | |rowspan="2" style="text-align:center"|— | ||
| + | |rowspan="2" style="text-align:center"|20 | ||
|- | |- | ||
| − | + | |{{i|Super Rod}} | |
| − | |||
| − | |{{ | ||
| − | |||
| − | | | ||
|} | |} | ||
| Line 58: | Line 43: | ||
! Ingredients | ! Ingredients | ||
! class="unsortable" | Crafting recipe | ! class="unsortable" | Crafting recipe | ||
| − | |||
| − | |||
| − | |||
| − | |||
| − | |||
| − | |||
| − | |||
| − | |||
| − | |||
| − | |||
| − | |||
| − | |||
| − | |||
| − | |||
| − | |||
| − | |||
| − | |||
| − | |||
| − | |||
| − | |||
| − | |||
| − | |||
| − | |||
| − | |||
| − | |||
| − | |||
| − | |||
|- | |- | ||
|style="text-align:center"|[[Healer]] | |style="text-align:center"|[[Healer]] | ||
| − | |[[Aluminum | + | |[[Aluminum Ingot]] +<br>[[Iron Ingot]] +<br>[[Diamond]] |
|{{Grid/Crafting Table | |{{Grid/Crafting Table | ||
| − | |A1=Aluminum | + | |A1=Aluminum Ingot |B1=Iron Ingot |C1=Aluminum Ingot |
|A2=Iron Ingot |B2=Diamond |C2=Iron Ingot | |A2=Iron Ingot |B2=Diamond |C2=Iron Ingot | ||
| − | |A3=Aluminum | + | |A3=Aluminum Ingot |B3=Iron Ingot |C3=Aluminum Ingot |
| − | |Output=Healer | + | |Output=Healer |
|nobreak=y}} | |nobreak=y}} | ||
|- | |- | ||
|style="text-align:center"|[[Itemfinder]] | |style="text-align:center"|[[Itemfinder]] | ||
| − | |[[Diamond]] +<br>[[Gold Ingot]] +<br>[[Redstone]] +<br>[[Aluminum | + | |[[Diamond]] +<br>[[Gold Ingot]] +<br>[[Redstone]] +<br>[[Aluminum Ingot]] +<br>[[Glass Pane]] |
|{{Grid/Crafting Table | |{{Grid/Crafting Table | ||
|A1=Diamond|B1=Gold Ingot|C1=Diamond | |A1=Diamond|B1=Gold Ingot|C1=Diamond | ||
|A2=Gold Ingot|B2=Redstone|C2=Gold Ingot | |A2=Gold Ingot|B2=Redstone|C2=Gold Ingot | ||
| − | |A3=Aluminum | + | |A3=Aluminum Ingot|B3=Glass Pane|C3=Aluminum Ingot |
|Output=Itemfinder | |Output=Itemfinder | ||
|nobreak=y}} | |nobreak=y}} | ||
| Line 114: | Line 72: | ||
|- | |- | ||
|style="text-align:center"|[[Diamond Hammer]] | |style="text-align:center"|[[Diamond Hammer]] | ||
| − | |[[Diamond]] +<br> | + | |[[Diamond]] +<br>{{mc|Stick}} |
|{{Grid/Crafting Table | |{{Grid/Crafting Table | ||
|A1=Diamond |B1=Diamond |C1=Diamond | |A1=Diamond |B1=Diamond |C1=Diamond | ||
|A2=Diamond |B2=Stick |C2=Diamond | |A2=Diamond |B2=Stick |C2=Diamond | ||
| − | + | |B3=Stick | |
|Output=Diamond Hammer | |Output=Diamond Hammer | ||
| + | |B2-link={{mclink|Stick}} | ||
| + | |B3-link={{mclink|Stick}} | ||
|nobreak=y}} | |nobreak=y}} | ||
|} | |} | ||
==Trivia== | ==Trivia== | ||
| − | + | Prior to 9.0.1, [[Aluminum Plates]] were used instead of [[Aluminum Ingots]] in the recipe. | |
| − | {|class="mw-collapsible mw- | + | {|class="mw-collapsible mw-collapsed wikitable sortable" |
| + | |- | ||
| + | ! Item | ||
| + | ! class="unsortable" | Crafting recipe | ||
| + | |- | ||
| + | |style="text-align:center"|[[Healer]] | ||
| + | |{{Grid/Crafting Table | ||
| + | |A1=Aluminum Plate |B1=Iron Ingot |C1=Aluminum Plate | ||
| + | |A2=Iron Ingot |B2=Diamond |C2=Iron Ingot | ||
| + | |A3=Aluminum Plate |B3=Iron Ingot |C3=Aluminum Plate | ||
| + | |Output=Healer |OA= | ||
| + | |nobreak=y}} | ||
| + | |- | ||
| + | |style="text-align:center"|[[Itemfinder]] | ||
| + | |{{Grid/Crafting Table | ||
| + | |A1=Diamond|B1=Gold Ingot|C1=Diamond | ||
| + | |A2=Gold Ingot|B2=Redstone|C2=Gold Ingot | ||
| + | |A3=Aluminum Plate|B3=Glass Pane|C3=Aluminum Plate | ||
| + | |Output=Itemfinder | ||
| + | |nobreak=y}} | ||
| + | |} | ||
| + | |||
| + | Diamonds used to be part of the following crafting recipes, '''which are no longer working'''. They were removed due to many held items being far too easy to make. | ||
| + | {|class="mw-collapsible mw-collapsed wikitable sortable" | ||
|- | |- | ||
! Item | ! Item | ||
| − | |||
! class="unsortable" | Crafting recipe | ! class="unsortable" | Crafting recipe | ||
|- | |- | ||
|style="text-align:center"|[[Bug Gem]] | |style="text-align:center"|[[Bug Gem]] | ||
| − | |||
|{{Grid/Crafting Table | |{{Grid/Crafting Table | ||
|A1=Diamond|B1=Slimeball | |A1=Diamond|B1=Slimeball | ||
| Line 139: | Line 120: | ||
|- | |- | ||
|style="text-align:center"|[[Dark Gem]] | |style="text-align:center"|[[Dark Gem]] | ||
| − | |||
|{{Grid/Crafting Table | |{{Grid/Crafting Table | ||
|A1=Diamond|B1=Nether Brick | |A1=Diamond|B1=Nether Brick | ||
|Output=Dark Gem | |Output=Dark Gem | ||
| + | |B1-link={{mclink|Nether_Brick}} | ||
|nobreak=y |shapeless=y}} | |nobreak=y |shapeless=y}} | ||
|- | |- | ||
|style="text-align:center"|[[Dragon Gem]] | |style="text-align:center"|[[Dragon Gem]] | ||
| − | |||
|{{Grid/Crafting Table | |{{Grid/Crafting Table | ||
|A1=Diamond|B1=Dragon Scale | |A1=Diamond|B1=Dragon Scale | ||
| Line 153: | Line 133: | ||
|- | |- | ||
|style="text-align:center"|[[Electric Gem]] | |style="text-align:center"|[[Electric Gem]] | ||
| − | |||
|{{Grid/Crafting Table | |{{Grid/Crafting Table | ||
|A1=Diamond|B1=Thunder Stone | |A1=Diamond|B1=Thunder Stone | ||
| Line 160: | Line 139: | ||
|- | |- | ||
|style="text-align:center"|[[Fighting Gem]] | |style="text-align:center"|[[Fighting Gem]] | ||
| − | |||
|{{Grid/Crafting Table | |{{Grid/Crafting Table | ||
|A1=Diamond|B1=Brick | |A1=Diamond|B1=Brick | ||
| Line 167: | Line 145: | ||
|- | |- | ||
|style="text-align:center"|[[Fire Gem]] | |style="text-align:center"|[[Fire Gem]] | ||
| − | |||
|{{Grid/Crafting Table | |{{Grid/Crafting Table | ||
|A1=Diamond|B1=Fire Stone | |A1=Diamond|B1=Fire Stone | ||
| Line 174: | Line 151: | ||
|- | |- | ||
|style="text-align:center"|[[Flying Gem]] | |style="text-align:center"|[[Flying Gem]] | ||
| − | |||
|{{Grid/Crafting Table | |{{Grid/Crafting Table | ||
|A1=Diamond|B1=Feather | |A1=Diamond|B1=Feather | ||
| Line 181: | Line 157: | ||
|- | |- | ||
|style="text-align:center"|[[Ghost Gem]] | |style="text-align:center"|[[Ghost Gem]] | ||
| − | |||
|{{Grid/Crafting Table | |{{Grid/Crafting Table | ||
|A1=Diamond|B1=Ghast Tear | |A1=Diamond|B1=Ghast Tear | ||
| Line 188: | Line 163: | ||
|- | |- | ||
|style="text-align:center"|[[Grass Gem]] | |style="text-align:center"|[[Grass Gem]] | ||
| − | |||
|{{Grid/Crafting Table | |{{Grid/Crafting Table | ||
|A1=Diamond|B1=Leaf Stone | |A1=Diamond|B1=Leaf Stone | ||
| Line 195: | Line 169: | ||
|- | |- | ||
|style="text-align:center"|[[Ground Gem]] | |style="text-align:center"|[[Ground Gem]] | ||
| − | |||
|{{Grid/Crafting Table | |{{Grid/Crafting Table | ||
|A1=Diamond|B1=Bone | |A1=Diamond|B1=Bone | ||
| Line 202: | Line 175: | ||
|- | |- | ||
|style="text-align:center"|[[Ice Gem]] | |style="text-align:center"|[[Ice Gem]] | ||
| − | |||
|{{Grid/Crafting Table | |{{Grid/Crafting Table | ||
|A1=Diamond|B1=Snowball | |A1=Diamond|B1=Snowball | ||
| Line 209: | Line 181: | ||
|- | |- | ||
|style="text-align:center"|[[Normal Gem]] | |style="text-align:center"|[[Normal Gem]] | ||
| − | |||
|{{Grid/Crafting Table | |{{Grid/Crafting Table | ||
|A1=Diamond|B1=Sugar | |A1=Diamond|B1=Sugar | ||
| Line 216: | Line 187: | ||
|- | |- | ||
|style="text-align:center"|[[Poison Gem]] | |style="text-align:center"|[[Poison Gem]] | ||
| − | |||
|{{Grid/Crafting Table | |{{Grid/Crafting Table | ||
|A1=Diamond|B1=Spider Eye | |A1=Diamond|B1=Spider Eye | ||
| Line 223: | Line 193: | ||
|- | |- | ||
|style="text-align:center"|[[Psychic Gem]] | |style="text-align:center"|[[Psychic Gem]] | ||
| − | |||
|{{Grid/Crafting Table | |{{Grid/Crafting Table | ||
|A1=Diamond|B1=Ender Pearl | |A1=Diamond|B1=Ender Pearl | ||
| Line 230: | Line 199: | ||
|- | |- | ||
|style="text-align:center"|[[Rock Gem]] | |style="text-align:center"|[[Rock Gem]] | ||
| − | |||
|{{Grid/Crafting Table | |{{Grid/Crafting Table | ||
|A1=Diamond|B1=Everstone | |A1=Diamond|B1=Everstone | ||
| Line 237: | Line 205: | ||
|- | |- | ||
|style="text-align:center"|[[Steel Gem]] | |style="text-align:center"|[[Steel Gem]] | ||
| − | |||
|{{Grid/Crafting Table | |{{Grid/Crafting Table | ||
|A1=Diamond|B1=Aluminum Ingot | |A1=Diamond|B1=Aluminum Ingot | ||
| Line 244: | Line 211: | ||
|- | |- | ||
|style="text-align:center"|[[Water Gem]] | |style="text-align:center"|[[Water Gem]] | ||
| − | |||
|{{Grid/Crafting Table | |{{Grid/Crafting Table | ||
|A1=Diamond|B1=Water Stone | |A1=Diamond|B1=Water Stone | ||
Latest revision as of 15:35, 27 February 2023
For information on Diamonds in vanilla Minecraft, see this page.
Diamonds are used to craft a healer, Itemfinder, diamond hammer, new running boots, and Gems. Also, move tutors sometimes require diamonds as payment for their services. Diamonds can be found rarely in caves like in vanilla Minecraft, but they can also be found as drops from certain wild Pokémon.
Obtaining
Pokémon drops
Main article: Drops
| Pokémon | Chance | Quantity |
|---|---|---|
| Tyranitar | 10% | 1 |
| Sableye | 10% | 1 |
| Garchomp | 30% | 1-2 |
| Diancie | 30% | 1-3 |
| Coalossal | 30% | 1 |
| Duraludon | 30% | 1-2 |
Fishing
Main article: Fishing
| Fluid | Rod | Biome | ModID | Time | Rarity |
|---|---|---|---|---|---|
| Oceanic | — | — | 20 | ||
Usage
Crafting ingredient
| Item | Ingredients | Crafting recipe |
|---|---|---|
| Healer | Aluminum Ingot + Iron Ingot + Diamond |
|
| Itemfinder | Diamond + Gold Ingot + Redstone + Aluminum Ingot + Glass Pane |
|
| New Running Shoes | Diamond + Old Running Shoes + Iron Ingot + Feather |
|
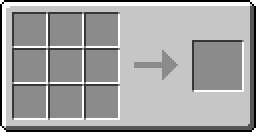
| Diamond Hammer | Diamond + Stick |
|
Trivia
Prior to 9.0.1, Aluminum Plates were used instead of Aluminum Ingots in the recipe.
| Item | Crafting recipe |
|---|---|
| Healer |
|
| Itemfinder |
|
Diamonds used to be part of the following crafting recipes, which are no longer working. They were removed due to many held items being far too easy to make.
| Item | Crafting recipe |
|---|---|
| Bug Gem |
|
| Dark Gem |
|
| Dragon Gem |
|
| Electric Gem |
|
| Fighting Gem |
|
| Fire Gem |
|
| Flying Gem |
|
| Ghost Gem |
|
| Grass Gem |
|
| Ground Gem |
|
| Ice Gem |
|
| Normal Gem |
|
| Poison Gem |
|
| Psychic Gem |
|
| Rock Gem |
|
| Steel Gem |
|
| Water Gem |
|