|
|
| (14 intermediate revisions by the same user not shown) |
| Line 1: |
Line 1: |
| − | =List of Structures=
| + | {{Test |
| − | ==Village==
| + | |name=Block of Platinum |
| − | ===Poké Centers===
| + | |image=Grid_Platinum_Block.png |
| − | {|class="wikitable"
| + | |image_grid=Grid_Platinum_Block.png |
| − | !style="text-align:center"|Name
| + | |stackable= Yes |
| − | !style="text-align:center"|{{tt|ID|Used when spawning a structure with structure blocks.}}
| + | |tool= Iron_Pickaxe |
| − | !style="text-align:center"|Image
| + | }} |
| − | !style="text-align:center"|Locations
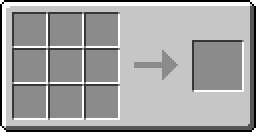
| + | A [[Platinum Block]] is a type of block made from nine [[Platinum Ingot|platinum ingots]]. Its only purposes are decoration and storage of platinum ingots. When placed, it requires a pickaxe to be retrieved. |
| − | |-
| |
| − | |[[Desert Poké Center]]
| |
| − | |<code>pixelmon:village/desert/desert_pokecenter</code>
| |
| − | |[[File:Desert_Poké_Center.png]]
| |
| − | |[[Arid]] in Villages
| |
| − | |-
| |
| − | |[[Plains Poké Center]]
| |
| − | |<code>pixelmon:village/plains/plains_pokecenter</code>
| |
| − | |[[File:Plains_Poké_Center.png]]
| |
| − | |[[Plains (Category)]] in Villages
| |
| − | |-
| |
| − | |[[Savanna Poké Center]]
| |
| − | |<code>pixelmon:village/savanna/savanna_pokecenter</code>
| |
| − | |[[File:Savanna_Poké_Center.png]]
| |
| − | |[[Savannas]] in Villages
| |
| − | |-
| |
| − | |[[Snowy Poké Center]]
| |
| − | |<code>pixelmon:village/snowy/snowy_pokecenter</code>
| |
| − | |[[File:Snowy_Poké_Center.png]]
| |
| − | |[[Freezing]] in Villages
| |
| − | |-
| |
| − | |[[Taiga Poké Center]]
| |
| − | |<code>pixelmon:village/taiga/taiga_pokecenter</code>
| |
| − | |[[File:Taiga_Poké_Center.png]]
| |
| − | |[[Taigas]] in Villages
| |
| − | |}
| |
| − | | |
| − | ===Marts===
| |
| − | {|class="wikitable"
| |
| − | !style="text-align:center"|Name
| |
| − | !style="text-align:center"|{{tt|ID|Used when spawning a structure with structure blocks.}}
| |
| − | !style="text-align:center"|Image
| |
| − | !style="text-align:center"|Locations
| |
| − | |-
| |
| − | |[[Desert Mart]]
| |
| − | |<code>pixelmon:village/desert/desert_mart</code>
| |
| − | |[[File:Desert_Mart.png]]
| |
| − | |[[Arid]] in Villages
| |
| − | |-
| |
| − | |[[Plains Mart]]
| |
| − | |<code>pixelmon:village/plains/plains_mart</code>
| |
| − | |[[File:Plains_Mart.png]]
| |
| − | |[[Plains (Category)]] in Villages
| |
| − | |-
| |
| − | |[[Savanna Mart]]
| |
| − | |<code>pixelmon:village/savanna/savanna_mart</code>
| |
| − | |[[File:Savanna_Mart.png]]
| |
| − | |[[Savannas]] in Villages
| |
| − | |-
| |
| − | |[[Snowy Mart]]
| |
| − | |<code>pixelmon:village/snowy/snowy_mart</code>
| |
| − | |[[File:Snowy_Mart.png]]
| |
| − | |[[Freezing]] in Villages
| |
| − | |-
| |
| − | |[[Taiga Mart]]
| |
| − | |<code>pixelmon:village/taiga/taiga_mart</code>
| |
| − | |[[File:Taiga_Mart.png]]
| |
| − | |[[Taigas]] in Villages
| |
| − | |}
| |
| − | | |
| − | ===Day Care Buildings===
| |
| − | {|class="wikitable"
| |
| − | !style="text-align:center"|Name
| |
| − | !style="text-align:center"|{{tt|ID|Used when spawning a structure with structure blocks.}}
| |
| − | !style="text-align:center"|Image
| |
| − | !style="text-align:center"|Locations
| |
| − | |-
| |
| − | |[[Desert Day Care Building]]
| |
| − | |<code>pixelmon:village/desert/desert_daycare</code>
| |
| − | |[[File:Desert_Day_Care.png]]
| |
| − | |[[Arid]] in Villages | |
| − | |-
| |
| − | |[[Plains Day Care Building]]
| |
| − | |<code>pixelmon:village/plains/plains_daycare</code>
| |
| − | |[[File:Plains_Day_Care.png]]
| |
| − | |[[Plains (Category)]] in Villages
| |
| − | |-
| |
| − | |[[Savanna Day Care Building]]
| |
| − | |<code>pixelmon:village/savanna/savanna_daycare</code>
| |
| − | |[[File:Savanna_Day_Care.png]]
| |
| − | |[[Savannas]] in Villages
| |
| − | |-
| |
| − | |[[Snowy Day Care Building]]
| |
| − | |<code>pixelmon:village/snowy/snowy_daycare</code>
| |
| − | |[[File:Snowy_Day_Care.png]]
| |
| − | |[[Freezing]] in Villages
| |
| − | |-
| |
| − | |[[Taiga Day Care Building]]
| |
| − | |<code>pixelmon:village/taiga/taiga_daycare</code>
| |
| − | |[[File:Taiga_Day_Care.png]]
| |
| − | |[[Taigas]] in Villages
| |
| − | |}
| |
| − | | |
| − | ==Shrines==
| |
| − | {|class="wikitable"
| |
| − | !style="text-align:center" colspan="2"|Name
| |
| − | !style="text-align:center"|{{tt|ID|Used when spawning a structure with structure blocks.}}
| |
| − | !style="text-align:center"|Image
| |
| − | !style="text-align:center"|Locations
| |
| − | |-
| |
| − | |colspan="2"|[[Water Chalice]]
| |
| − | |<code>pixelmon:shrines/chalice_shrine_a</code>
| |
| − | |[[File:Chalice_Shrine_A.png|150px]]
| |
| − | |[[Ocean]]
| |
| − | |-
| |
| − | |colspan="2"|[[Land Chalice]]
| |
| − | |<code>pixelmon:shrines/chalice_shrine_b</code>
| |
| − | |[[File:Chalice_Shrine_B.png|150px]]
| |
| − | |[[Extreme Hills]]
| |
| − | |-
| |
| − | |rowspan="2"|[[Fiery Shrine]]
| |
| − | |Variant A
| |
| − | |<code>pixelmon:shrines/tres_shrine_a</code>
| |
| − | |[[File:Tres_Shrine_A.png]]
| |
| − | |rowspan="2"|[[Mesas]]
| |
| − | |-
| |
| − | |Variant B
| |
| − | |<code>pixelmon:shrines/tres_shrine_b</code>
| |
| − | |[[File:Tres_Shrine_B.png]]
| |
| − | |-
| |
| − | |rowspan="2"|[[Frozen Shrine]]
| |
| − | |Variant A
| |
| − | |<code>pixelmon:shrines/uno_shrine_a</code>
| |
| − | |[[File:Uno_Shrine_A.png]]
| |
| − | |rowspan="2"|[[Icy]]
| |
| − | |-
| |
| − | |Variant B
| |
| − | |<code>pixelmon:shrines/uno_shrine_b</code>
| |
| − | |[[File:Uno_Shrine_B.png]]
| |
| − | |-
| |
| − | |rowspan="2"|[[Static Shrine]]
| |
| − | |Variant A
| |
| − | |<code>pixelmon:shrines/dos_shrine_a</code>
| |
| − | |[[File:Dos_Shrine_A.png]]
| |
| − | |rowspan="2"|[[Savannas]]
| |
| − | |-
| |
| − | |Variant B
| |
| − | |<code>pixelmon:shrines/dos_shrine_b</code>
| |
| − | |[[File:Dos_Shrine_B.png]]
| |
| − | |-
| |
| − | |rowspan="4"|[[Ilex Shrine]]
| |
| − | |Variant A
| |
| − | |<code>pixelmon:shrines/ilex_shrine_a</code>
| |
| − | |[[File:Ilex_Shrine_A.png]]
| |
| − | |rowspan="4"|[[Forests]]
| |
| − | |-
| |
| − | |Variant B
| |
| − | |<code>pixelmon:shrines/ilex_shrine_b</code>
| |
| − | |[[File:Ilex_Shrine_B.png]]
| |
| − | |-
| |
| − | |Variant C
| |
| − | |<code>pixelmon:shrines/ilex_shrine_b</code>
| |
| − | |[[File:Ilex_Shrine_C.png]]
| |
| − | |-
| |
| − | |Variant D
| |
| − | |<code>pixelmon:shrines/ilex_shrine_b</code>
| |
| − | |[[File:Ilex_Shrine_D.png]]
| |
| − | |}
| |
| | | | |
| − | ==Haunted Tower== | + | ==Obtaining== |
| − | {|class="wikitable"
| + | ===Crafting=== |
| − | !style="text-align:center" colspan="2"|Name
| + | {|class="mw-collapsible mw-uncollapsed wikitable sortable" |
| − | !style="text-align:center"|{{tt|ID|Used when spawning a structure with structure blocks.}}
| |
| − | !style="text-align:center"|Image
| |
| − | !style="text-align:center"|Locations
| |
| − | |-
| |
| − | |rowspan="4"|[[Haunted Tower]]
| |
| − | |Variant A
| |
| − | |<code>pixelmon:hauntedtower/haunted_tower_a</code>
| |
| − | |[[File:Haunted_Tower_A.png|150px]]
| |
| − | |rowspan="4"|[[Dark Forest]]
| |
| | |- | | |- |
| − | |Variant B
| + | ! Item |
| − | |<code>pixelmon:hauntedtower/haunted_tower_b</code>
| + | ! Ingredients |
| − | |[[File:Haunted_Tower_B.png|150px]] | + | ! class="unsortable" | Crafting recipe |
| | |- | | |- |
| − | |Variant C | + | |style="text-align:center"|[[Platinum Block]] |
| − | |<code>pixelmon:hauntedtower/haunted_tower_c</code> | + | |[[Platinum Ingot]] |
| − | |[[File:Haunted_Tower_C.png|150px]] | + | |{{Grid/Crafting Table |
| − | |- | + | |A1=Platinum Ingot|B1=Platinum Ingot|C1=Platinum Ingot |
| − | |Variant D | + | |A2=Platinum Ingot|B2=Platinum Ingot|C2=Platinum Ingot |
| − | |<code>pixelmon:hauntedtower/haunted_tower_d</code> | + | |A3=Platinum Ingot|B3=Platinum Ingot|C3=Platinum Ingot |
| − | |[[File:Haunted_Tower_D.png|150px]] | + | |Output=Platinum Block}} |
| | |} | | |} |
| | | | |
| − | ==Boats== | + | ==Usage== |
| − | {|class="wikitable"
| + | ===Crafting ingredient=== |
| − | !style="text-align:center"|Name
| + | {|class="mw-collapsible mw-uncollapsed wikitable sortable" |
| − | !style="text-align:center"|{{tt|ID|Used when spawning a structure with structure blocks.}}
| |
| − | !style="text-align:center"|Image
| |
| − | !style="text-align:center"|Locations
| |
| − | |-
| |
| − | |[[Boat Fishing]]
| |
| − | |<code>pixelmon:boats/boat_fishing</code>
| |
| − | |[[File:Boat_Fishing.png|150px]]
| |
| − | |rowspan="7"|[[Ocean]]
| |
| − | |-
| |
| − | |[[Boat Hauler]]
| |
| − | |<code>pixelmon:boats/boat_hauler</code>
| |
| − | |[[File:Boat_Hauler.png|150px]]
| |
| − | |-
| |
| − | |[[Boat Magikarp]]
| |
| − | |<code>pixelmon:boats/boat_magikarp</code>
| |
| − | |[[File:Boat_Magikarp.png|150px]]
| |
| − | |-
| |
| − | |[[Boat Magikarp S]]
| |
| − | |<code>pixelmon:boats/boat_magikarp_s</code>
| |
| − | |[[File:Boat_Magikarp_S.png|150px]]
| |
| − | |-
| |
| − | |[[Boat Pirate]]
| |
| − | |<code>pixelmon:boats/boat_pirate</code>
| |
| − | |[[File:Boat_Pirate.png|150px]]
| |
| − | |-
| |
| − | |[[Boat Sail]]
| |
| − | |<code>pixelmon:boats/boat_sail</code>
| |
| − | |[[File:Boat_Sail.png|150px]]
| |
| − | |-
| |
| − | |[[Boat Submarine]]
| |
| − | |<code>pixelmon:boats/boat_submarine</code>
| |
| − | |[[File:Boat_Submarine.png|150px]]
| |
| − | |}
| |
| − | | |
| − | ==Spear Pillar==
| |
| − | {|class="wikitable" | |
| − | !style="text-align:center" colspan="2"|Name
| |
| − | !style="text-align:center"|{{tt|ID|Used when spawning a structure with structure blocks.}}
| |
| − | !style="text-align:center"|Image
| |
| − | !style="text-align:center"|Locations
| |
| − | |-
| |
| − | |rowspan="2"|[[Spear Pillar]]
| |
| − | |Variant A
| |
| − | |<code>pixelmon:temples/spear_pillar_a</code>
| |
| − | |[[File:Spear_Pillar_A.png|150px]]
| |
| − | |rowspan="2"|[[Desert Hills]]
| |
| − | |-
| |
| − | |Variant B
| |
| − | |<code>pixelmon:temples/spear_pillar_b</code>
| |
| − | |[[File:Spear_Pillar_B.png|150px]]
| |
| − | |}
| |
| − | | |
| − | ==Plasma Ship==
| |
| − | {|class="wikitable"
| |
| − | !style="text-align:center"|Name
| |
| − | !style="text-align:center"|{{tt|ID|Used when spawning a structure with structure blocks.}}
| |
| − | !style="text-align:center"|Image
| |
| − | !style="text-align:center"|Locations
| |
| − | |-
| |
| − | |rowspan="4"|[[Plasma Ship]]
| |
| − | |<code>pixelmon:teams/plasma/plasma_ship_front_bottom</code>
| |
| − | |[[File:Plasma_Ship_Front_Bottom.png|150px]]
| |
| − | |rowspan="4"|[[Deep Frozen Ocean]]<br>[[Deep Cold Ocean]]<br>[[Ice Spikes]]<br>[[Snowy Tundra]]
| |
| − | |-
| |
| − | |<code>pixelmon:teams/plasma/plasma_ship_front_top</code>
| |
| − | |[[File:Plasma_Ship_Front_Top.png|150px]]
| |
| | |- | | |- |
| − | |<code>pixelmon:teams/plasma/plasma_ship_rear_bottom</code>
| + | ! Item |
| − | |[[File:Plasma_Ship_Rear_Bottom.png|150px]] | + | ! Ingredients |
| | + | ! class="unsortable" | Crafting recipe |
| | |- | | |- |
| − | |<code>pixelmon:teams/plasma/plasma_ship_rear_top</code> | + | |style="text-align:center"|[[Platinum Ingot]] |
| − | |[[File:Plasma_Ship_Rear_Top.png|150px]] | + | |[[Platinum Block]] |
| | + | |{{Grid/Crafting Table |
| | + | |B2=Platinum Block |
| | + | |Output=Platinum Ingot|OA=9 |
| | + | |shapeless=y}} |
| | |} | | |} |
| | | | |
| − | ==Dens==
| + | [[Category:Items]] |
| − | {|class="wikitable"
| |
| − | !style="text-align:center" colspan="2"|Name
| |
| − | !style="text-align:center"|{{tt|ID|Used when spawning a structure with structure blocks.}}
| |
| − | !style="text-align:center"|Image
| |
| − | !style="text-align:center"|Locations
| |
| − | |-
| |
| − | |rowspan="3"|[[Badlands Den]]
| |
| − | |Variant A
| |
| − | |<code>pixelmon:dens/den_badlands_a</code>
| |
| − | |[[File:Badlands_Den_A.png|150px]]
| |
| − | |rowspan="3"|[[Mesas]]
| |
| − | |-
| |
| − | |Variant B
| |
| − | |<code>pixelmon:dens/den_badlands_b</code>
| |
| − | |[[File:Badlands_Den_B.png|150px]]
| |
| − | |-
| |
| − | |Variant Plateau
| |
| − | |<code>pixelmon:dens/den_badlands_plateau_a</code>
| |
| − | |[[File:Badlands_Plateau_Den_A.png|150px]]
| |
| − | | |
| − | |-
| |
| − | |rowspan="2"|[[Nether Den]]
| |
| − | |Variant A
| |
| − | |<code>pixelmon:dens/den_nether_a</code>
| |
| − | |[[File:Nether_Den_A.png|150px]]
| |
| − | |rowspan="2"|[[Hellish]]
| |
| − | |-
| |
| − | |Variant B
| |
| − | |<code>pixelmon:dens/den_nether_b</code>
| |
| − | |[[File:Nether_Den_B.png|150px]]
| |
| − | | |
| − | |-
| |
| − | |[[Basalt Delta Den]]
| |
| − | |<code>pixelmon:dens/den_basalt_delta_a</code>
| |
| − | |[[File:Basalt_Delta_Den_A.png|150px]]
| |
| − | |rowspan="3"|[[Hellish]]
| |
| − | |-
| |
| − | |[[Crimson Forest Den]]
| |
| − | |<code>pixelmon:dens/den_crimson_forest_a</code>
| |
| − | |[[File:Crimson_Forest_Den_A.png|150px]]
| |
| − | | |
| − | | |
| − | | |
| − | | |
| − | | |
| − | |-
| |
| − | |rowspan="3"|[[Desert Den]]
| |
| − | |Variant A
| |
| − | |<code>pixelmon:dens/den_desert_a</code>
| |
| − | |[[File:Desert_Den_A.png|150px]]
| |
| − | |rowspan="3"|[[Arid]]
| |
| − | |-
| |
| − | |Variant B
| |
| − | |<code>pixelmon:dens/den_desert_b</code>
| |
| − | |[[File:Desert_Den_B.png|150px]]
| |
| − | |-
| |
| − | |Variant C
| |
| − | |<code>pixelmon:dens/den_desert_c</code>
| |
| − | |[[File:Desert_Den_C.png|150px]]
| |

 NodeCraft