
 NodeCraft
Difference between revisions of "PixelUtilities"
(remind me to write this up, or Some Body can xD) |
m (Text replacement - "https://minecraft.gamepedia.com" to "https://minecraft.wiki") |
||
| (112 intermediate revisions by 5 users not shown) | |||
| Line 1: | Line 1: | ||
| − | + | {{Legacy}} | |
| + | PixelUtilities is a [[Pixelmon]] [[sidemod]] that adds various new blocks and items. | ||
| + | |||
| + | '''Starting in ''Minecraft'' 1.8, most features in PixelUtilities were added directly into Pixelmon.''' | ||
| + | ==Installation== | ||
| + | {{SidemodVersionh}} | ||
| + | {{SidemodVersion|1.7.10|3.5|3.3.7}} | ||
| + | {{SidemodVersionf}} | ||
| + | As PixelUtilities adds new blocks and items, it must be installed in both participating clients and the server to be used on servers. | ||
| + | |||
| + | ===''Minecraft'' launcher=== | ||
| + | #Download PixelUtilities [https://adf.ly/3887320/pixelutilitiesrelease here]. | ||
| + | #Place the downloaded file in the mods folder. | ||
| + | ===[[Pixelmon launcher]]=== | ||
| + | #Download PixelUtilities [https://adf.ly/3887320/pixelutilitiesrelease here]. | ||
| + | #Edit your profile and choose the "Browse for Mods" option. | ||
| + | #Find the downloaded PixelUtilities file and select it. | ||
| + | ==Overview== | ||
| + | PixelUtilities contains several features, including: | ||
| + | *Tall grass based on the Pokémon games | ||
| + | *[[PokéLoot chests]] that contain Pokémon instead of items | ||
| + | *Pokémon currency | ||
| + | *Pokémon-themed ornamental blocks | ||
| + | *Colored lamps | ||
| + | *Additional materials | ||
| + | **Tools and armor using these materials | ||
| + | *[[Evolution stone]] tools and armor | ||
| + | *More badges | ||
| + | ==Items== | ||
| + | ===Pixelmon Grass=== | ||
| + | [[File:Grid Pixelmon Grass.png|16px|link=]]Pixelmon grass is ornamental grass that resembles the tall grass from the Generation 3 Pokémon games. By default, Pixelmon grass is purely cosmetic, but a config option will cause the grass to mimic wild Pokémon encounters in the Pokémon games; if players walk through the grass, wild Pokémon battles may randomly occur. The Pokémon that can appear in this manner, their rarities, and which biomes they appear in can be customized in the config files or with the /grassadd command. Pokémon levels will be their default level range found in the wild, but it is possible to instead scale their levels to be between the lowest and highest leveled Pokémon in a player's party through a change of a config setting.<!--It is also possible to disable normal Pokémon spawning, causing Pixelmon grass to become to only way that Pokémon can spawn.--> | ||
| + | ===Pokégifts=== | ||
| + | {{i|Pokégift}}s resemble [[Cherish Balls]] and act like [[PokéLoot chests]] except that they hold Pokémon instead of items. After placing a Pokégift, right-clicking it will place the first Pokémon that is outside of its Poké Ball from the player's party into the Pokégift and remove that Pokémon from the party. Further right-clicks will allow the player to change the Pokémon inside the Pokégift. Holding shift and right-clicking will prevent the Pokémon inside from being changed and allow the Pokégift to be able to be picked up by other players. Pokégifts preserve all aspects of Pokémon placed inside, including level, [[Nature]], [[EVs]], IVs, [[Abilities]], caught [[Poké Balls]], and movesets. | ||
| + | |||
| + | By default, Pokégifts work on a first come, first served basis and disappear upon being collected. By editing the config file, it is possible to make them usable by each player a single time. | ||
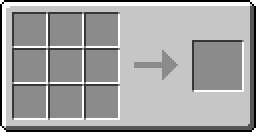
| + | {{Grid/Crafting Table | ||
| + | |B1=Cherish Ball | ||
| + | |A2=Cherish Ball|C2=Cherish Ball | ||
| + | |B3=Cherish Ball | ||
| + | |Output=Pokégift|OA=4}} | ||
| + | ====Event Pokégifts==== | ||
| + | {{i|Event Pokégift}}s are special types of Pokégifts that can be accessed by enabling them in the pixelutilities.cfg file. They each contain 1-6 random Pokémon inside of them. Additional config options can be set to allow [[Legendary Pokémon]] to spawn inside them or increase the rate of [[Shiny Pokémon]] found inside of them to {{frac|10}}. All Pokémon found inside event Pokégifts are level 5 and caught in [[Cherish Balls]]. | ||
| + | |||
| + | By default, event Pokégifts spawn upon the creation of a new world or turning on a server around Halloween (October 31), Christmas (December 25) and potentially a custom day, customizable in the [[PixelUtilities#Config|PixelUtilities config]]. They can also be made to spawn manually via the invocation of the command, /puevent, details of which can be found [[PixelUtilities#Commands|here]]. | ||
| + | ===PokéCoins=== | ||
| + | PokéCoins are items that are intended to be used as currency. By default, PokéCoins can only be obtained by spawning them in, but a config option can allow Pokémon to drop random amounts of $1 and $10 PokéCoins. Another config option can customize the chance of Pokémon dropping PokéCoins. | ||
| + | *{{i|$1 PokéCoin|1}} | ||
| + | *{{i|$5 PokéCoin|1}} | ||
| + | *{{i|$10 PokéCoin|1}} | ||
| + | *{{i|$50 PokéCoin|1}} | ||
| + | *{{i|$100 PokéCoin|1}} | ||
| + | ===Radio=== | ||
| + | A radio allows players to choose a YouTube video (via URL) and have its audio play in the game. It also allows players to choose whether or not to loop the audio clip. | ||
| + | {{Grid/Crafting Table | ||
| + | |C1=Iron Ingot | ||
| + | |A2=Oak Wood Planks|B2=Iron Ingot|C2=Oak Wood Planks | ||
| + | |A3=Oak Wood Planks|B3=Diamond|C3=Oak Wood Planks | ||
| + | |Output=Radio|Output-link=}} | ||
| + | ===Lamps=== | ||
| + | Lamps emit colored light that corresponds to their color. There are seven different kinds of lamps, all crafted with [https://minecraft.wiki/Redstone_Torch redstone torches] and matching colors of [https://minecraft.wiki/Stained_Glass_Pane stained glass panes]. When Pixelmon updates to ''Minecraft'' 1.8, lamps will be removed from PixelUtilities due to the API being used not having a 1.8 version. | ||
| + | {{Grid/Crafting Table | ||
| + | |A1=Blue Stained Glass Pane|B1=Blue Stained Glass Pane|C1=Blue Stained Glass Pane | ||
| + | |A2=Blue Stained Glass Pane|B2=Redstone Torch|C2=Blue Stained Glass Pane | ||
| + | |A3=Blue Stained Glass Pane|B3=Blue Stained Glass Pane|C3=Blue Stained Glass Pane | ||
| + | |Output=Blue Lamp | ||
| + | |Output-link=|A1-link=https://minecraft.wiki/Blue_Stained_Glass_Pane|B1-link=https://minecraft.wiki/Blue_Stained_Glass_Pane|C1-link=https://minecraft.wiki/Blue_Stained_Glass_Pane|A2-link=https://minecraft.wiki/Blue_Stained_Glass_Pane|B2-link=https://minecraft.wiki/Redstone_Torch|C2-link=https://minecraft.wiki/Blue_Stained_Glass_Pane|A3-link=https://minecraft.wiki/Blue_Stained_Glass_Pane|B3-link=https://minecraft.wiki/Blue_Stained_Glass_Pane|C3-link=https://minecraft.wiki/Blue_Stained_Glass_Pane|nobreak=y}} | ||
| + | {{Grid/Crafting Table | ||
| + | |A1=Green Stained Glass Pane|B1=Green Stained Glass Pane|C1=Green Stained Glass Pane | ||
| + | |A2=Green Stained Glass Pane|B2=Redstone Torch|C2=Green Stained Glass Pane | ||
| + | |A3=Green Stained Glass Pane|B3=Green Stained Glass Pane|C3=Green Stained Glass Pane | ||
| + | |Output=Green Lamp | ||
| + | |Output-link=|A1-link=https://minecraft.wiki/Green_Stained_Glass_Pane|B1-link=https://minecraft.wiki/Green_Stained_Glass_Pane|C1-link=https://minecraft.wiki/Green_Stained_Glass_Pane|A2-link=https://minecraft.wiki/Green_Stained_Glass_Pane|B2-link=https://minecraft.wiki/Redstone_Torch|C2-link=https://minecraft.wiki/Green_Stained_Glass_Pane|A3-link=https://minecraft.wiki/Green_Stained_Glass_Pane|B3-link=https://minecraft.wiki/Green_Stained_Glass_Pane|C3-link=https://minecraft.wiki/Green_Stained_Glass_Pane|nobreak=y}} | ||
| + | {{Grid/Crafting Table | ||
| + | |A1=Orange Stained Glass Pane|B1=Orange Stained Glass Pane|C1=Orange Stained Glass Pane | ||
| + | |A2=Orange Stained Glass Pane|B2=Redstone Torch|C2=Orange Stained Glass Pane | ||
| + | |A3=Orange Stained Glass Pane|B3=Orange Stained Glass Pane|C3=Orange Stained Glass Pane | ||
| + | |Output=Orange Lamp | ||
| + | |Output-link=|A1-link=https://minecraft.wiki/Orange_Stained_Glass_Pane|B1-link=https://minecraft.wiki/Orange_Stained_Glass_Pane|C1-link=https://minecraft.wiki/Orange_Stained_Glass_Pane|A2-link=https://minecraft.wiki/Orange_Stained_Glass_Pane|B2-link=https://minecraft.wiki/Redstone_Torch|C2-link=https://minecraft.wiki/Orange_Stained_Glass_Pane|A3-link=https://minecraft.wiki/Orange_Stained_Glass_Pane|B3-link=https://minecraft.wiki/Orange_Stained_Glass_Pane|C3-link=https://minecraft.wiki/Orange_Stained_Glass_Pane|nobreak=y}} | ||
| + | {{Grid/Crafting Table | ||
| + | |A1=Purple Stained Glass Pane|B1=Purple Stained Glass Pane|C1=Purple Stained Glass Pane | ||
| + | |A2=Purple Stained Glass Pane|B2=Redstone Torch|C2=Purple Stained Glass Pane | ||
| + | |A3=Purple Stained Glass Pane|B3=Purple Stained Glass Pane|C3=Purple Stained Glass Pane | ||
| + | |Output=Purple Lamp | ||
| + | |Output-link=|A1-link=https://minecraft.wiki/Purple_Stained_Glass_Pane|B1-link=https://minecraft.wiki/Purple_Stained_Glass_Pane|C1-link=https://minecraft.wiki/Purple_Stained_Glass_Pane|A2-link=https://minecraft.wiki/Purple_Stained_Glass_Pane|B2-link=https://minecraft.wiki/Redstone_Torch|C2-link=https://minecraft.wiki/Purple_Stained_Glass_Pane|A3-link=https://minecraft.wiki/Purple_Stained_Glass_Pane|B3-link=https://minecraft.wiki/Purple_Stained_Glass_Pane|C3-link=https://minecraft.wiki/Purple_Stained_Glass_Pane|nobreak=y}} | ||
| + | {{Grid/Crafting Table | ||
| + | |A1=Red Stained Glass Pane|B1=Red Stained Glass Pane|C1=Red Stained Glass Pane | ||
| + | |A2=Red Stained Glass Pane|B2=Redstone Torch|C2=Red Stained Glass Pane | ||
| + | |A3=Red Stained Glass Pane|B3=Red Stained Glass Pane|C3=Red Stained Glass Pane | ||
| + | |Output=Red Lamp | ||
| + | |Output-link=|A1-link=https://minecraft.wiki/Red_Stained_Glass_Pane|B1-link=https://minecraft.wiki/Red_Stained_Glass_Pane|C1-link=https://minecraft.wiki/Red_Stained_Glass_Pane|A2-link=https://minecraft.wiki/Red_Stained_Glass_Pane|B2-link=https://minecraft.wiki/Redstone_Torch|C2-link=https://minecraft.wiki/Red_Stained_Glass_Pane|A3-link=https://minecraft.wiki/Red_Stained_Glass_Pane|B3-link=https://minecraft.wiki/Red_Stained_Glass_Pane|C3-link=https://minecraft.wiki/Red_Stained_Glass_Pane|nobreak=y}} | ||
| + | {{Grid/Crafting Table | ||
| + | |A1=White Stained Glass Pane|B1=White Stained Glass Pane|C1=White Stained Glass Pane | ||
| + | |A2=White Stained Glass Pane|B2=Redstone Torch|C2=White Stained Glass Pane | ||
| + | |A3=White Stained Glass Pane|B3=White Stained Glass Pane|C3=White Stained Glass Pane | ||
| + | |Output=White Lamp | ||
| + | |Output-link=|A1-link=https://minecraft.wiki/White_Stained_Glass_Pane|B1-link=https://minecraft.wiki/White_Stained_Glass_Pane|C1-link=https://minecraft.wiki/White_Stained_Glass_Pane|A2-link=https://minecraft.wiki/White_Stained_Glass_Pane|B2-link=https://minecraft.wiki/Redstone_Torch|C2-link=https://minecraft.wiki/White_Stained_Glass_Pane|A3-link=https://minecraft.wiki/White_Stained_Glass_Pane|B3-link=https://minecraft.wiki/White_Stained_Glass_Pane|C3-link=https://minecraft.wiki/White_Stained_Glass_Pane|nobreak=y}} | ||
| + | {{Grid/Crafting Table | ||
| + | |A1=Yellow Stained Glass Pane|B1=Yellow Stained Glass Pane|C1=Yellow Stained Glass Pane | ||
| + | |A2=Yellow Stained Glass Pane|B2=Redstone Torch|C2=Yellow Stained Glass Pane | ||
| + | |A3=Yellow Stained Glass Pane|B3=Yellow Stained Glass Pane|C3=Yellow Stained Glass Pane | ||
| + | |Output=Yellow Lamp | ||
| + | |Output-link=|A1-link=https://minecraft.wiki/Yellow_Stained_Glass_Pane|B1-link=https://minecraft.wiki/Yellow_Stained_Glass_Pane|C1-link=https://minecraft.wiki/Yellow_Stained_Glass_Pane|A2-link=https://minecraft.wiki/Yellow_Stained_Glass_Pane|B2-link=https://minecraft.wiki/Redstone_Torch|C2-link=https://minecraft.wiki/Yellow_Stained_Glass_Pane|A3-link=https://minecraft.wiki/Yellow_Stained_Glass_Pane|B3-link=https://minecraft.wiki/Yellow_Stained_Glass_Pane|C3-link=https://minecraft.wiki/Yellow_Stained_Glass_Pane}} | ||
| + | |||
| + | ===Conveyor=== | ||
| + | A [[File:Grid Conveyor.png|16px|link=]]conveyor causes any entity (including players, Pokémon, and items) that passes over it to be quickly propelled in the direction that the conveyor is facing. | ||
| + | ===Sewage=== | ||
| + | {{i|Sewage|1}} acts like [https://minecraft.wiki/Water water], following the same fluid dynamics. However, it is a thick brown color, mostly obscuring what it covers (although such objects are still barely visible). While a player is submerged in sewage, vision is similar to being underwater, with the fluid's color and visibility matching water's. Like water, players and Pokémon can drown inside of sewage, although the speed at which damage is taken is no different than normal water despite the implications of uncleanliness. | ||
| + | ===PixelBoy=== | ||
| + | A PixelBoy is a Game Boy Color emulator. To use it, the player's system must contain compatible ROMs. It also doubles as a notepad ("Notepad--"), but the contents of the notepad will disappear if the player exits the notepad screen. | ||
| + | {{Grid/Crafting Table | ||
| + | |A1=Crystal|B1=Crystal|C1=Crystal | ||
| + | |A2=Crystal|B2=Glass Pane|C2=Crystal | ||
| + | |A3=Silicon|B3=Silicon|C3=Silicon | ||
| + | |Output=PixelBoy | ||
| + | |Output-link=|A1-link=|B1-link=|C1-link=|A2-link=|C2-link=|A3-link=|B3-link=|C3-link= | ||
| + | |B2-link={{mclink|Glass_Pane}} | ||
| + | }} | ||
| + | ===CD=== | ||
| + | A {{i|CD|1}} is an item that does nothing. | ||
| + | |||
| + | ===Decorative=== | ||
| + | ====Objects==== | ||
| + | *Aron Poké Doll | ||
| + | *{{i|Blue Rug}} | ||
| + | *{{i|Boulder}} | ||
| + | *{{i|Box}} | ||
| + | *{{i|Clothed Table}} | ||
| + | *{{i|Green Rug}} | ||
| + | *{{i|Gym Sign}} | ||
| + | *[[File:Grid Pokéball.png|16px|link=]]Poké Ball | ||
| + | *{{i|Poké Ball Statue|1}} | ||
| + | *{{i|PokéCenter Sign}} | ||
| + | *{{i|Red Cushion Chair}} | ||
| + | *{{i|Red Rug}} | ||
| + | *Totodile Poké Doll | ||
| + | *{{i|Trash Can}} | ||
| + | *{{i|Tree}} | ||
| + | *{{i|TV}} | ||
| + | *{{i|Yellow Cushion Chair}} | ||
| + | ====Blocks==== | ||
| + | *{{i|Bridge Block}} | ||
| + | *{{i|Cave Rock}} | ||
| + | *{{i|Inside Wall Molding}} | ||
| + | *{{i|Poké Mart Sign}} | ||
| + | *{{i|PokéDirt}} | ||
| + | *{{i|PokéGrass|1}} | ||
| + | *{{i|PokéSand}} | ||
| + | *{{i|PokéSand Corner 1}} | ||
| + | *{{i|PokéSand Corner 2}} | ||
| + | *{{i|PokéSand Corner 3}} | ||
| + | *{{i|PokéSand Corner 4}} | ||
| + | *{{i|PokéSand Side 1}} | ||
| + | *{{i|PokéSand Side 2}} | ||
| + | *{{i|PokéSand Side 3}} | ||
| + | *{{i|PokéSand Side 4}} | ||
| + | *[[File:Grid Rock.png|16px|link=Rock (block)]][[Rock (block)|Rock]] | ||
| + | *{{i|Sandy Grass}} | ||
| + | *{{i|Shingles}} | ||
| + | *{{i|Shingles Corner 1}} | ||
| + | *{{i|Shingles Corner 2}} | ||
| + | *{{i|Tree Bottom}} | ||
| + | *{{i|Tree Top}} | ||
| + | *{{i|Window 1}} | ||
| + | *{{i|Window 2}} | ||
| + | *{{i|Wooden Flooring}} | ||
| + | |||
| + | ===Minerals=== | ||
| + | PixelUtilities introduces five types of minerals: [[rubies]], [[sapphires]], [[amethysts]], [[crystals]], and [[silicon]]. | ||
| + | ====Ores==== | ||
| + | All five types of ore introduced with PixelUtilities spawn within stone from height levels 1 to 64. Each ore's maximum vein size is different: | ||
| + | {| class="wikitable" | ||
| + | |- | ||
| + | !Ore | ||
| + | !Vein size | ||
| + | |- | ||
| + | |{{i|Ruby Ore}} | ||
| + | |style="text-align:center"|7 | ||
| + | |- | ||
| + | |{{i|Sapphire Ore}} | ||
| + | |style="text-align:center"|5 | ||
| + | |- | ||
| + | |{{i|Amethyst Ore}} | ||
| + | |style="text-align:center"|6 | ||
| + | |- | ||
| + | |{{i|Crystal Ore}} | ||
| + | |style="text-align:center"|6 | ||
| + | |- | ||
| + | |{{i|Silicon Ore}} | ||
| + | |style="text-align:center"|4 | ||
| + | |} | ||
| + | All five ores require an {{mc|Iron_Pickaxe|iron pickaxe}} or better to mine. They drop in block form and need to be smelted in order to be used. | ||
| + | {{Grid/Furnace | ||
| + | |Top=Ruby Ore | ||
| + | |Output=Ruby | ||
| + | |nobreak=y}} | ||
| + | {{Grid/Furnace | ||
| + | |Top=Sapphire Ore | ||
| + | |Output=Sapphire | ||
| + | |nobreak=y}} | ||
| + | {{Grid/Furnace | ||
| + | |Top=Amethyst Ore | ||
| + | |Output=Amethyst | ||
| + | |nobreak=y}} | ||
| + | {{Grid/Furnace | ||
| + | |Top=Crystal Ore | ||
| + | |Output=Crystal | ||
| + | |nobreak=y}} | ||
| + | {{Grid/Furnace | ||
| + | |Top=Silicon Ore | ||
| + | |Output=Silicon}} | ||
| + | |||
| + | ====Mineral blocks==== | ||
| + | All minerals besides [[silicon]] can be made into decorative blocks. | ||
| + | {{Grid/Crafting Table | ||
| + | |A1=Ruby|B1=Ruby|C1=Ruby | ||
| + | |A2=Ruby|B2=Ruby|C2=Ruby | ||
| + | |A3=Ruby|B3=Ruby|C3=Ruby | ||
| + | |Output=Ruby Block | ||
| + | |nobreak=y}} | ||
| + | {{Grid/Crafting Table | ||
| + | |A1=Sapphire|B1=Sapphire|C1=Sapphire | ||
| + | |A2=Sapphire|B2=Sapphire|C2=Sapphire | ||
| + | |A3=Sapphire|B3=Sapphire|C3=Sapphire | ||
| + | |Output=Sapphire Block | ||
| + | |nobreak=y}} | ||
| + | {{Grid/Crafting Table | ||
| + | |A1=Amethyst|B1=Amethyst|C1=Amethyst | ||
| + | |A2=Amethyst|B2=Amethyst|C2=Amethyst | ||
| + | |A3=Amethyst|B3=Amethyst|C3=Amethyst | ||
| + | |Output=Amethyst Block | ||
| + | |nobreak=y}} | ||
| + | {{Grid/Crafting Table | ||
| + | |A1=Crystal|B1=Crystal|C1=Crystal | ||
| + | |A2=Crystal|B2=Crystal|C2=Crystal | ||
| + | |A3=Crystal|B3=Crystal|C3=Crystal | ||
| + | |Output=Crystal Block}} | ||
| + | ===Tools=== | ||
| + | Rubies, sapphires, amethysts, and crystal can all be crafted into tools. PixelUtilities also introduces tools made out of [[evolution stones]], which each have special effects when right-clicked (except for hoes and swords). These special effects use up 1 durability each time they are used. All tools introduced by PixelUtilities can be enchanted. | ||
| + | {| class="wikitable" | ||
| + | |- | ||
| + | !Tool type | ||
| + | !Durability | ||
| + | !Efficiency comparison | ||
| + | !{{tt|Sword damage|Hearts}} | ||
| + | ![https://minecraft.wiki/Enchantment_mechanics#How_Enchantments_Are_Chosen Enchantability] | ||
| + | !Effect | ||
| + | |- | ||
| + | |{{i|Ruby}} | ||
| + | |style="text-align:center"|300 | ||
| + | |style="text-align:center"|Between iron and diamond | ||
| + | |style="text-align:center"|3 | ||
| + | |style="text-align:center"|14 | ||
| + | |style="text-align:center"|None | ||
| + | |- | ||
| + | |{{i|Sapphire}} | ||
| + | |style="text-align:center"|300 | ||
| + | |style="text-align:center"|Between iron and diamond | ||
| + | |style="text-align:center"|3 | ||
| + | |style="text-align:center"|14 | ||
| + | |style="text-align:center"|None | ||
| + | |- | ||
| + | |{{i|Amethyst}} | ||
| + | |style="text-align:center"|300 | ||
| + | |style="text-align:center"|Between iron and diamond | ||
| + | |style="text-align:center"|3 | ||
| + | |style="text-align:center"|14 | ||
| + | |style="text-align:center"|None | ||
| + | |- | ||
| + | |{{i|Crystal}} | ||
| + | |style="text-align:center"|300 | ||
| + | |style="text-align:center"|Between iron and diamond | ||
| + | |style="text-align:center"|3 | ||
| + | |style="text-align:center"|14 | ||
| + | |style="text-align:center"|None | ||
| + | |- | ||
| + | |{{i|Fire Stone}} | ||
| + | |style="text-align:center"|1561 | ||
| + | |style="text-align:center"|Speed equal to gold/mines equivalent items to diamond | ||
| + | |style="text-align:center"|2 | ||
| + | |style="text-align:center"|22 | ||
| + | |style="text-align:center"|Turns source {{mc|water}} into {{mc|obsidian}} | ||
| + | |- | ||
| + | |{{i|Water Stone}} | ||
| + | |style="text-align:center"|1561 | ||
| + | |style="text-align:center"|Speed equal to gold/mines equivalent items to diamond | ||
| + | |style="text-align:center"|2 | ||
| + | |style="text-align:center"|22 | ||
| + | |style="text-align:center"|Turns source {{mc|lava}} into {{mc|obsidian}} | ||
| + | |- | ||
| + | |{{i|Leaf Stone}} | ||
| + | |style="text-align:center"|1561 | ||
| + | |style="text-align:center"|Speed equal to gold/mines equivalent items to diamond | ||
| + | |style="text-align:center"|2 | ||
| + | |style="text-align:center"|22 | ||
| + | |style="text-align:center"|Acts like [[bone meal]] | ||
| + | |- | ||
| + | |{{i|Thunder Stone}} | ||
| + | |style="text-align:center"|1561 | ||
| + | |style="text-align:center"|Speed equal to gold/mines equivalent items to diamond | ||
| + | |style="text-align:center"|2 | ||
| + | |style="text-align:center"|22 | ||
| + | |style="text-align:center"|Enchants the tool with Efficiency VIII | ||
| + | |- | ||
| + | |{{i|Sun Stone}} | ||
| + | |style="text-align:center"|1561 | ||
| + | |style="text-align:center"|Speed equal to gold/mines equivalent items to diamond | ||
| + | |style="text-align:center"|2 | ||
| + | |style="text-align:center"|22 | ||
| + | |style="text-align:center"|Places a {{mc|Torch|torch}} | ||
| + | |- | ||
| + | |{{i|Moon Stone}} | ||
| + | |style="text-align:center"|1561 | ||
| + | |style="text-align:center"|Speed equal to gold/mines equivalent items to diamond | ||
| + | |style="text-align:center"|2 | ||
| + | |style="text-align:center"|22 | ||
| + | |style="text-align:center"|Gives Night Vision for five minutes | ||
| + | |- | ||
| + | |{{i|Dawn Stone}} | ||
| + | |style="text-align:center"|1561 | ||
| + | |style="text-align:center"|Speed equal to gold/mines equivalent items to diamond | ||
| + | |style="text-align:center"|2 | ||
| + | |style="text-align:center"|22 | ||
| + | |style="text-align:center"|None | ||
| + | |} | ||
| + | ====Ruby tools==== | ||
| + | {{Grid/Crafting Table | ||
| + | |A1=Ruby|B1=Ruby|C1= | ||
| + | |A2=Ruby|B2=Stick|C2= | ||
| + | |A3=|B3=Stick|C3= | ||
| + | |Output=Ruby Axe | ||
| + | |B2-link={{mclink|Stick}}|B3-link={{mclink|Stick}} | ||
| + | |nobreak=y | ||
| + | }} | ||
| + | {{Grid/Crafting Table | ||
| + | |A1=Ruby|B1=Ruby|C1=Ruby | ||
| + | |A2=Ruby|B2=Stick|C2=Ruby | ||
| + | |A3=|B3=Stick|C3= | ||
| + | |Output=Ruby Hammer | ||
| + | |B2-link={{mclink|Stick}}|B3-link={{mclink|Stick}} | ||
| + | |nobreak=y | ||
| + | }} | ||
| + | {{Grid/Crafting Table | ||
| + | |A1=Ruby|B1=Ruby|C1= | ||
| + | |A2=|B2=Stick|C2= | ||
| + | |A3=|B3=Stick|C3= | ||
| + | |Output=Ruby Hoe | ||
| + | |B2-link={{mclink|Stick}}|B3-link={{mclink|Stick}} | ||
| + | |nobreak=y | ||
| + | }} | ||
| + | {{Grid/Crafting Table | ||
| + | |A1=Ruby|B1=Ruby|C1=Ruby | ||
| + | |A2=|B2=Stick|C2= | ||
| + | |A3=|B3=Stick|C3= | ||
| + | |Output=Ruby Pickaxe | ||
| + | |B2-link={{mclink|Stick}}|B3-link={{mclink|Stick}} | ||
| + | |nobreak=y | ||
| + | }} | ||
| + | {{Grid/Crafting Table | ||
| + | |A1=|B1=Ruby|C1= | ||
| + | |A2=|B2=Stick|C2= | ||
| + | |A3=|B3=Stick|C3= | ||
| + | |Output=Ruby Shovel | ||
| + | |B2-link={{mclink|Stick}}|B3-link={{mclink|Stick}} | ||
| + | |nobreak=y | ||
| + | }} | ||
| + | {{Grid/Crafting Table | ||
| + | |A1=|B1=Ruby|C1= | ||
| + | |A2=|B2=Ruby|C2= | ||
| + | |A3=|B3=Stick|C3= | ||
| + | |Output=Ruby Sword | ||
| + | |B3-link={{mclink|Stick}} | ||
| + | }} | ||
| + | ====Sapphire tools==== | ||
| + | {{Grid/Crafting Table | ||
| + | |A1=Sapphire|B1=Sapphire|C1= | ||
| + | |A2=Sapphire|B2=Stick|C2= | ||
| + | |A3=|B3=Stick|C3= | ||
| + | |Output=Sapphire Axe | ||
| + | |B2-link={{mclink|Stick}}|B3-link={{mclink|Stick}} | ||
| + | |nobreak=y | ||
| + | }} | ||
| + | {{Grid/Crafting Table | ||
| + | |A1=Sapphire|B1=Sapphire|C1=Sapphire | ||
| + | |A2=Sapphire|B2=Stick|C2=Sapphire | ||
| + | |A3=|B3=Stick|C3= | ||
| + | |Output=Sapphire Hammer | ||
| + | |B2-link={{mclink|Stick}}|B3-link={{mclink|Stick}} | ||
| + | |nobreak=y | ||
| + | }} | ||
| + | {{Grid/Crafting Table | ||
| + | |A1=Sapphire|B1=Sapphire|C1= | ||
| + | |A2=|B2=Stick|C2= | ||
| + | |A3=|B3=Stick|C3= | ||
| + | |Output=Sapphire Hoe | ||
| + | |B2-link={{mclink|Stick}}|B3-link={{mclink|Stick}} | ||
| + | |nobreak=y | ||
| + | }} | ||
| + | {{Grid/Crafting Table | ||
| + | |A1=Sapphire|B1=Sapphire|C1=Sapphire | ||
| + | |A2=|B2=Stick|C2= | ||
| + | |A3=|B3=Stick|C3= | ||
| + | |Output=Sapphire Pickaxe | ||
| + | |B2-link={{mclink|Stick}}|B3-link={{mclink|Stick}} | ||
| + | |nobreak=y | ||
| + | }} | ||
| + | {{Grid/Crafting Table | ||
| + | |A1=|B1=Sapphire|C1= | ||
| + | |A2=|B2=Stick|C2= | ||
| + | |A3=|B3=Stick|C3= | ||
| + | |Output=Sapphire Shovel | ||
| + | |B2-link={{mclink|Stick}}|B3-link={{mclink|Stick}} | ||
| + | |nobreak=y | ||
| + | }} | ||
| + | {{Grid/Crafting Table | ||
| + | |A1=|B1=Sapphire|C1= | ||
| + | |A2=|B2=Sapphire|C2= | ||
| + | |A3=|B3=Stick|C3= | ||
| + | |Output=Sapphire Sword | ||
| + | |B3-link={{mclink|Stick}} | ||
| + | }} | ||
| + | ====Amethyst tools==== | ||
| + | {{Grid/Crafting Table | ||
| + | |A1=Amethyst|B1=Amethyst|C1= | ||
| + | |A2=Amethyst|B2=Stick|C2= | ||
| + | |A3=|B3=Stick|C3= | ||
| + | |Output=Amethyst Axe | ||
| + | |B2-link={{mclink|Stick}}|B3-link={{mclink|Stick}} | ||
| + | |nobreak=y | ||
| + | }} | ||
| + | {{Grid/Crafting Table | ||
| + | |A1=Amethyst|B1=Amethyst|C1=Amethyst | ||
| + | |A2=Amethyst|B2=Stick|C2=Amethyst | ||
| + | |A3=|B3=Stick|C3= | ||
| + | |Output=Amethyst Hammer | ||
| + | |B2-link={{mclink|Stick}}|B3-link={{mclink|Stick}} | ||
| + | |nobreak=y | ||
| + | }} | ||
| + | {{Grid/Crafting Table | ||
| + | |A1=Amethyst|B1=Amethyst|C1= | ||
| + | |A2=|B2=Stick|C2= | ||
| + | |A3=|B3=Stick|C3= | ||
| + | |Output=Amethyst Hoe | ||
| + | |B2-link={{mclink|Stick}}|B3-link={{mclink|Stick}} | ||
| + | |nobreak=y | ||
| + | }} | ||
| + | {{Grid/Crafting Table | ||
| + | |A1=Amethyst|B1=Amethyst|C1=Amethyst | ||
| + | |A2=|B2=Stick|C2= | ||
| + | |A3=|B3=Stick|C3= | ||
| + | |Output=Amethyst Pickaxe | ||
| + | |B2-link={{mclink|Stick}}|B3-link={{mclink|Stick}} | ||
| + | |nobreak=y | ||
| + | }} | ||
| + | {{Grid/Crafting Table | ||
| + | |A1=|B1=Amethyst|C1= | ||
| + | |A2=|B2=Stick|C2= | ||
| + | |A3=|B3=Stick|C3= | ||
| + | |Output=Amethyst Shovel | ||
| + | |B2-link={{mclink|Stick}}|B3-link={{mclink|Stick}} | ||
| + | |nobreak=y | ||
| + | }} | ||
| + | {{Grid/Crafting Table | ||
| + | |A1=|B1=Amethyst|C1= | ||
| + | |A2=|B2=Amethyst|C2= | ||
| + | |A3=|B3=Stick|C3= | ||
| + | |Output=Amethyst Sword | ||
| + | |B3-link={{mclink|Stick}} | ||
| + | }} | ||
| + | ====Crystal tools==== | ||
| + | {{Grid/Crafting Table | ||
| + | |A1=Crystal|B1=Crystal|C1= | ||
| + | |A2=Crystal|B2=Stick|C2= | ||
| + | |A3=|B3=Stick|C3= | ||
| + | |Output=Crystal Axe | ||
| + | |B2-link={{mclink|Stick}}|B3-link={{mclink|Stick}} | ||
| + | |nobreak=y | ||
| + | }} | ||
| + | {{Grid/Crafting Table | ||
| + | |A1=Crystal|B1=Crystal|C1=Crystal | ||
| + | |A2=Crystal|B2=Stick|C2=Crystal | ||
| + | |A3=|B3=Stick|C3= | ||
| + | |Output=Crystal Hammer | ||
| + | |B2-link={{mclink|Stick}}|B3-link={{mclink|Stick}} | ||
| + | |nobreak=y | ||
| + | }} | ||
| + | {{Grid/Crafting Table | ||
| + | |A1=Crystal|B1=Crystal|C1= | ||
| + | |A2=|B2=Stick|C2= | ||
| + | |A3=|B3=Stick|C3= | ||
| + | |Output=Crystal Hoe | ||
| + | |B2-link={{mclink|Stick}}|B3-link={{mclink|Stick}} | ||
| + | |nobreak=y | ||
| + | }} | ||
| + | {{Grid/Crafting Table | ||
| + | |A1=Crystal|B1=Crystal|C1=Crystal | ||
| + | |A2=|B2=Stick|C2= | ||
| + | |A3=|B3=Stick|C3= | ||
| + | |Output=Crystal Pickaxe | ||
| + | |B2-link={{mclink|Stick}}|B3-link={{mclink|Stick}} | ||
| + | |nobreak=y | ||
| + | }} | ||
| + | {{Grid/Crafting Table | ||
| + | |A1=|B1=Crystal|C1= | ||
| + | |A2=|B2=Stick|C2= | ||
| + | |A3=|B3=Stick|C3= | ||
| + | |Output=Crystal Shovel | ||
| + | |B2-link={{mclink|Stick}}|B3-link={{mclink|Stick}} | ||
| + | |nobreak=y | ||
| + | }} | ||
| + | {{Grid/Crafting Table | ||
| + | |A1=|B1=Crystal|C1= | ||
| + | |A2=|B2=Crystal|C2= | ||
| + | |A3=|B3=Stick|C3= | ||
| + | |Output=Crystal Sword | ||
| + | |B3-link={{mclink|Stick}} | ||
| + | }} | ||
| + | ====Fire Stone tools==== | ||
| + | {{Grid/Crafting Table | ||
| + | |A1=Fire Stone|B1=Fire Stone|C1= | ||
| + | |A2=Fire Stone|B2=Stick|C2= | ||
| + | |A3=|B3=Stick|C3= | ||
| + | |Output=Fire Stone Axe | ||
| + | |B2-link={{mclink|Stick}}|B3-link={{mclink|Stick}} | ||
| + | |nobreak=y | ||
| + | }} | ||
| + | {{Grid/Crafting Table | ||
| + | |A1=Fire Stone|B1=Fire Stone|C1=Fire Stone | ||
| + | |A2=Fire Stone|B2=Stick|C2=Fire Stone | ||
| + | |A3=|B3=Stick|C3= | ||
| + | |Output=Fire Stone Hammer | ||
| + | |B2-link={{mclink|Stick}}|B3-link={{mclink|Stick}} | ||
| + | |nobreak=y | ||
| + | }} | ||
| + | {{Grid/Crafting Table | ||
| + | |A1=Fire Stone|B1=Fire Stone|C1= | ||
| + | |A2=|B2=Stick|C2= | ||
| + | |A3=|B3=Stick|C3= | ||
| + | |Output=Fire Stone Hoe | ||
| + | |B2-link={{mclink|Stick}}|B3-link={{mclink|Stick}} | ||
| + | |nobreak=y | ||
| + | }} | ||
| + | {{Grid/Crafting Table | ||
| + | |A1=Fire Stone|B1=Fire Stone|C1=Fire Stone | ||
| + | |A2=|B2=Stick|C2= | ||
| + | |A3=|B3=Stick|C3= | ||
| + | |Output=Fire Stone Pickaxe | ||
| + | |B2-link={{mclink|Stick}}|B3-link={{mclink|Stick}} | ||
| + | |nobreak=y | ||
| + | }} | ||
| + | {{Grid/Crafting Table | ||
| + | |A1=|B1=Fire Stone|C1= | ||
| + | |A2=|B2=Stick|C2= | ||
| + | |A3=|B3=Stick|C3= | ||
| + | |Output=Fire Stone Shovel | ||
| + | |B2-link={{mclink|Stick}}|B3-link={{mclink|Stick}} | ||
| + | |nobreak=y | ||
| + | }} | ||
| + | {{Grid/Crafting Table | ||
| + | |A1=|B1=Fire Stone|C1= | ||
| + | |A2=|B2=Fire Stone|C2= | ||
| + | |A3=|B3=Stick|C3= | ||
| + | |Output=Fire Stone Sword | ||
| + | |B3-link={{mclink|Stick}} | ||
| + | }} | ||
| + | ====Water Stone tools==== | ||
| + | {{Grid/Crafting Table | ||
| + | |A1=Water Stone|B1=Water Stone|C1= | ||
| + | |A2=Water Stone|B2=Stick|C2= | ||
| + | |A3=|B3=Stick|C3= | ||
| + | |Output=Water Stone Axe | ||
| + | |B2-link={{mclink|Stick}}|B3-link={{mclink|Stick}} | ||
| + | |nobreak=y | ||
| + | }} | ||
| + | {{Grid/Crafting Table | ||
| + | |A1=Water Stone|B1=Water Stone|C1=Water Stone | ||
| + | |A2=Water Stone|B2=Stick|C2=Water Stone | ||
| + | |A3=|B3=Stick|C3= | ||
| + | |Output=Water Stone Hammer | ||
| + | |B2-link={{mclink|Stick}}|B3-link={{mclink|Stick}} | ||
| + | |nobreak=y | ||
| + | }} | ||
| + | {{Grid/Crafting Table | ||
| + | |A1=Water Stone|B1=Water Stone|C1= | ||
| + | |A2=|B2=Stick|C2= | ||
| + | |A3=|B3=Stick|C3= | ||
| + | |Output=Water Stone Hoe | ||
| + | |B2-link={{mclink|Stick}}|B3-link={{mclink|Stick}} | ||
| + | |nobreak=y | ||
| + | }} | ||
| + | {{Grid/Crafting Table | ||
| + | |A1=Water Stone|B1=Water Stone|C1=Water Stone | ||
| + | |A2=|B2=Stick|C2= | ||
| + | |A3=|B3=Stick|C3= | ||
| + | |Output=Water Stone Pickaxe | ||
| + | |B2-link={{mclink|Stick}}|B3-link={{mclink|Stick}} | ||
| + | |nobreak=y | ||
| + | }} | ||
| + | {{Grid/Crafting Table | ||
| + | |A1=|B1=Water Stone|C1= | ||
| + | |A2=|B2=Stick|C2= | ||
| + | |A3=|B3=Stick|C3= | ||
| + | |Output=Water Stone Shovel | ||
| + | |B2-link={{mclink|Stick}}|B3-link={{mclink|Stick}} | ||
| + | |nobreak=y | ||
| + | }} | ||
| + | {{Grid/Crafting Table | ||
| + | |A1=|B1=Water Stone|C1= | ||
| + | |A2=|B2=Water Stone|C2= | ||
| + | |A3=|B3=Stick|C3= | ||
| + | |Output=Water Stone Sword | ||
| + | |B3-link={{mclink|Stick}} | ||
| + | }} | ||
| + | ====Leaf Stone tools==== | ||
| + | {{Grid/Crafting Table | ||
| + | |A1=Leaf Stone|B1=Leaf Stone|C1= | ||
| + | |A2=Leaf Stone|B2=Stick|C2= | ||
| + | |A3=|B3=Stick|C3= | ||
| + | |Output=Leaf Stone Axe | ||
| + | |B2-link={{mclink|Stick}}|B3-link={{mclink|Stick}} | ||
| + | |nobreak=y | ||
| + | }} | ||
| + | {{Grid/Crafting Table | ||
| + | |A1=Leaf Stone|B1=Leaf Stone|C1=Leaf Stone | ||
| + | |A2=Leaf Stone|B2=Stick|C2=Leaf Stone | ||
| + | |A3=|B3=Stick|C3= | ||
| + | |Output=Leaf Stone Hammer | ||
| + | |B2-link={{mclink|Stick}}|B3-link={{mclink|Stick}} | ||
| + | |nobreak=y | ||
| + | }} | ||
| + | {{Grid/Crafting Table | ||
| + | |A1=Leaf Stone|B1=Leaf Stone|C1= | ||
| + | |A2=|B2=Stick|C2= | ||
| + | |A3=|B3=Stick|C3= | ||
| + | |Output=Leaf Stone Hoe | ||
| + | |B2-link={{mclink|Stick}}|B3-link={{mclink|Stick}} | ||
| + | |nobreak=y | ||
| + | }} | ||
| + | {{Grid/Crafting Table | ||
| + | |A1=Leaf Stone|B1=Leaf Stone|C1=Leaf Stone | ||
| + | |A2=|B2=Stick|C2= | ||
| + | |A3=|B3=Stick|C3= | ||
| + | |Output=Leaf Stone Pickaxe | ||
| + | |B2-link={{mclink|Stick}}|B3-link={{mclink|Stick}} | ||
| + | |nobreak=y | ||
| + | }} | ||
| + | {{Grid/Crafting Table | ||
| + | |A1=|B1=Leaf Stone|C1= | ||
| + | |A2=|B2=Stick|C2= | ||
| + | |A3=|B3=Stick|C3= | ||
| + | |Output=Leaf Stone Shovel | ||
| + | |B2-link={{mclink|Stick}}|B3-link={{mclink|Stick}} | ||
| + | |nobreak=y | ||
| + | }} | ||
| + | {{Grid/Crafting Table | ||
| + | |A1=|B1=Leaf Stone|C1= | ||
| + | |A2=|B2=Leaf Stone|C2= | ||
| + | |A3=|B3=Stick|C3= | ||
| + | |Output=Leaf Stone Sword | ||
| + | |B3-link={{mclink|Stick}} | ||
| + | }} | ||
| + | ====Thunder Stone tools==== | ||
| + | {{Grid/Crafting Table | ||
| + | |A1=Thunder Stone|B1=Thunder Stone|C1= | ||
| + | |A2=Thunder Stone|B2=Stick|C2= | ||
| + | |A3=|B3=Stick|C3= | ||
| + | |Output=Thunder Stone Axe | ||
| + | |B2-link={{mclink|Stick}}|B3-link={{mclink|Stick}} | ||
| + | |nobreak=y | ||
| + | }} | ||
| + | {{Grid/Crafting Table | ||
| + | |A1=Thunder Stone|B1=Thunder Stone|C1=Thunder Stone | ||
| + | |A2=Thunder Stone|B2=Stick|C2=Thunder Stone | ||
| + | |A3=|B3=Stick|C3= | ||
| + | |Output=Thunder Stone Hammer | ||
| + | |B2-link={{mclink|Stick}}|B3-link={{mclink|Stick}} | ||
| + | |nobreak=y | ||
| + | }} | ||
| + | {{Grid/Crafting Table | ||
| + | |A1=Thunder Stone|B1=Thunder Stone|C1= | ||
| + | |A2=|B2=Stick|C2= | ||
| + | |A3=|B3=Stick|C3= | ||
| + | |Output=Thunder Stone Hoe | ||
| + | |B2-link={{mclink|Stick}}|B3-link={{mclink|Stick}} | ||
| + | |nobreak=y | ||
| + | }} | ||
| + | {{Grid/Crafting Table | ||
| + | |A1=Thunder Stone|B1=Thunder Stone|C1=Thunder Stone | ||
| + | |A2=|B2=Stick|C2= | ||
| + | |A3=|B3=Stick|C3= | ||
| + | |Output=Thunder Stone Pickaxe | ||
| + | |B2-link={{mclink|Stick}}|B3-link={{mclink|Stick}} | ||
| + | |nobreak=y | ||
| + | }} | ||
| + | {{Grid/Crafting Table | ||
| + | |A1=|B1=Thunder Stone|C1= | ||
| + | |A2=|B2=Stick|C2= | ||
| + | |A3=|B3=Stick|C3= | ||
| + | |Output=Thunder Stone Shovel | ||
| + | |B2-link={{mclink|Stick}}|B3-link={{mclink|Stick}} | ||
| + | |nobreak=y | ||
| + | }} | ||
| + | {{Grid/Crafting Table | ||
| + | |A1=|B1=Thunder Stone|C1= | ||
| + | |A2=|B2=Thunder Stone|C2= | ||
| + | |A3=|B3=Stick|C3= | ||
| + | |Output=Thunder Stone Sword | ||
| + | |B3-link={{mclink|Stick}} | ||
| + | }} | ||
| + | ====Sun Stone tools==== | ||
| + | {{Grid/Crafting Table | ||
| + | |A1=Sun Stone|B1=Sun Stone|C1= | ||
| + | |A2=Sun Stone|B2=Stick|C2= | ||
| + | |A3=|B3=Stick|C3= | ||
| + | |Output=Sun Stone Axe | ||
| + | |B2-link={{mclink|Stick}}|B3-link={{mclink|Stick}} | ||
| + | |nobreak=y | ||
| + | }} | ||
| + | {{Grid/Crafting Table | ||
| + | |A1=Sun Stone|B1=Sun Stone|C1=Sun Stone | ||
| + | |A2=Sun Stone|B2=Stick|C2=Sun Stone | ||
| + | |A3=|B3=Stick|C3= | ||
| + | |Output=Sun Stone Hammer | ||
| + | |B2-link={{mclink|Stick}}|B3-link={{mclink|Stick}} | ||
| + | |nobreak=y | ||
| + | }} | ||
| + | {{Grid/Crafting Table | ||
| + | |A1=Sun Stone|B1=Sun Stone|C1= | ||
| + | |A2=|B2=Stick|C2= | ||
| + | |A3=|B3=Stick|C3= | ||
| + | |Output=Sun Stone Hoe | ||
| + | |B2-link={{mclink|Stick}}|B3-link={{mclink|Stick}} | ||
| + | |nobreak=y | ||
| + | }} | ||
| + | {{Grid/Crafting Table | ||
| + | |A1=Sun Stone|B1=Sun Stone|C1=Sun Stone | ||
| + | |A2=|B2=Stick|C2= | ||
| + | |A3=|B3=Stick|C3= | ||
| + | |Output=Sun Stone Pickaxe | ||
| + | |B2-link={{mclink|Stick}}|B3-link={{mclink|Stick}} | ||
| + | |nobreak=y | ||
| + | }} | ||
| + | {{Grid/Crafting Table | ||
| + | |A1=|B1=Sun Stone|C1= | ||
| + | |A2=|B2=Stick|C2= | ||
| + | |A3=|B3=Stick|C3= | ||
| + | |Output=Sun Stone Shovel | ||
| + | |B2-link={{mclink|Stick}}|B3-link={{mclink|Stick}} | ||
| + | |nobreak=y | ||
| + | }} | ||
| + | {{Grid/Crafting Table | ||
| + | |A1=|B1=Sun Stone|C1= | ||
| + | |A2=|B2=Sun Stone|C2= | ||
| + | |A3=|B3=Stick|C3= | ||
| + | |Output=Sun Stone Sword | ||
| + | |B3-link={{mclink|Stick}} | ||
| + | }} | ||
| + | ====Moon Stone tools==== | ||
| + | {{Grid/Crafting Table | ||
| + | |A1=Moon Stone|B1=Moon Stone|C1= | ||
| + | |A2=Moon Stone|B2=Stick|C2= | ||
| + | |A3=|B3=Stick|C3= | ||
| + | |Output=Moon Stone Axe | ||
| + | |B2-link={{mclink|Stick}}|B3-link={{mclink|Stick}} | ||
| + | |nobreak=y | ||
| + | }} | ||
| + | {{Grid/Crafting Table | ||
| + | |A1=Moon Stone|B1=Moon Stone|C1=Moon Stone | ||
| + | |A2=Moon Stone|B2=Stick|C2=Moon Stone | ||
| + | |A3=|B3=Stick|C3= | ||
| + | |Output=Moon Stone Hammer | ||
| + | |B2-link={{mclink|Stick}}|B3-link={{mclink|Stick}} | ||
| + | |nobreak=y | ||
| + | }} | ||
| + | {{Grid/Crafting Table | ||
| + | |A1=Moon Stone|B1=Moon Stone|C1= | ||
| + | |A2=|B2=Stick|C2= | ||
| + | |A3=|B3=Stick|C3= | ||
| + | |Output=Moon Stone Hoe | ||
| + | |B2-link={{mclink|Stick}}|B3-link={{mclink|Stick}} | ||
| + | |nobreak=y | ||
| + | }} | ||
| + | {{Grid/Crafting Table | ||
| + | |A1=Moon Stone|B1=Moon Stone|C1=Moon Stone | ||
| + | |A2=|B2=Stick|C2= | ||
| + | |A3=|B3=Stick|C3= | ||
| + | |Output=Moon Stone Pickaxe | ||
| + | |B2-link={{mclink|Stick}}|B3-link={{mclink|Stick}} | ||
| + | |nobreak=y | ||
| + | }} | ||
| + | {{Grid/Crafting Table | ||
| + | |A1=|B1=Moon Stone|C1= | ||
| + | |A2=|B2=Stick|C2= | ||
| + | |A3=|B3=Stick|C3= | ||
| + | |Output=Moon Stone Shovel | ||
| + | |B2-link={{mclink|Stick}}|B3-link={{mclink|Stick}} | ||
| + | |nobreak=y | ||
| + | }} | ||
| + | {{Grid/Crafting Table | ||
| + | |A1=|B1=Moon Stone|C1= | ||
| + | |A2=|B2=Moon Stone|C2= | ||
| + | |A3=|B3=Stick|C3= | ||
| + | |Output=Moon Stone Sword | ||
| + | |B3-link={{mclink|Stick}} | ||
| + | }} | ||
| + | ====Dawn Stone tools==== | ||
| + | PixelUtilities contains Dawn Stone tools, although they cannot be crafted from [[Dawn Stones]]. These tools cannot be obtained without spawning them in. | ||
| + | *{{i|Dawn Stone Axe}} | ||
| + | *{{i|Dawn Stone Hammer}} | ||
| + | *{{i|Dawn Stone Hoe}} | ||
| + | *{{i|Dawn Stone Pickaxe}} | ||
| + | *{{i|Dawn Stone Shovel}} | ||
| + | *{{i|Dawn Stone Sword}} | ||
| + | |||
| + | ===Armor=== | ||
| + | Gems can be made into armor themed after various evil teams from the ''Pokémon'' games. PixelUtilities also introduces armor made out of [[evolution stones]], which each give an appropriately themed special effect if the respective full set of armor is worn. Evil team armor pieces can be enchanted like their vanilla ''Minecraft'' counterparts, but evolution stone armor cannot be manually enchanted, instead gaining a set enchantment if the player wears the full armor set. These enchantments persist even if pieces of armor are later taken off or broken. | ||
| + | {| class="wikitable" | ||
| + | |- | ||
| + | !Armor type | ||
| + | !Helmet protection | ||
| + | !Chestplate protection | ||
| + | !Leggings protection | ||
| + | !Boots protection | ||
| + | !Helmet durability | ||
| + | !Chestplate durability | ||
| + | !Leggings durability | ||
| + | !Boots durability | ||
| + | ![https://minecraft.wiki/Enchantment_mechanics#How_Enchantments_Are_Chosen Enchantability] | ||
| + | !Special effect | ||
| + | |- | ||
| + | |{{i|Ruby}} (Magma) | ||
| + | |style="text-align:center"|1.5 | ||
| + | |style="text-align:center"|3.5 | ||
| + | |style="text-align:center"|3 | ||
| + | |style="text-align:center"|1.5 | ||
| + | |style="text-align:center"|2200 | ||
| + | |style="text-align:center"|3200 | ||
| + | |style="text-align:center"|3000 | ||
| + | |style="text-align:center"|2600 | ||
| + | |style="text-align:center"|10 | ||
| + | |style="text-align:center"|None | ||
| + | |- | ||
| + | |{{i|Sapphire}} (Aqua) | ||
| + | |style="text-align:center"|1.5 | ||
| + | |style="text-align:center"|3.5 | ||
| + | |style="text-align:center"|3 | ||
| + | |style="text-align:center"|1.5 | ||
| + | |style="text-align:center"|2200 | ||
| + | |style="text-align:center"|3200 | ||
| + | |style="text-align:center"|3000 | ||
| + | |style="text-align:center"|2600 | ||
| + | |style="text-align:center"|10 | ||
| + | |style="text-align:center"|None | ||
| + | |- | ||
| + | |{{i|Silicon}} (Galactic) | ||
| + | |style="text-align:center"|1.5 | ||
| + | |style="text-align:center"|3.5 | ||
| + | |style="text-align:center"|3 | ||
| + | |style="text-align:center"|1.5 | ||
| + | |style="text-align:center"|2200 | ||
| + | |style="text-align:center"|3200 | ||
| + | |style="text-align:center"|3000 | ||
| + | |style="text-align:center"|2600 | ||
| + | |style="text-align:center"|10 | ||
| + | |style="text-align:center"|None | ||
| + | |- | ||
| + | |{{i|Amethyst}} (Rocket) | ||
| + | |style="text-align:center"|1.5 | ||
| + | |style="text-align:center"|3.5 | ||
| + | |style="text-align:center"|3 | ||
| + | |style="text-align:center"|1.5 | ||
| + | |style="text-align:center"|2200 | ||
| + | |style="text-align:center"|3200 | ||
| + | |style="text-align:center"|3000 | ||
| + | |style="text-align:center"|2600 | ||
| + | |style="text-align:center"|10 | ||
| + | |style="text-align:center"|None | ||
| + | |- | ||
| + | |{{i|Crystal}} (Plasma) | ||
| + | |style="text-align:center"|1.5 | ||
| + | |style="text-align:center"|3.5 | ||
| + | |style="text-align:center"|3 | ||
| + | |style="text-align:center"|1.5 | ||
| + | |style="text-align:center"|2200 | ||
| + | |style="text-align:center"|3200 | ||
| + | |style="text-align:center"|3000 | ||
| + | |style="text-align:center"|2600 | ||
| + | |style="text-align:center"|10 | ||
| + | |style="text-align:center"|None | ||
| + | |- | ||
| + | |{{i|Crystal}}/{{-}}{{i|Silicon}} (Neo Plasma) | ||
| + | |style="text-align:center"|1.5 | ||
| + | |style="text-align:center"|3.5 | ||
| + | |style="text-align:center"|3 | ||
| + | |style="text-align:center"|1.5 | ||
| + | |style="text-align:center"|2200 | ||
| + | |style="text-align:center"|3200 | ||
| + | |style="text-align:center"|3000 | ||
| + | |style="text-align:center"|2600 | ||
| + | |style="text-align:center"|10 | ||
| + | |style="text-align:center"|None | ||
| + | |- | ||
| + | |{{i|Fire Stone}} | ||
| + | |style="text-align:center"|2 | ||
| + | |style="text-align:center"|4 | ||
| + | |style="text-align:center"|3 | ||
| + | |style="text-align:center"|2 | ||
| + | |style="text-align:center"|440 | ||
| + | |style="text-align:center"|640 | ||
| + | |style="text-align:center"|600 | ||
| + | |style="text-align:center"|520 | ||
| + | |style="text-align:center"|0 | ||
| + | |style="text-align:center"|Fire Resistance/Fire Protection II/+50% walking speed | ||
| + | |- | ||
| + | |{{i|Water Stone}} | ||
| + | |style="text-align:center"|2 | ||
| + | |style="text-align:center"|4 | ||
| + | |style="text-align:center"|3 | ||
| + | |style="text-align:center"|2 | ||
| + | |style="text-align:center"|440 | ||
| + | |style="text-align:center"|640 | ||
| + | |style="text-align:center"|600 | ||
| + | |style="text-align:center"|520 | ||
| + | |style="text-align:center"|0 | ||
| + | |style="text-align:center"|Water Breathing/Aqua Affinity II/+50% walking speed | ||
| + | |- | ||
| + | |{{i|Leaf Stone}} | ||
| + | |style="text-align:center"|1.5 | ||
| + | |style="text-align:center"|3.5 | ||
| + | |style="text-align:center"|3 | ||
| + | |style="text-align:center"|1.5 | ||
| + | |style="text-align:center"|165 | ||
| + | |style="text-align:center"|240 | ||
| + | |style="text-align:center"|225 | ||
| + | |style="text-align:center"|195 | ||
| + | |style="text-align:center"|0 | ||
| + | |style="text-align:center"|Feather Falling III/Thorns III/+50% walking speed | ||
| + | |- | ||
| + | |{{i|Thunder Stone}} | ||
| + | |style="text-align:center"|1.5 | ||
| + | |style="text-align:center"|3.5 | ||
| + | |style="text-align:center"|3 | ||
| + | |style="text-align:center"|1.5 | ||
| + | |style="text-align:center"|165 | ||
| + | |style="text-align:center"|240 | ||
| + | |style="text-align:center"|225 | ||
| + | |style="text-align:center"|195 | ||
| + | |style="text-align:center"|0 | ||
| + | |style="text-align:center"|Haste/+100% walking speed | ||
| + | |- | ||
| + | |{{i|Sun Stone}} | ||
| + | |style="text-align:center"|1.5 | ||
| + | |style="text-align:center"|3.5 | ||
| + | |style="text-align:center"|3 | ||
| + | |style="text-align:center"|1.5 | ||
| + | |style="text-align:center"|165 | ||
| + | |style="text-align:center"|240 | ||
| + | |style="text-align:center"|225 | ||
| + | |style="text-align:center"|195 | ||
| + | |style="text-align:center"|0 | ||
| + | |style="text-align:center"|Protection IV/Projectile Protection IV/+50% walking speed | ||
| + | |- | ||
| + | |{{i|Moon Stone}} | ||
| + | |style="text-align:center"|1.5 | ||
| + | |style="text-align:center"|3.5 | ||
| + | |style="text-align:center"|3 | ||
| + | |style="text-align:center"|1.5 | ||
| + | |style="text-align:center"|165 | ||
| + | |style="text-align:center"|240 | ||
| + | |style="text-align:center"|225 | ||
| + | |style="text-align:center"|195 | ||
| + | |style="text-align:center"|0 | ||
| + | |style="text-align:center"|Protection IV/Blast Protection IV/+50% walking speed | ||
| + | |- | ||
| + | |{{i|Dawn Stone}} | ||
| + | |style="text-align:center"|2 | ||
| + | |style="text-align:center"|4 | ||
| + | |style="text-align:center"|3 | ||
| + | |style="text-align:center"|2 | ||
| + | |style="text-align:center"|440 | ||
| + | |style="text-align:center"|640 | ||
| + | |style="text-align:center"|600 | ||
| + | |style="text-align:center"|520 | ||
| + | |style="text-align:center"|0 | ||
| + | |style="text-align:center"|Jump Boost/+50% walking speed | ||
| + | |} | ||
| + | ====Magma armor==== | ||
| + | Magma armor is designed after the outfits of Team Magma from the Generation 3 ''Pokémon'' games. | ||
| + | {{Grid/Crafting Table | ||
| + | |A1=Ruby|B1=Ruby|C1=Ruby | ||
| + | |A2=Ruby|C2=Ruby | ||
| + | |Output=Magma Helmet | ||
| + | |nobreak=y}} | ||
| + | {{Grid/Crafting Table | ||
| + | |A1=Ruby|C1=Ruby | ||
| + | |A2=Ruby|B2=Ruby|C2=Ruby | ||
| + | |A3=Ruby|B3=Ruby|C3=Ruby | ||
| + | |Output=Magma Chestplate | ||
| + | |nobreak=y}} | ||
| + | {{Grid/Crafting Table | ||
| + | |A1=Ruby|B1=Ruby|C1=Ruby | ||
| + | |A2=Ruby|C2=Ruby | ||
| + | |A3=Ruby|C3=Ruby | ||
| + | |Output=Magma Leggings | ||
| + | |nobreak=y}} | ||
| + | {{Grid/Crafting Table | ||
| + | |A3=Ruby|C3=Ruby | ||
| + | |A2=Ruby|C2=Ruby | ||
| + | |Output=Magma Boots}} | ||
| + | ====Aqua armor==== | ||
| + | Aqua armor is based on the outfits of Team Aqua from the Generation 3 ''Pokémon'' games. | ||
| + | {{Grid/Crafting Table | ||
| + | |A1=Sapphire|B1=Sapphire|C1=Sapphire | ||
| + | |A2=Sapphire|C2=Sapphire | ||
| + | |Output=Aqua Helmet | ||
| + | |nobreak=y}} | ||
| + | {{Grid/Crafting Table | ||
| + | |A1=Sapphire|C1=Sapphire | ||
| + | |A2=Sapphire|B2=Sapphire|C2=Sapphire | ||
| + | |A3=Sapphire|B3=Sapphire|C3=Sapphire | ||
| + | |Output=Aqua Chestplate | ||
| + | |nobreak=y}} | ||
| + | {{Grid/Crafting Table | ||
| + | |A1=Sapphire|B1=Sapphire|C1=Sapphire | ||
| + | |A2=Sapphire|C2=Sapphire | ||
| + | |A3=Sapphire|C3=Sapphire | ||
| + | |Output=Aqua Leggings | ||
| + | |nobreak=y}} | ||
| + | {{Grid/Crafting Table | ||
| + | |A3=Sapphire|C3=Sapphire | ||
| + | |A2=Sapphire|C2=Sapphire | ||
| + | |Output=Aqua Boots}} | ||
| + | ====Galactic armor==== | ||
| + | Galactic armor is designed after the outfits of Team Galactic from the Generation 4 ''Pokémon'' games. | ||
| + | {{Grid/Crafting Table | ||
| + | |A1=Silicon|B1=Silicon|C1=Silicon | ||
| + | |A2=Silicon|C2=Silicon | ||
| + | |Output=Galactic Swag | ||
| + | |nobreak=y}} | ||
| + | {{Grid/Crafting Table | ||
| + | |A1=Silicon|C1=Silicon | ||
| + | |A2=Silicon|B2=Silicon|C2=Silicon | ||
| + | |A3=Silicon|B3=Silicon|C3=Silicon | ||
| + | |Output=Galactic Chestplate | ||
| + | |nobreak=y}} | ||
| + | {{Grid/Crafting Table | ||
| + | |A1=Silicon|B1=Silicon|C1=Silicon | ||
| + | |A2=Silicon|C2=Silicon | ||
| + | |A3=Silicon|C3=Silicon | ||
| + | |Output=Galactic Leggings | ||
| + | |nobreak=y}} | ||
| + | {{Grid/Crafting Table | ||
| + | |A3=Silicon|C3=Silicon | ||
| + | |A2=Silicon|C2=Silicon | ||
| + | |Output=Galactic Boots}} | ||
| + | ====Rocket armor==== | ||
| + | Rocket armor is based on Team Rocket's outfits from the Generation 1 and 2 ''Pokémon'' games. | ||
| + | {{Grid/Crafting Table | ||
| + | |A1=Amethyst|B1=Amethyst|C1=Amethyst | ||
| + | |A2=Amethyst|C2=Amethyst | ||
| + | |Output=Rocket Helmet | ||
| + | |nobreak=y}} | ||
| + | {{Grid/Crafting Table | ||
| + | |A1=Amethyst|C1=Amethyst | ||
| + | |A2=Amethyst|B2=Amethyst|C2=Amethyst | ||
| + | |A3=Amethyst|B3=Amethyst|C3=Amethyst | ||
| + | |Output=Rocket Chestplate | ||
| + | |nobreak=y}} | ||
| + | {{Grid/Crafting Table | ||
| + | |A1=Amethyst|B1=Amethyst|C1=Amethyst | ||
| + | |A2=Amethyst|C2=Amethyst | ||
| + | |A3=Amethyst|C3=Amethyst | ||
| + | |Output=Rocket Leggings | ||
| + | |nobreak=y}} | ||
| + | {{Grid/Crafting Table | ||
| + | |A3=Amethyst|C3=Amethyst | ||
| + | |A2=Amethyst|C2=Amethyst | ||
| + | |Output=Rocket Boots}} | ||
| + | ====Plasma armor==== | ||
| + | Plasma armor is based on ''Pokémon Black and White'''s Team Plasma uniforms. | ||
| + | {{Grid/Crafting Table | ||
| + | |A1=Crystal|B1=Crystal|C1=Crystal | ||
| + | |A2=Crystal|C2=Crystal | ||
| + | |Output=Plasma Helmet | ||
| + | |nobreak=y}} | ||
| + | {{Grid/Crafting Table | ||
| + | |A1=Crystal|C1=Crystal | ||
| + | |A2=Crystal|B2=Crystal|C2=Crystal | ||
| + | |A3=Crystal|B3=Crystal|C3=Crystal | ||
| + | |Output=Plasma Chestplate | ||
| + | |nobreak=y}} | ||
| + | {{Grid/Crafting Table | ||
| + | |A1=Crystal|B1=Crystal|C1=Crystal | ||
| + | |A2=Crystal|C2=Crystal | ||
| + | |A3=Crystal|C3=Crystal | ||
| + | |Output=Plasma Leggings | ||
| + | |nobreak=y}} | ||
| + | {{Grid/Crafting Table | ||
| + | |A3=Crystal|C3=Crystal | ||
| + | |A2=Crystal|C2=Crystal | ||
| + | |Output=Plasma Boots}} | ||
| + | ====Neo Plasma armor==== | ||
| + | Neo Plasma armor is based on ''Pokémon Black 2 and White 2'''s Team Plasma uniforms. | ||
| + | {{Grid/Crafting Table | ||
| + | |A1=Crystal|B1=Crystal|C1=Crystal | ||
| + | |A2=Silicon|C2=Silicon | ||
| + | |Output=Neo Plasma Helmet | ||
| + | |nobreak=y}} | ||
| + | {{Grid/Crafting Table | ||
| + | |A1=Crystal|C1=Crystal | ||
| + | |A2=Crystal|B2=Crystal|C2=Crystal | ||
| + | |A3=Silicon|B3=Silicon|C3=Silicon | ||
| + | |Output=Neo Plasma Chestplate | ||
| + | |nobreak=y}} | ||
| + | {{Grid/Crafting Table | ||
| + | |A1=Crystal|B1=Crystal|C1=Crystal | ||
| + | |A2=Crystal|C2=Crystal | ||
| + | |A3=Silicon|C3=Silicon | ||
| + | |Output=Neo Plasma Leggings | ||
| + | |nobreak=y}} | ||
| + | {{Grid/Crafting Table | ||
| + | |A3=Crystal|C3=Crystal | ||
| + | |A2=Silicon|C2=Silicon | ||
| + | |Output=Neo Plasma Boots}} | ||
| + | ====Fire Stone armor==== | ||
| + | {{Grid/Crafting Table | ||
| + | |A1=Fire Stone|B1=Fire Stone|C1=Fire Stone | ||
| + | |A2=Fire Stone|C2=Fire Stone | ||
| + | |Output=Fire Stone Helmet | ||
| + | |Output-link= | ||
| + | |nobreak=y}} | ||
| + | {{Grid/Crafting Table | ||
| + | |A1=Fire Stone|C1=Fire Stone | ||
| + | |A2=Fire Stone|B2=Fire Stone|C2=Fire Stone | ||
| + | |A3=Fire Stone|B3=Fire Stone|C3=Fire Stone | ||
| + | |Output=Fire Stone Chestplate | ||
| + | |Output-link= | ||
| + | |nobreak=y}} | ||
| + | {{Grid/Crafting Table | ||
| + | |A1=Fire Stone|B1=Fire Stone|C1=Fire Stone | ||
| + | |A2=Fire Stone|C2=Fire Stone | ||
| + | |A3=Fire Stone|C3=Fire Stone | ||
| + | |Output=Fire Stone Leggings | ||
| + | |Output-link= | ||
| + | |nobreak=y}} | ||
| + | {{Grid/Crafting Table | ||
| + | |A3=Fire Stone|C3=Fire Stone | ||
| + | |A2=Fire Stone|C2=Fire Stone | ||
| + | |Output=Fire Stone Boots | ||
| + | |Output-link=}} | ||
| + | |||
| + | ====Water Stone armor==== | ||
| + | {{Grid/Crafting Table | ||
| + | |A1=Water Stone|B1=Water Stone|C1=Water Stone | ||
| + | |A2=Water Stone|C2=Water Stone | ||
| + | |Output=Water Stone Helmet | ||
| + | |Output-link= | ||
| + | |nobreak=y}} | ||
| + | {{Grid/Crafting Table | ||
| + | |A1=Water Stone|C1=Water Stone | ||
| + | |A2=Water Stone|B2=Water Stone|C2=Water Stone | ||
| + | |A3=Water Stone|B3=Water Stone|C3=Water Stone | ||
| + | |Output=Water Stone Chestplate | ||
| + | |Output-link= | ||
| + | |nobreak=y}} | ||
| + | {{Grid/Crafting Table | ||
| + | |A1=Water Stone|B1=Water Stone|C1=Water Stone | ||
| + | |A2=Water Stone|C2=Water Stone | ||
| + | |A3=Water Stone|C3=Water Stone | ||
| + | |Output=Water Stone Leggings | ||
| + | |Output-link= | ||
| + | |nobreak=y}} | ||
| + | {{Grid/Crafting Table | ||
| + | |A3=Water Stone|C3=Water Stone | ||
| + | |A2=Water Stone|C2=Water Stone | ||
| + | |Output=Water Stone Boots | ||
| + | |Output-link=}} | ||
| + | ====Leaf Stone armor==== | ||
| + | {{Grid/Crafting Table | ||
| + | |A1=Leaf Stone|B1=Leaf Stone|C1=Leaf Stone | ||
| + | |A2=Leaf Stone|C2=Leaf Stone | ||
| + | |Output=Leaf Stone Helmet | ||
| + | |Output-link= | ||
| + | |nobreak=y}} | ||
| + | {{Grid/Crafting Table | ||
| + | |A1=Leaf Stone|C1=Leaf Stone | ||
| + | |A2=Leaf Stone|B2=Leaf Stone|C2=Leaf Stone | ||
| + | |A3=Leaf Stone|B3=Leaf Stone|C3=Leaf Stone | ||
| + | |Output=Leaf Stone Chestplate | ||
| + | |Output-link= | ||
| + | |nobreak=y}} | ||
| + | {{Grid/Crafting Table | ||
| + | |A1=Leaf Stone|B1=Leaf Stone|C1=Leaf Stone | ||
| + | |A2=Leaf Stone|C2=Leaf Stone | ||
| + | |A3=Leaf Stone|C3=Leaf Stone | ||
| + | |Output=Leaf Stone Leggings | ||
| + | |Output-link= | ||
| + | |nobreak=y}} | ||
| + | {{Grid/Crafting Table | ||
| + | |A3=Leaf Stone|C3=Leaf Stone | ||
| + | |A2=Leaf Stone|C2=Leaf Stone | ||
| + | |Output=Leaf Stone Boots | ||
| + | |Output-link=}} | ||
| + | ====Thunder Stone armor==== | ||
| + | {{Grid/Crafting Table | ||
| + | |A1=Thunder Stone|B1=Thunder Stone|C1=Thunder Stone | ||
| + | |A2=Thunder Stone|C2=Thunder Stone | ||
| + | |Output=Thunder Stone Helmet | ||
| + | |Output-link= | ||
| + | |nobreak=y}} | ||
| + | {{Grid/Crafting Table | ||
| + | |A1=Thunder Stone|C1=Thunder Stone | ||
| + | |A2=Thunder Stone|B2=Thunder Stone|C2=Thunder Stone | ||
| + | |A3=Thunder Stone|B3=Thunder Stone|C3=Thunder Stone | ||
| + | |Output=Thunder Stone Chestplate | ||
| + | |Output-link= | ||
| + | |nobreak=y}} | ||
| + | {{Grid/Crafting Table | ||
| + | |A1=Thunder Stone|B1=Thunder Stone|C1=Thunder Stone | ||
| + | |A2=Thunder Stone|C2=Thunder Stone | ||
| + | |A3=Thunder Stone|C3=Thunder Stone | ||
| + | |Output=Thunder Stone Leggings | ||
| + | |Output-link= | ||
| + | |nobreak=y}} | ||
| + | {{Grid/Crafting Table | ||
| + | |A3=Thunder Stone|C3=Thunder Stone | ||
| + | |A2=Thunder Stone|C2=Thunder Stone | ||
| + | |Output=Thunder Stone Boots | ||
| + | |Output-link=}} | ||
| + | ====Sun Stone armor==== | ||
| + | {{Grid/Crafting Table | ||
| + | |A1=Sun Stone|B1=Sun Stone|C1=Sun Stone | ||
| + | |A2=Sun Stone|C2=Sun Stone | ||
| + | |Output=Sun Stone Helmet | ||
| + | |Output-link= | ||
| + | |nobreak=y}} | ||
| + | {{Grid/Crafting Table | ||
| + | |A1=Sun Stone|C1=Sun Stone | ||
| + | |A2=Sun Stone|B2=Sun Stone|C2=Sun Stone | ||
| + | |A3=Sun Stone|B3=Sun Stone|C3=Sun Stone | ||
| + | |Output=Sun Stone Chestplate | ||
| + | |Output-link= | ||
| + | |nobreak=y}} | ||
| + | {{Grid/Crafting Table | ||
| + | |A1=Sun Stone|B1=Sun Stone|C1=Sun Stone | ||
| + | |A2=Sun Stone|C2=Sun Stone | ||
| + | |A3=Sun Stone|C3=Sun Stone | ||
| + | |Output=Sun Stone Leggings | ||
| + | |Output-link= | ||
| + | |nobreak=y}} | ||
| + | {{Grid/Crafting Table | ||
| + | |A3=Sun Stone|C3=Sun Stone | ||
| + | |A2=Sun Stone|C2=Sun Stone | ||
| + | |Output=Sun Stone Boots | ||
| + | |Output-link=}} | ||
| + | ====Moon Stone armor==== | ||
| + | {{Grid/Crafting Table | ||
| + | |A1=Moon Stone|B1=Moon Stone|C1=Moon Stone | ||
| + | |A2=Moon Stone|C2=Moon Stone | ||
| + | |Output=Moon Stone Helmet | ||
| + | |Output-link= | ||
| + | |nobreak=y}} | ||
| + | {{Grid/Crafting Table | ||
| + | |A1=Moon Stone|C1=Moon Stone | ||
| + | |A2=Moon Stone|B2=Moon Stone|C2=Moon Stone | ||
| + | |A3=Moon Stone|B3=Moon Stone|C3=Moon Stone | ||
| + | |Output=Moon Stone Chestplate | ||
| + | |Output-link= | ||
| + | |nobreak=y}} | ||
| + | {{Grid/Crafting Table | ||
| + | |A1=Moon Stone|B1=Moon Stone|C1=Moon Stone | ||
| + | |A2=Moon Stone|C2=Moon Stone | ||
| + | |A3=Moon Stone|C3=Moon Stone | ||
| + | |Output=Moon Stone Leggings | ||
| + | |Output-link= | ||
| + | |nobreak=y}} | ||
| + | {{Grid/Crafting Table | ||
| + | |A3=Moon Stone|C3=Moon Stone | ||
| + | |A2=Moon Stone|C2=Moon Stone | ||
| + | |Output=Moon Stone Boots | ||
| + | |Output-link=}} | ||
| + | ====Dawn Stone armor==== | ||
| + | Dawn Stone armor exists in PixelUtilities, although it cannot be crafted from [[Dawn Stones]]. This armor can only be obtained by spawning it in. | ||
| + | *{{i|Dawn Stone Boots}} | ||
| + | *{{i|Dawn Stone Chestplate}} | ||
| + | *{{i|Dawn Stone Helmet}} | ||
| + | *{{i|Dawn Stone Leggings}} | ||
| + | |||
| + | ===Badges=== | ||
| + | PixelUtilities adds seventeen badges, one badge based on each Pokémon [[type]]. All seventeen badges are original and do not come from any Pokémon game. Each badge is named after the Japanese word for its corresponding type. | ||
| + | {| class="wikitable sortable" | ||
| + | |- | ||
| + | !Badge | ||
| + | !Type | ||
| + | |- | ||
| + | |{{i|Aisu Badge|1}} | ||
| + | |style="background:#{{ice color}}"|{{t|Ice}} | ||
| + | |- | ||
| + | |{{i|Bagu Badge|1}} | ||
| + | |style="background:#{{bug color}}"|{{t|Bug}} | ||
| + | |- | ||
| + | |{{i|Dendo Badge|1}} | ||
| + | |style="background:#{{electric color}}"|{{t|Electric}} | ||
| + | |- | ||
| + | |{{i|Doku Badge|1}} | ||
| + | |style="background:#{{poison color}}"|{{t|Poison}} | ||
| + | |- | ||
| + | |{{i|Doragon Badge|1}} | ||
| + | |style="background:#{{dragon color}}"|{{t|Dragon}} | ||
| + | |- | ||
| + | |{{i|Gosuto Badge|1}} | ||
| + | |style="background:#{{ghost color}}"|{{t|Ghost}} | ||
| + | |- | ||
| + | |{{i|Iwa Badge|1}} | ||
| + | |style="background:#{{rock color}}"|{{t|Rock}} | ||
| + | |- | ||
| + | |{{i|Jimen Badge|1}} | ||
| + | |style="background:#{{ground color}}"|{{t|Ground}} | ||
| + | |- | ||
| + | |{{i|Kasai Badge|1}} | ||
| + | |style="background:#{{fire color}}"|{{t|Fire}} | ||
| + | |- | ||
| + | |{{i|Kurai Badge|1}} | ||
| + | |style="background:#{{dark color}}"|{{t|Dark}} | ||
| + | |- | ||
| + | |{{i|Kusa Badge|1}} | ||
| + | |style="background:#{{grass color}}"|{{t|Grass}} | ||
| + | |- | ||
| + | |{{i|Mizu Badge|1}} | ||
| + | |style="background:#{{water color}}"|{{t|Water}} | ||
| + | |- | ||
| + | |{{i|Nomaru Badge|1}} | ||
| + | |style="background:#{{normal color}}"|{{t|Normal}} | ||
| + | |- | ||
| + | |{{i|Seishin Badge|1}} | ||
| + | |style="background:#{{psychic color}}"|{{t|Psychic}} | ||
| + | |- | ||
| + | |{{i|Sento Badge|1}} | ||
| + | |style="background:#{{fighting color}}"|{{t|Fighting}} | ||
| + | |- | ||
| + | |{{i|Suchiru Badge|1}} | ||
| + | |style="background:#{{steel color}}"|{{t|Steel}} | ||
| + | |- | ||
| + | |{{i|Tobu Badge|1}} | ||
| + | |style="background:#{{flying color}}"|{{t|Flying}} | ||
| + | |} | ||
| + | |||
| + | ==Achievements== | ||
| + | *Get Silicon!: Smelt [[silicon ore]] to obtain [[silicon]]. | ||
| + | *Team Aqua Wannabe!: Craft an [[Aqua helmet]]. | ||
| + | *Team Aqua Grunt!: Craft a pair of [[Aqua boots]]. | ||
| + | *Team Aqua Executive!: Craft [[Aqua leggings]]. | ||
| + | *Team Aqua Leader!: Craft an [[Aqua chestplate]]. | ||
| + | *Team Galactic Wannabe!: Craft a [[Galactic swag]]. | ||
| + | *Team Galactic Grunt!: Craft a pair of [[Galactic boots]]. | ||
| + | *Team Galactic Executive!: Craft [[Galactic leggings]]. | ||
| + | *Team Galactic Leader!: Craft a [[Galactic chestplate]]. | ||
| + | *Team Magma Wannabe!: Craft a [[Magma helmet]]. | ||
| + | *Team Magma Grunt!: Craft a pair of [[Magma boots]]. | ||
| + | *Team Magma Executive!: Craft [[Magma leggings]]. | ||
| + | *Team Magma Leader!: Craft a [[Magma chestplate]]. | ||
| + | *Team Plasma Wannabe!: Craft a [[Plasma helmet]]. | ||
| + | *Team Plasma Grunt!: Craft a pair of [[Plasma boots]]. | ||
| + | *Team Plasma Executive!: Craft [[Plasma leggings]]. | ||
| + | *Team Plasma Leader!: Craft a [[Plasma chestplate]]. | ||
| + | *Team Rocket Wannabe!: Craft a [[Rocket helmet]]. | ||
| + | *Team Rocket Grunt!: Craft a pair of [[Rocket boots]]. | ||
| + | *Team Rocket Executive!: Craft [[Rocket leggings]]. | ||
| + | *Team Rocket Leader!: Craft a [[Rocket chestplate]]. | ||
| + | *Pokégift Get!: Receive a Pokémon from a [[Pokégift]] chest. | ||
| + | *Pokégift Give!: Place a Pokémon inside a Pokégift chest. | ||
| + | |||
| + | ==Commands== | ||
| + | {{CommandSyntax}} | ||
| + | */dropsadd <quantity>: This adds the item the player is holding to a list of possible drops for all Pokémon. The item will be dropped in quantities in a range from 1 to the specified quantity. | ||
| + | */grassadd <Pokémon> <biome>: The specified Pokémon will be added to the list of Pokémon that can be encountered via Pixelmon grass in the specified biome. | ||
| + | */puevent | ||
| + | **/puevent <x> <y> <z>: Sets the event Pokégift spawn location to the given coordinates. If a "y" follows the coordinate arguments, an event Pokégift will also spawn at the specified coordinates. | ||
| + | **/puevent y: Spawns an event Pokégift at the player's location. | ||
| + | **/puevent spawn: Spawns an event Pokégift at the currently set spawn location. | ||
| + | **/puevent <any>: Any other single argument besides "y" or "spawn" will cause the event Pokégift spawn location to be set to where the player is. | ||
| + | ===Permission nodes=== | ||
| + | */dropsadd: com.pixelutilities.commands.AddToDrops | ||
| + | */grassadd: com.pixelutilities.commands.AddToGrassCommand | ||
| + | */puevent: com.pixelutilities.commands.EventLocation | ||
| + | |||
| + | ==Config settings== | ||
| + | PixelUtilities uses two different config files. In single-player, the pixelutilities.cfg file can be configured at the main ''Minecraft'' menu by going to Mods→PixelUtilities→Config. | ||
| + | ===pixelutilities.cfg=== | ||
| + | *"Are Pokegifts re-usable?": This makes Pokégift chests permanent like [[PokéLoot]]'s {{tt|PL1D|Permanent, Limit 1 Drop}} option; otherwise they are {{tt|FCFS|First Come, First Served}}. | ||
| + | *"Battle Music?": This causes a specified music clip to be played while players are in battle. | ||
| + | *"BattleMusic URL": This is a URL to the YouTube video where the battle music will derive from. By default, the music is a remix of the wild Pokémon battle theme from the Generation 1 ''Pokémon'' games. | ||
| + | *"Custom Event Time": The numeric day and month to have an event Pokégift spawn separated by a /. | ||
| + | *"Event Co-ords": Allows specification of the location of spawned event Pokégifts. | ||
| + | *"Event has Legendaries": Allows event Pokégifts to randomly have [[Legendary Pokémon]]. | ||
| + | *"Event has Shinies": Allows event Pokégift Pokémon to have a chance of being [[Shiny]] (See event shiny rate below). | ||
| + | *"Event load": This causes an event Pokégift to spawn near the world spawn when the server starts or the world loads. | ||
| + | *"Event shiny rate": The chance an event Pokégift Pokémon will be Shiny ({{frac|''x''}}). | ||
| + | *"Have events": This allows event Pokégifts to be used; without it, interacting with them does nothing. | ||
| + | *"Make Pixelmon drop PokéCoins": Whether or not Pokémon may occasionally drop a random amount of PokéCoins. | ||
| + | *"Max Event Pixelmon": The maximum amount of Pokémon that can be in an event Pokégift (up to 6). | ||
| + | *"Only spawn Pixelmon in grass": This setting causes Pokémon to only spawn from random encounters in Pixelmon grass; Pokémon will not spawn randomly in the world. | ||
| + | *"Ore Generation": This allows PixelUtilities ores to spawn. | ||
| + | *"Pixelmon coin drop rate": The chance of Pokémon dropping PokéCoins ({{frac|''x''}}). This value can be between 4 and 100. | ||
| + | *"Pixelmon in grass spawn rate": The chance of Pokémon encounters in Pixelmon grass. A higher value makes the encounter rate lower. | ||
| + | *"Pixelmon grass worldgen": Allows Pixelmon Grass to randomly generate in new chunks | ||
| + | *"Pixelmon spawn in grass": This causes players that walk through Pixelmon grass to randomly be engaged in wild Pokémon battles. | ||
| + | *"Scale encounters to team": Pokémon found in Pixelmon grass will have a level between the lowest and highest level of the Pokémon in the player's party. | ||
| + | *"Specify event spawns": This is required to use the /puevent command | ||
| + | *"VLC missing message": Enables or disables a message stating that [https://www.videolan.org/index.html VLC] is required for certain parts of PixelUtilities if it is not installed. | ||
| + | |||
| + | ===pixelutilities-spawner.cfg=== | ||
| + | *"encounter lists": For each [[biome]], a list of Pokémon that will spawn in that biome from Pixelmon grass encounters can be configured. | ||
| + | *"special spawn rates": The rarity of Pixelmon grass encounters for each biome. | ||
| + | |||
| + | ==Item IDs== | ||
| + | [[PixelUtilities/Item IDs]] | ||
| + | [[Category:Sidemods]] | ||
Latest revision as of 00:58, 25 September 2023
PixelUtilities is a Pixelmon sidemod that adds various new blocks and items.
Starting in Minecraft 1.8, most features in PixelUtilities were added directly into Pixelmon.
Contents
Installation
| Minecraft version | Pixelmon version | PixelUtilities version |
|---|---|---|
| 1.7.10 | 3.5 | 3.3.7 |
As PixelUtilities adds new blocks and items, it must be installed in both participating clients and the server to be used on servers.
Minecraft launcher
- Download PixelUtilities here.
- Place the downloaded file in the mods folder.
Pixelmon launcher
- Download PixelUtilities here.
- Edit your profile and choose the "Browse for Mods" option.
- Find the downloaded PixelUtilities file and select it.
Overview
PixelUtilities contains several features, including:
- Tall grass based on the Pokémon games
- PokéLoot chests that contain Pokémon instead of items
- Pokémon currency
- Pokémon-themed ornamental blocks
- Colored lamps
- Additional materials
- Tools and armor using these materials
- Evolution stone tools and armor
- More badges
Items
Pixelmon Grass
![]() Pixelmon grass is ornamental grass that resembles the tall grass from the Generation 3 Pokémon games. By default, Pixelmon grass is purely cosmetic, but a config option will cause the grass to mimic wild Pokémon encounters in the Pokémon games; if players walk through the grass, wild Pokémon battles may randomly occur. The Pokémon that can appear in this manner, their rarities, and which biomes they appear in can be customized in the config files or with the /grassadd command. Pokémon levels will be their default level range found in the wild, but it is possible to instead scale their levels to be between the lowest and highest leveled Pokémon in a player's party through a change of a config setting.
Pixelmon grass is ornamental grass that resembles the tall grass from the Generation 3 Pokémon games. By default, Pixelmon grass is purely cosmetic, but a config option will cause the grass to mimic wild Pokémon encounters in the Pokémon games; if players walk through the grass, wild Pokémon battles may randomly occur. The Pokémon that can appear in this manner, their rarities, and which biomes they appear in can be customized in the config files or with the /grassadd command. Pokémon levels will be their default level range found in the wild, but it is possible to instead scale their levels to be between the lowest and highest leveled Pokémon in a player's party through a change of a config setting.
Pokégifts
![]() Pokégifts resemble Cherish Balls and act like PokéLoot chests except that they hold Pokémon instead of items. After placing a Pokégift, right-clicking it will place the first Pokémon that is outside of its Poké Ball from the player's party into the Pokégift and remove that Pokémon from the party. Further right-clicks will allow the player to change the Pokémon inside the Pokégift. Holding shift and right-clicking will prevent the Pokémon inside from being changed and allow the Pokégift to be able to be picked up by other players. Pokégifts preserve all aspects of Pokémon placed inside, including level, Nature, EVs, IVs, Abilities, caught Poké Balls, and movesets.
Pokégifts resemble Cherish Balls and act like PokéLoot chests except that they hold Pokémon instead of items. After placing a Pokégift, right-clicking it will place the first Pokémon that is outside of its Poké Ball from the player's party into the Pokégift and remove that Pokémon from the party. Further right-clicks will allow the player to change the Pokémon inside the Pokégift. Holding shift and right-clicking will prevent the Pokémon inside from being changed and allow the Pokégift to be able to be picked up by other players. Pokégifts preserve all aspects of Pokémon placed inside, including level, Nature, EVs, IVs, Abilities, caught Poké Balls, and movesets.
By default, Pokégifts work on a first come, first served basis and disappear upon being collected. By editing the config file, it is possible to make them usable by each player a single time.
![]()
![]()
![]()
![]()
![]()
Event Pokégifts
![]() Event Pokégifts are special types of Pokégifts that can be accessed by enabling them in the pixelutilities.cfg file. They each contain 1-6 random Pokémon inside of them. Additional config options can be set to allow Legendary Pokémon to spawn inside them or increase the rate of Shiny Pokémon found inside of them to 110. All Pokémon found inside event Pokégifts are level 5 and caught in Cherish Balls.
Event Pokégifts are special types of Pokégifts that can be accessed by enabling them in the pixelutilities.cfg file. They each contain 1-6 random Pokémon inside of them. Additional config options can be set to allow Legendary Pokémon to spawn inside them or increase the rate of Shiny Pokémon found inside of them to 110. All Pokémon found inside event Pokégifts are level 5 and caught in Cherish Balls.
By default, event Pokégifts spawn upon the creation of a new world or turning on a server around Halloween (October 31), Christmas (December 25) and potentially a custom day, customizable in the PixelUtilities config. They can also be made to spawn manually via the invocation of the command, /puevent, details of which can be found here.
PokéCoins
PokéCoins are items that are intended to be used as currency. By default, PokéCoins can only be obtained by spawning them in, but a config option can allow Pokémon to drop random amounts of $1 and $10 PokéCoins. Another config option can customize the chance of Pokémon dropping PokéCoins.
 $1 PokéCoin
 $5 PokéCoin
 $10 PokéCoin
 $50 PokéCoin
 $100 PokéCoin
Radio
A radio allows players to choose a YouTube video (via URL) and have its audio play in the game. It also allows players to choose whether or not to loop the audio clip.
![]()
![]()
![]()
![]()
![]()
![]()
![]()
![]()
Lamps
Lamps emit colored light that corresponds to their color. There are seven different kinds of lamps, all crafted with redstone torches and matching colors of stained glass panes. When Pixelmon updates to Minecraft 1.8, lamps will be removed from PixelUtilities due to the API being used not having a 1.8 version.
![]()
![]()
![]()
![]()
![]()
![]()
![]()
![]()
![]()
![]()
![]()
![]()
![]()
![]()
![]()
![]()
![]()
![]()
![]()
![]()
![]()
![]()
![]()
![]()
![]()
![]()
![]()
![]()
![]()
![]()
![]()
![]()
![]()
![]()
![]()
![]()
![]()
![]()
![]()
![]()
![]()
![]()
![]()
![]()
![]()
![]()
![]()
![]()
![]()
![]()
![]()
![]()
![]()
![]()
![]()
![]()
![]()
![]()
![]()
![]()
![]()
![]()
![]()
![]()
![]()
![]()
![]()
![]()
![]()
![]()
Conveyor
A ![]() conveyor causes any entity (including players, Pokémon, and items) that passes over it to be quickly propelled in the direction that the conveyor is facing.
conveyor causes any entity (including players, Pokémon, and items) that passes over it to be quickly propelled in the direction that the conveyor is facing.
Sewage
![]() Sewage acts like water, following the same fluid dynamics. However, it is a thick brown color, mostly obscuring what it covers (although such objects are still barely visible). While a player is submerged in sewage, vision is similar to being underwater, with the fluid's color and visibility matching water's. Like water, players and Pokémon can drown inside of sewage, although the speed at which damage is taken is no different than normal water despite the implications of uncleanliness.
Sewage acts like water, following the same fluid dynamics. However, it is a thick brown color, mostly obscuring what it covers (although such objects are still barely visible). While a player is submerged in sewage, vision is similar to being underwater, with the fluid's color and visibility matching water's. Like water, players and Pokémon can drown inside of sewage, although the speed at which damage is taken is no different than normal water despite the implications of uncleanliness.
PixelBoy
A PixelBoy is a Game Boy Color emulator. To use it, the player's system must contain compatible ROMs. It also doubles as a notepad ("Notepad--"), but the contents of the notepad will disappear if the player exits the notepad screen.
![]()
![]()
![]()
![]()
![]()
![]()
![]()
![]()
![]()
![]()
CD
A ![]() CD is an item that does nothing.
CD is an item that does nothing.
Decorative
Objects
- Aron Poké Doll
 Blue Rug
 Boulder
 Box
Box Clothed Table
 Green Rug
 Gym Sign
 Poké Ball
 Poké Ball Statue
 PokéCenter Sign
 Red Cushion Chair
 Red Rug
- Totodile Poké Doll
 Trash Can
 Tree
Tree TV
TV Yellow Cushion Chair
Blocks
 Bridge Block
 Cave Rock
 Inside Wall Molding
 Poké Mart Sign
 PokéDirt
 PokéGrass
 PokéSand
 PokéSand Corner 1
 PokéSand Corner 2
 PokéSand Corner 3
 PokéSand Corner 4
 PokéSand Side 1
 PokéSand Side 2
 PokéSand Side 3
 PokéSand Side 4
 Rock
Rock Sandy Grass
 Shingles
 Shingles Corner 1
 Shingles Corner 2
 Tree Bottom
 Tree Top
 Window 1
 Window 2
 Wooden Flooring
Minerals
PixelUtilities introduces five types of minerals: rubies, sapphires, amethysts, crystals, and silicon.
Ores
All five types of ore introduced with PixelUtilities spawn within stone from height levels 1 to 64. Each ore's maximum vein size is different:
| Ore | Vein size |
|---|---|
| 7 | |
| 5 | |
| 6 | |
| 6 | |
| 4 |
All five ores require an iron pickaxe or better to mine. They drop in block form and need to be smelted in order to be used.
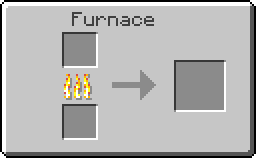
![]()
![]()
![]()
![]()
![]()
![]()
![]()
![]()
![]()
![]()
![]()
![]()
![]()
![]()
![]()
Mineral blocks
All minerals besides silicon can be made into decorative blocks.
![]()
![]()
![]()
![]()
![]()
![]()
![]()
![]()
![]()
![]()
![]()
![]()
![]()
![]()
![]()
![]()
![]()
![]()
![]()
![]()
![]()
![]()
![]()
![]()
![]()
![]()
![]()
![]()
![]()
![]()
![]()
![]()
![]()
![]()
![]()
![]()
![]()
![]()
![]()
![]()
Tools
Rubies, sapphires, amethysts, and crystal can all be crafted into tools. PixelUtilities also introduces tools made out of evolution stones, which each have special effects when right-clicked (except for hoes and swords). These special effects use up 1 durability each time they are used. All tools introduced by PixelUtilities can be enchanted.
| Tool type | Durability | Efficiency comparison | Sword damage | Enchantability | Effect |
|---|---|---|---|---|---|
| 300 | Between iron and diamond | 3 | 14 | None | |
| 300 | Between iron and diamond | 3 | 14 | None | |
| 300 | Between iron and diamond | 3 | 14 | None | |
| 300 | Between iron and diamond | 3 | 14 | None | |
| 1561 | Speed equal to gold/mines equivalent items to diamond | 2 | 22 | Turns source water into obsidian | |
| 1561 | Speed equal to gold/mines equivalent items to diamond | 2 | 22 | Turns source lava into obsidian | |
| 1561 | Speed equal to gold/mines equivalent items to diamond | 2 | 22 | Acts like bone meal | |
| 1561 | Speed equal to gold/mines equivalent items to diamond | 2 | 22 | Enchants the tool with Efficiency VIII | |
| 1561 | Speed equal to gold/mines equivalent items to diamond | 2 | 22 | Places a torch | |
| 1561 | Speed equal to gold/mines equivalent items to diamond | 2 | 22 | Gives Night Vision for five minutes | |
| 1561 | Speed equal to gold/mines equivalent items to diamond | 2 | 22 | None |
Ruby tools
![]()
![]()
![]()
![]()
![]()
![]()
![]()
![]()
![]()
![]()
![]()
![]()
![]()
![]()
![]()
![]()
![]()
![]()
![]()
![]()
![]()
![]()
![]()
![]()
![]()
![]()
![]()
![]()
![]()
![]()
![]()
![]()
![]()
Sapphire tools
![]()
![]()
![]()
![]()
![]()
![]()
![]()
![]()
![]()
![]()
![]()
![]()
![]()
![]()
![]()
![]()
![]()
![]()
![]()
![]()
![]()
![]()
![]()
![]()
![]()
![]()
![]()
![]()
![]()
![]()
![]()
![]()
![]()
Amethyst tools
![]()
![]()
![]()
![]()
![]()
![]()
![]()
![]()
![]()
![]()
![]()
![]()
![]()
![]()
![]()
![]()
![]()
![]()
![]()
![]()
![]()
![]()
![]()
![]()
![]()
![]()
![]()
![]()
![]()
![]()
![]()
![]()
![]()
Crystal tools
![]()
![]()
![]()
![]()
![]()
![]()
![]()
![]()
![]()
![]()
![]()
![]()
![]()
![]()
![]()
![]()
![]()
![]()
![]()
![]()
![]()
![]()
![]()
![]()
![]()
![]()
![]()
![]()
![]()
![]()
![]()
![]()
![]()
Fire Stone tools
![]()
![]()
![]()
![]()
![]()
![]()
![]()
![]()
![]()
![]()
![]()
![]()
![]()
![]()
![]()
![]()
![]()
![]()
![]()
![]()
![]()
![]()
![]()
![]()
![]()
![]()
![]()
![]()
![]()
![]()
![]()
![]()
![]()
Water Stone tools
![]()
![]()
![]()
![]()
![]()
![]()
![]()
![]()
![]()
![]()
![]()
![]()
![]()
![]()
![]()
![]()
![]()
![]()
![]()
![]()
![]()
![]()
![]()
![]()
![]()
![]()
![]()
![]()
![]()
![]()
![]()
![]()
![]()
Leaf Stone tools
![]()
![]()
![]()
![]()
![]()
![]()
![]()
![]()
![]()
![]()
![]()
![]()
![]()
![]()
![]()
![]()
![]()
![]()
![]()
![]()
![]()
![]()
![]()
![]()
![]()
![]()
![]()
![]()
![]()
![]()
![]()
![]()
![]()
Thunder Stone tools
![]()
![]()
![]()
![]()
![]()
![]()
![]()
![]()
![]()
![]()
![]()
![]()
![]()
![]()
![]()
![]()
![]()
![]()
![]()
![]()
![]()
![]()
![]()
![]()
![]()
![]()
![]()
![]()
![]()
![]()
![]()
![]()
![]()
Sun Stone tools
![]()
![]()
![]()
![]()
![]()
![]()
![]()
![]()
![]()
![]()
![]()
![]()
![]()
![]()
![]()
![]()
![]()
![]()
![]()
![]()
![]()
![]()
![]()
![]()
![]()
![]()
![]()
![]()
![]()
![]()
![]()
![]()
![]()
Moon Stone tools
![]()
![]()
![]()
![]()
![]()
![]()
![]()
![]()
![]()
![]()
![]()
![]()
![]()
![]()
![]()
![]()
![]()
![]()
![]()
![]()
![]()
![]()
![]()
![]()
![]()
![]()
![]()
![]()
![]()
![]()
![]()
![]()
![]()
Dawn Stone tools
PixelUtilities contains Dawn Stone tools, although they cannot be crafted from Dawn Stones. These tools cannot be obtained without spawning them in.
 Dawn Stone Axe
 Dawn Stone Hammer
 Dawn Stone Hoe
 Dawn Stone Pickaxe
 Dawn Stone Shovel
 Dawn Stone Sword
Armor
Gems can be made into armor themed after various evil teams from the Pokémon games. PixelUtilities also introduces armor made out of evolution stones, which each give an appropriately themed special effect if the respective full set of armor is worn. Evil team armor pieces can be enchanted like their vanilla Minecraft counterparts, but evolution stone armor cannot be manually enchanted, instead gaining a set enchantment if the player wears the full armor set. These enchantments persist even if pieces of armor are later taken off or broken.
| Armor type | Helmet protection | Chestplate protection | Leggings protection | Boots protection | Helmet durability | Chestplate durability | Leggings durability | Boots durability | Enchantability | Special effect |
|---|---|---|---|---|---|---|---|---|---|---|
| 1.5 | 3.5 | 3 | 1.5 | 2200 | 3200 | 3000 | 2600 | 10 | None | |
| 1.5 | 3.5 | 3 | 1.5 | 2200 | 3200 | 3000 | 2600 | 10 | None | |
| 1.5 | 3.5 | 3 | 1.5 | 2200 | 3200 | 3000 | 2600 | 10 | None | |
| 1.5 | 3.5 | 3 | 1.5 | 2200 | 3200 | 3000 | 2600 | 10 | None | |
| 1.5 | 3.5 | 3 | 1.5 | 2200 | 3200 | 3000 | 2600 | 10 | None | |
| 1.5 | 3.5 | 3 | 1.5 | 2200 | 3200 | 3000 | 2600 | 10 | None | |
| 2 | 4 | 3 | 2 | 440 | 640 | 600 | 520 | 0 | Fire Resistance/Fire Protection II/+50% walking speed | |
| 2 | 4 | 3 | 2 | 440 | 640 | 600 | 520 | 0 | Water Breathing/Aqua Affinity II/+50% walking speed | |
| 1.5 | 3.5 | 3 | 1.5 | 165 | 240 | 225 | 195 | 0 | Feather Falling III/Thorns III/+50% walking speed | |
| 1.5 | 3.5 | 3 | 1.5 | 165 | 240 | 225 | 195 | 0 | Haste/+100% walking speed | |
| 1.5 | 3.5 | 3 | 1.5 | 165 | 240 | 225 | 195 | 0 | Protection IV/Projectile Protection IV/+50% walking speed | |
| 1.5 | 3.5 | 3 | 1.5 | 165 | 240 | 225 | 195 | 0 | Protection IV/Blast Protection IV/+50% walking speed | |
| 2 | 4 | 3 | 2 | 440 | 640 | 600 | 520 | 0 | Jump Boost/+50% walking speed |
Magma armor
Magma armor is designed after the outfits of Team Magma from the Generation 3 Pokémon games.
![]()
![]()
![]()
![]()
![]()
![]()
![]()
![]()
![]()
![]()
![]()
![]()
![]()
![]()
![]()
![]()
![]()
![]()
![]()
![]()
![]()
![]()
![]()
![]()
![]()
![]()
![]()
![]()
Aqua armor
Aqua armor is based on the outfits of Team Aqua from the Generation 3 Pokémon games.
![]()
![]()
![]()
![]()
![]()
![]()
![]()
![]()
![]()
![]()
![]()
![]()
![]()
![]()
![]()
![]()
![]()
![]()
![]()
![]()
![]()
![]()
![]()
![]()
![]()
![]()
![]()
![]()
Galactic armor
Galactic armor is designed after the outfits of Team Galactic from the Generation 4 Pokémon games.
![]()
![]()
![]()
![]()
![]()
![]()
![]()
![]()
![]()
![]()
![]()
![]()
![]()
![]()
![]()
![]()
![]()
![]()
![]()
![]()
![]()
![]()
![]()
![]()
![]()
![]()
![]()
![]()
Rocket armor
Rocket armor is based on Team Rocket's outfits from the Generation 1 and 2 Pokémon games.
![]()
![]()
![]()
![]()
![]()
![]()
![]()
![]()
![]()
![]()
![]()
![]()
![]()
![]()
![]()
![]()
![]()
![]()
![]()
![]()
![]()
![]()
![]()
![]()
![]()
![]()
![]()
![]()
Plasma armor
Plasma armor is based on Pokémon Black and White's Team Plasma uniforms.
![]()
![]()
![]()
![]()
![]()
![]()
![]()
![]()
![]()
![]()
![]()
![]()
![]()
![]()
![]()
![]()
![]()
![]()
![]()
![]()
![]()
![]()
![]()
![]()
![]()
![]()
![]()
![]()
Neo Plasma armor
Neo Plasma armor is based on Pokémon Black 2 and White 2's Team Plasma uniforms.
![]()
![]()
![]()
![]()
![]()
![]()
![]()
![]()
![]()
![]()
![]()
![]()
![]()
![]()
![]()
![]()
![]()
![]()
![]()
![]()
![]()
![]()
![]()
![]()
![]()
![]()
![]()
![]()
Fire Stone armor
![]()
![]()
![]()
![]()
![]()
![]()
![]()
![]()
![]()
![]()
![]()
![]()
![]()
![]()
![]()
![]()
![]()
![]()
![]()
![]()
![]()
![]()
![]()
![]()
![]()
![]()
![]()
![]()
Water Stone armor
![]()
![]()
![]()
![]()
![]()
![]()
![]()
![]()
![]()
![]()
![]()
![]()
![]()
![]()
![]()
![]()
![]()
![]()
![]()
![]()
![]()
![]()
![]()
![]()
![]()
![]()
![]()
![]()
Leaf Stone armor
![]()
![]()
![]()
![]()
![]()
![]()
![]()
![]()
![]()
![]()
![]()
![]()
![]()
![]()
![]()
![]()
![]()
![]()
![]()
![]()
![]()
![]()
![]()
![]()
![]()
![]()
![]()
![]()
Thunder Stone armor
![]()
![]()
![]()
![]()
![]()
![]()
![]()
![]()
![]()
![]()
![]()
![]()
![]()
![]()
![]()
![]()
![]()
![]()
![]()
![]()
![]()
![]()
![]()
![]()
![]()
![]()
![]()
![]()
Sun Stone armor
![]()
![]()
![]()
![]()
![]()
![]()
![]()
![]()
![]()
![]()
![]()
![]()
![]()
![]()
![]()
![]()
![]()
![]()
![]()
![]()
![]()
![]()
![]()
![]()
![]()
![]()
![]()
![]()
Moon Stone armor
![]()
![]()
![]()
![]()
![]()
![]()
![]()
![]()
![]()
![]()
![]()
![]()
![]()
![]()
![]()
![]()
![]()
![]()
![]()
![]()
![]()
![]()
![]()
![]()
![]()
![]()
![]()
![]()
Dawn Stone armor
Dawn Stone armor exists in PixelUtilities, although it cannot be crafted from Dawn Stones. This armor can only be obtained by spawning it in.
Badges
PixelUtilities adds seventeen badges, one badge based on each Pokémon type. All seventeen badges are original and do not come from any Pokémon game. Each badge is named after the Japanese word for its corresponding type.
| Badge | Type |
|---|---|
Achievements
- Get Silicon!: Smelt silicon ore to obtain silicon.
- Team Aqua Wannabe!: Craft an Aqua helmet.
- Team Aqua Grunt!: Craft a pair of Aqua boots.
- Team Aqua Executive!: Craft Aqua leggings.
- Team Aqua Leader!: Craft an Aqua chestplate.
- Team Galactic Wannabe!: Craft a Galactic swag.
- Team Galactic Grunt!: Craft a pair of Galactic boots.
- Team Galactic Executive!: Craft Galactic leggings.
- Team Galactic Leader!: Craft a Galactic chestplate.
- Team Magma Wannabe!: Craft a Magma helmet.
- Team Magma Grunt!: Craft a pair of Magma boots.
- Team Magma Executive!: Craft Magma leggings.
- Team Magma Leader!: Craft a Magma chestplate.
- Team Plasma Wannabe!: Craft a Plasma helmet.
- Team Plasma Grunt!: Craft a pair of Plasma boots.
- Team Plasma Executive!: Craft Plasma leggings.
- Team Plasma Leader!: Craft a Plasma chestplate.
- Team Rocket Wannabe!: Craft a Rocket helmet.
- Team Rocket Grunt!: Craft a pair of Rocket boots.
- Team Rocket Executive!: Craft Rocket leggings.
- Team Rocket Leader!: Craft a Rocket chestplate.
- Pokégift Get!: Receive a Pokémon from a Pokégift chest.
- Pokégift Give!: Place a Pokémon inside a Pokégift chest.
Commands
Note: Command syntax is displayed in the standard Minecraft command format. An explanation of this format can be found here.
- /dropsadd <quantity>: This adds the item the player is holding to a list of possible drops for all Pokémon. The item will be dropped in quantities in a range from 1 to the specified quantity.
- /grassadd <Pokémon> <biome>: The specified Pokémon will be added to the list of Pokémon that can be encountered via Pixelmon grass in the specified biome.
- /puevent
- /puevent <x> <y> <z>: Sets the event Pokégift spawn location to the given coordinates. If a "y" follows the coordinate arguments, an event Pokégift will also spawn at the specified coordinates.
- /puevent y: Spawns an event Pokégift at the player's location.
- /puevent spawn: Spawns an event Pokégift at the currently set spawn location.
- /puevent <any>: Any other single argument besides "y" or "spawn" will cause the event Pokégift spawn location to be set to where the player is.
Permission nodes
- /dropsadd: com.pixelutilities.commands.AddToDrops
- /grassadd: com.pixelutilities.commands.AddToGrassCommand
- /puevent: com.pixelutilities.commands.EventLocation
Config settings
PixelUtilities uses two different config files. In single-player, the pixelutilities.cfg file can be configured at the main Minecraft menu by going to Mods→PixelUtilities→Config.
pixelutilities.cfg
- "Are Pokegifts re-usable?": This makes Pokégift chests permanent like PokéLoot's PL1D option; otherwise they are FCFS.
- "Battle Music?": This causes a specified music clip to be played while players are in battle.
- "BattleMusic URL": This is a URL to the YouTube video where the battle music will derive from. By default, the music is a remix of the wild Pokémon battle theme from the Generation 1 Pokémon games.
- "Custom Event Time": The numeric day and month to have an event Pokégift spawn separated by a /.
- "Event Co-ords": Allows specification of the location of spawned event Pokégifts.
- "Event has Legendaries": Allows event Pokégifts to randomly have Legendary Pokémon.
- "Event has Shinies": Allows event Pokégift Pokémon to have a chance of being Shiny (See event shiny rate below).
- "Event load": This causes an event Pokégift to spawn near the world spawn when the server starts or the world loads.
- "Event shiny rate": The chance an event Pokégift Pokémon will be Shiny (1x).
- "Have events": This allows event Pokégifts to be used; without it, interacting with them does nothing.
- "Make Pixelmon drop PokéCoins": Whether or not Pokémon may occasionally drop a random amount of PokéCoins.
- "Max Event Pixelmon": The maximum amount of Pokémon that can be in an event Pokégift (up to 6).
- "Only spawn Pixelmon in grass": This setting causes Pokémon to only spawn from random encounters in Pixelmon grass; Pokémon will not spawn randomly in the world.
- "Ore Generation": This allows PixelUtilities ores to spawn.
- "Pixelmon coin drop rate": The chance of Pokémon dropping PokéCoins (1x). This value can be between 4 and 100.
- "Pixelmon in grass spawn rate": The chance of Pokémon encounters in Pixelmon grass. A higher value makes the encounter rate lower.
- "Pixelmon grass worldgen": Allows Pixelmon Grass to randomly generate in new chunks
- "Pixelmon spawn in grass": This causes players that walk through Pixelmon grass to randomly be engaged in wild Pokémon battles.
- "Scale encounters to team": Pokémon found in Pixelmon grass will have a level between the lowest and highest level of the Pokémon in the player's party.
- "Specify event spawns": This is required to use the /puevent command
- "VLC missing message": Enables or disables a message stating that VLC is required for certain parts of PixelUtilities if it is not installed.
pixelutilities-spawner.cfg
- "encounter lists": For each biome, a list of Pokémon that will spawn in that biome from Pixelmon grass encounters can be configured.
- "special spawn rates": The rarity of Pixelmon grass encounters for each biome.