
 NodeCraft
Difference between revisions of "Hammers"
(Add info on hammer's mining extra blocks) |
|||
| (14 intermediate revisions by 5 users not shown) | |||
| Line 1: | Line 1: | ||
| − | Hammers are | + | Hammers are a type of tool which can be used on any of the three types of Tumblestone Crystals (Red, Black and Sky) to gather [[Tumblestone|Raw Tumblestones]]. Hammers can be obtained via crafting, or as loot from a village toolsmith chest. When a crystal is fully destroyed, 1-3 [[Tumblestone|Raw Tumblestones]] are dropped, and the crystal will begin to regrow. |
| − | = | + | |
| + | |||
| + | Additionally, hammers destroy a 3x3 area when they are used to mine. To balance this increased mining capability, hammers are typically 4x slower than a pickaxe of the same material and take additional durability damage according to the Hammer Durability Loss Multiplier. The Hammer Durability Loss Multiplier is by default set to 3, and can be changed in the config.yml file. The extra durability damage is calculated as follows: | ||
| + | |||
| + | <small>Extra Damage = (Additional Blocks Broken Besides Targeted Block * The Hammer Durability Loss Multiplier) - Additional Blocks Broken Besides Targeted Block</small> | ||
| + | |||
| + | |||
| + | |||
| + | If you only mine one block with a hammer, it will still only take 1 damage to its durability. | ||
| + | |||
| + | <small>Extra Damage = (0 * 3) - 0 = 0</small> | ||
| + | |||
| + | <small>Total Damage = 1 Mined Blocks + 0 Extra Damage = 1</small> | ||
| + | |||
| + | If you mine a maximum of 9 blocks with a hammer, it will take a total of 25 damage to its durability. | ||
| + | |||
| + | <small>Extra Damage = (8 * 3) - 8 = 16</small> | ||
| + | |||
| + | <small>Total Damage = 9 Mined Blocks + 16 Extra Damage = 25</small> | ||
| + | |||
| + | |||
| + | ==Obtaining== | ||
| + | ===Chest Loot=== | ||
| + | 2 hammers will always be found in village toolsmith chests. Possible materials are Aluminum, Iron, Amethyst, Crystal, Sapphire, Ruby, Silver, Gold, Diamond and Platinum. | ||
| + | |||
| + | ===Crafting=== | ||
| + | {|class="mw-collapsible mw-uncollapsed wikitable sortable" | ||
| + | |- | ||
| + | ! Item | ||
| + | ! Ingredients | ||
| + | ! class="unsortable" | Crafting recipe | ||
| + | ! Item | ||
| + | ! Ingredients | ||
| + | ! class="unsortable" | Crafting recipe | ||
| + | |- | ||
| + | |style="text-align:center"|[[Wood Hammer (item)|Wood Hammer]] | ||
| + | |[[Wood Planks]] +<br>{{mc|Stick}} | ||
| + | |{{Grid/Crafting Table | ||
| + | |A1=Oak Wood Planks |B1=Oak Wood Planks |C1=Oak Wood Planks | ||
| + | |A2=Oak Wood Planks |B2=Stick |C2=Oak Wood Planks | ||
| + | |B3=Stick | ||
| + | |Output=Wood Hammer | ||
| + | |Output-link=Wood Hammer (item) | ||
| + | |nobreak=y | ||
| + | |B2-link={{mclink|Stick}}|B3-link={{mclink|Stick}} | ||
| + | }} | ||
| + | |style="text-align:center"|[[Stone Hammer]] | ||
| + | |[[Cobblestone]] +<br>{{mc|Stick}} | ||
| + | |{{Grid/Crafting Table | ||
| + | |A1=Cobblestone |B1=Cobblestone |C1=Cobblestone | ||
| + | |A2=Cobblestone |B2=Stick |C2=Cobblestone | ||
| + | |B3=Stick | ||
| + | |Output=Stone Hammer | ||
| + | |nobreak=y | ||
| + | |B2-link={{mclink|Stick}}|B3-link={{mclink|Stick}} | ||
| + | }} | ||
| + | |- | ||
| + | |style="text-align:center"|[[Aluminum Hammer]] | ||
| + | |[[Aluminum Ingot]] +<br>{{mc|Stick}} | ||
| + | |{{Grid/Crafting Table | ||
| + | |A1=Aluminum Ingot |B1=Aluminum Ingot |C1=Aluminum Ingot | ||
| + | |A2=Aluminum Ingot |B2=Stick |C2=Aluminum Ingot | ||
| + | |B3=Stick | ||
| + | |Output=Aluminum Hammer | ||
| + | |nobreak=y | ||
| + | |B2-link={{mclink|Stick}}|B3-link={{mclink|Stick}} | ||
| + | }} | ||
| + | |style="text-align:center"|[[Iron Hammer]] | ||
| + | |[[Iron Ingot]] +<br>{{mc|Stick}} | ||
| + | |{{Grid/Crafting Table | ||
| + | |A1=Iron Ingot |B1=Iron Ingot |C1=Iron Ingot | ||
| + | |A2=Iron Ingot |B2=Stick |C2=Iron Ingot | ||
| + | |B3=Stick | ||
| + | |Output=Iron Hammer | ||
| + | |nobreak=y | ||
| + | |B2-link={{mclink|Stick}}|B3-link={{mclink|Stick}} | ||
| + | }} | ||
| + | |- | ||
| + | |style="text-align:center"|[[Gold Hammer]] | ||
| + | |[[Gold Ingot]] +<br>{{mc|Stick}} | ||
| + | |{{Grid/Crafting Table | ||
| + | |A1=Gold Ingot |B1=Gold Ingot |C1=Gold Ingot | ||
| + | |A2=Gold Ingot |B2=Stick |C2=Gold Ingot | ||
| + | |B3=Stick | ||
| + | |Output=Gold Hammer | ||
| + | |nobreak=y | ||
| + | |B2-link={{mclink|Stick}}|B3-link={{mclink|Stick}} | ||
| + | }} | ||
| + | |style="text-align:center"|[[Diamond Hammer]] | ||
| + | |[[Diamond]] +<br>{{mc|Stick}} | ||
| + | |{{Grid/Crafting Table | ||
| + | |A1=Diamond |B1=Diamond |C1=Diamond | ||
| + | |A2=Diamond |B2=Stick |C2=Diamond | ||
| + | |B3=Stick | ||
| + | |Output=Diamond Hammer | ||
| + | |nobreak=y | ||
| + | |B2-link={{mclink|Stick}}|B3-link={{mclink|Stick}} | ||
| + | }} | ||
| + | |- | ||
| + | |style="text-align:center"|[[Ruby Hammer]] | ||
| + | |[[Ruby]] +<br>{{mc|Stick}} | ||
| + | |{{Grid/Crafting Table | ||
| + | |A1=Ruby|B1=Ruby|C1=Ruby | ||
| + | |A2=Ruby|B2=Stick|C2=Ruby | ||
| + | |B3=Stick | ||
| + | |Output=Ruby Hammer | ||
| + | |nobreak=y | ||
| + | |B2-link={{mclink|Stick}}|B3-link={{mclink|Stick}} | ||
| + | }} | ||
| + | |style="text-align:center"|[[Sapphire Hammer]] | ||
| + | |[[Sapphire]] +<br>{{mc|Stick}} | ||
| + | |{{Grid/Crafting Table | ||
| + | |A1=Sapphire|B1=Sapphire|C1=Sapphire | ||
| + | |A2=Sapphire|B2=Stick|C2=Sapphire | ||
| + | |B3=Stick | ||
| + | |Output=Sapphire Hammer | ||
| + | |nobreak=y | ||
| + | |B2-link={{mclink|Stick}}|B3-link={{mclink|Stick}} | ||
| + | }} | ||
| + | |- | ||
| + | |style="text-align:center"|[[Amethyst Hammer]] | ||
| + | |[[Amethyst]] +<br>{{mc|Stick}} | ||
| + | |{{Grid/Crafting Table | ||
| + | |A1=Amethyst|B1=Amethyst|C1=Amethyst | ||
| + | |A2=Amethyst|B2=Stick|C2=Amethyst | ||
| + | |B3=Stick | ||
| + | |Output=Amethyst Hammer | ||
| + | |nobreak=y | ||
| + | |B2-link={{mclink|Stick}}|B3-link={{mclink|Stick}} | ||
| + | }} | ||
| + | |style="text-align:center"|[[Crystal Hammer]] | ||
| + | |[[Crystal]] +<br>{{mc|Stick}} | ||
| + | |{{Grid/Crafting Table | ||
| + | |A1=Crystal|B1=Crystal|C1=Crystal | ||
| + | |A2=Crystal|B2=Stick|C2=Crystal | ||
| + | |B3=Stick | ||
| + | |Output=Crystal Hammer | ||
| + | |nobreak=y | ||
| + | |B2-link={{mclink|Stick}}|B3-link={{mclink|Stick}} | ||
| + | }} | ||
| + | |- | ||
| + | |style="text-align:center"|[[Fire Stone Hammer]] | ||
| + | |[[Fire Stone]] +<br>{{mc|Stick}} | ||
| + | |{{Grid/Crafting Table | ||
| + | |A1=Fire Stone|B1=Fire Stone|C1=Fire Stone | ||
| + | |A2=Fire Stone|B2=Stick|C2=Fire Stone | ||
| + | |B3=Stick | ||
| + | |Output=Fire Stone Hammer | ||
| + | |nobreak=y | ||
| + | |B2-link={{mclink|Stick}}|B3-link={{mclink|Stick}} | ||
| + | }} | ||
| + | |style="text-align:center"|[[Water Stone Hammer]] | ||
| + | |[[Water Stone]] +<br>{{mc|Stick}} | ||
| + | |{{Grid/Crafting Table | ||
| + | |A1=Water Stone|B1=Water Stone|C1=Water Stone | ||
| + | |A2=Water Stone|B2=Stick|C2=Water Stone | ||
| + | |B3=Stick | ||
| + | |Output=Water Stone Hammer | ||
| + | |nobreak=y | ||
| + | |B2-link={{mclink|Stick}}|B3-link={{mclink|Stick}} | ||
| + | }} | ||
| + | |- | ||
| + | |style="text-align:center"|[[Leaf Stone Hammer]] | ||
| + | |[[Leaf Stone]] +<br>{{mc|Stick}} | ||
| + | |{{Grid/Crafting Table | ||
| + | |A1=Leaf Stone|B1=Leaf Stone|C1=Leaf Stone | ||
| + | |A2=Leaf Stone|B2=Stick|C2=Leaf Stone | ||
| + | |B3=Stick | ||
| + | |Output=Leaf Stone Hammer | ||
| + | |nobreak=y | ||
| + | |B2-link={{mclink|Stick}}|B3-link={{mclink|Stick}} | ||
| + | }} | ||
| + | |style="text-align:center"|[[Thunder Stone Hammer]] | ||
| + | |[[Thunder Stone]] +<br>{{mc|Stick}} | ||
| + | |{{Grid/Crafting Table | ||
| + | |A1=Thunder Stone|B1=Thunder Stone|C1=Thunder Stone | ||
| + | |A2=Thunder Stone|B2=Stick|C2=Thunder Stone | ||
| + | |B3=Stick | ||
| + | |Output=Thunder Stone Hammer | ||
| + | |nobreak=y | ||
| + | |B2-link={{mclink|Stick}}|B3-link={{mclink|Stick}} | ||
| + | }} | ||
| + | |- | ||
| + | |style="text-align:center"|[[Sun Stone Hammer]] | ||
| + | |[[Sun Stone]] +<br>{{mc|Stick}} | ||
| + | |{{Grid/Crafting Table | ||
| + | |A1=Sun Stone|B1=Sun Stone|C1=Sun Stone | ||
| + | |A2=Sun Stone|B2=Stick|C2=Sun Stone | ||
| + | |B3=Stick | ||
| + | |Output=Sun Stone Hammer | ||
| + | |nobreak=y | ||
| + | |B2-link={{mclink|Stick}}|B3-link={{mclink|Stick}} | ||
| + | }} | ||
| + | |style="text-align:center"|[[Moon Stone Hammer]] | ||
| + | |[[Moon Stone]] +<br>{{mc|Stick}} | ||
| + | |{{Grid/Crafting Table | ||
| + | |A1=Moon Stone|B1=Moon Stone|C1=Moon Stone | ||
| + | |A2=Moon Stone|B2=Stick|C2=Moon Stone | ||
| + | |B3=Stick | ||
| + | |Output=Moon Stone Hammer | ||
| + | |nobreak=y | ||
| + | |B2-link={{mclink|Stick}}|B3-link={{mclink|Stick}} | ||
| + | }} | ||
| + | |- | ||
| + | |style="text-align:center"|[[Dawn Stone Hammer]] | ||
| + | |[[Dawn Stone]] +<br>{{mc|Stick}} | ||
| + | |{{Grid/Crafting Table | ||
| + | |A1=Dawn Stone|B1=Dawn Stone|C1=Dawn Stone | ||
| + | |A2=Dawn Stone|B2=Stick|C2=Dawn Stone | ||
| + | |B3=Stick | ||
| + | |Output=Dawn Stone Hammer | ||
| + | |nobreak=y | ||
| + | |B2-link={{mclink|Stick}}|B3-link={{mclink|Stick}} | ||
| + | }} | ||
| + | |style="text-align:center"|[[Dusk Stone Hammer]] | ||
| + | |[[Dusk Stone]] +<br>{{mc|Stick}} | ||
| + | |{{Grid/Crafting Table | ||
| + | |A1=Dusk Stone|B1=Dusk Stone|C1=Dusk Stone | ||
| + | |A2=Dusk Stone|B2=Stick|C2=Dusk Stone | ||
| + | |B3=Stick | ||
| + | |Output=Dusk Stone Hammer | ||
| + | |nobreak=y | ||
| + | |B2-link={{mclink|Stick}}|B3-link={{mclink|Stick}} | ||
| + | }} | ||
| + | |- | ||
| + | |style="text-align:center"|[[Platinum Hammer]] | ||
| + | |[[Platinum Ingot]] +<br>{{mc|Stick}} | ||
| + | |{{Grid/Crafting Table | ||
| + | |A1=Platinum Ingot |B1=Platinum Ingot |C1=Platinum Ingot | ||
| + | |A2=Platinum Ingot |B2=Stick |C2=Platinum Ingot | ||
| + | |B3=Stick | ||
| + | |Output=Platinum Hammer | ||
| + | |nobreak=y | ||
| + | |B2-link={{mclink|Stick}}|B3-link={{mclink|Stick}} | ||
| + | }} | ||
| + | |style="text-align:center"|[[Silver Hammer]] | ||
| + | |[[Silver Ingot]] +<br>{{mc|Stick}} | ||
| + | |{{Grid/Crafting Table | ||
| + | |A1=Silver Ingot |B1=Silver Ingot |C1=Silver Ingot | ||
| + | |A2=Silver Ingot |B2=Stick |C2=Silver Ingot | ||
| + | |B3=Stick | ||
| + | |Output=Silver Hammer | ||
| + | |nobreak=y | ||
| + | |B2-link={{mclink|Stick}}|B3-link={{mclink|Stick}} | ||
| + | }} | ||
| + | |} | ||
| + | |||
| + | |||
| + | ==History== | ||
| + | {{History}} | ||
| + | |||
| + | Prior to version 9.0.1, hammers were used to turn [[iron discs]] into [[iron bases]], and [[aluminum discs]] into [[aluminum plates]]. One use of the hammer changes its target by one stage; three uses are needed to complete the transformation of an item. | ||
| + | |||
| + | <spoiler text="Comparison of former ingot/base hammering speeds"> | ||
{| class="wikitable sortable" | {| class="wikitable sortable" | ||
|- | |- | ||
| Line 24: | Line 277: | ||
|style="text-align:center"|1.5 | |style="text-align:center"|1.5 | ||
|- | |- | ||
| − | |{{i| | + | |{{i|Aluminum Hammer}} |
|style="text-align:center"|200 | |style="text-align:center"|200 | ||
|style="text-align:center"|66 | |style="text-align:center"|66 | ||
| − | |style="text-align:center"| | + | |style="text-align:center"|4.5 seconds |
| − | |style="text-align:center"| | + | |style="text-align:center"|11.25 seconds |
|style="text-align:center"|2 | |style="text-align:center"|2 | ||
|- | |- | ||
| Line 136: | Line 389: | ||
|style="text-align:center"|1.5 | |style="text-align:center"|1.5 | ||
|} | |} | ||
| − | Note: Manufacture time is based on the time taken to manufacture the item and retrieve it | + | |
| − | + | Note: Manufacture time is based on the time taken to manufacture the item and retrieve it by using the anvil as soon as it is finished. Retrieving the object by continuing to hammer is slightly slower. | |
| − | + | </spoiler> | |
| − | + | ||
| − | + | [[Category:Items]] | |
| − | |||
| − | |||
| − | |||
| − | |||
| − | |||
| − | |||
| − | |||
| − | |||
| − | |||
| − | |||
| − | |||
| − | |||
| − | |||
| − | |||
| − | |||
| − | |||
| − | |||
| − | |||
| − | |||
| − | |||
| − | |||
| − | |||
| − | |||
| − | |||
| − | |||
| − | |||
| − | |||
| − | |||
| − | |||
| − | |||
| − | |||
| − | |||
| − | |||
| − | |||
| − | |||
| − | |||
| − | |||
| − | |||
| − | |||
| − | |||
| − | |||
| − | |||
| − | |||
| − | |||
| − | |||
| − | |||
| − | |||
| − | |||
| − | |||
| − | |||
| − | |||
| − | |||
| − | |||
| − | |||
| − | |||
| − | |||
| − | |||
| − | |||
| − | |||
| − | |||
| − | |||
| − | |||
| − | |||
| − | |||
| − | |||
| − | |||
| − | |||
| − | |||
| − | |||
| − | |||
| − | |||
| − | |||
| − | |||
| − | |||
| − | |||
| − | |||
| − | |||
| − | |||
| − | |||
| − | |||
| − | |||
| − | |||
| − | |||
| − | |||
| − | |||
| − | |||
| − | |||
| − | |||
| − | |||
| − | |||
| − | |||
| − | |||
| − | |||
| − | |||
| − | |||
| − | |||
| − | |||
| − | |||
| − | |||
| − | |||
| − | |||
| − | |||
| − | |||
| − | |||
| − | |||
| − | |||
| − | |||
| − | |||
| − | |||
| − | |||
| − | |||
| − | |||
| − | |||
| − | |||
| − | |||
| − | |||
| − | |||
| − | |||
| − | |||
| − | |||
| − | |||
| − | |||
| − | |||
| − | |||
| − | |||
| − | |||
| − | |||
| − | |||
| − | |||
| − | |||
| − | |||
| − | |||
| − | |||
| − | |||
| − | |||
| − | |||
| − | |||
| − | |||
| − | |||
| − | |||
| − | |||
| − | |||
| − | |||
Latest revision as of 03:02, 20 June 2023
Hammers are a type of tool which can be used on any of the three types of Tumblestone Crystals (Red, Black and Sky) to gather Raw Tumblestones. Hammers can be obtained via crafting, or as loot from a village toolsmith chest. When a crystal is fully destroyed, 1-3 Raw Tumblestones are dropped, and the crystal will begin to regrow.
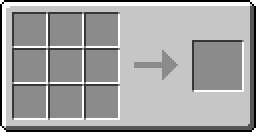
Additionally, hammers destroy a 3x3 area when they are used to mine. To balance this increased mining capability, hammers are typically 4x slower than a pickaxe of the same material and take additional durability damage according to the Hammer Durability Loss Multiplier. The Hammer Durability Loss Multiplier is by default set to 3, and can be changed in the config.yml file. The extra durability damage is calculated as follows:
Extra Damage = (Additional Blocks Broken Besides Targeted Block * The Hammer Durability Loss Multiplier) - Additional Blocks Broken Besides Targeted Block
If you only mine one block with a hammer, it will still only take 1 damage to its durability.
Extra Damage = (0 * 3) - 0 = 0
Total Damage = 1 Mined Blocks + 0 Extra Damage = 1
If you mine a maximum of 9 blocks with a hammer, it will take a total of 25 damage to its durability.
Extra Damage = (8 * 3) - 8 = 16
Total Damage = 9 Mined Blocks + 16 Extra Damage = 25
Contents
Obtaining
Chest Loot
2 hammers will always be found in village toolsmith chests. Possible materials are Aluminum, Iron, Amethyst, Crystal, Sapphire, Ruby, Silver, Gold, Diamond and Platinum.
Crafting
History
Prior to version 9.0.1, hammers were used to turn iron discs into iron bases, and aluminum discs into aluminum plates. One use of the hammer changes its target by one stage; three uses are needed to complete the transformation of an item.