
 NodeCraft
Difference between revisions of "Aluminum Plate"
From Pixelmon Wiki
m (Extra info to trivia about Ingots replacing Plate function) |
|||
| (28 intermediate revisions by 6 users not shown) | |||
| Line 1: | Line 1: | ||
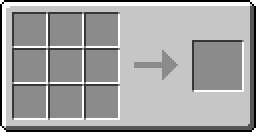
| − | + | [[File:Grid Aluminum Plate.png|right]] | |
| + | Prior to 9.0.1, aluminum plates could be used to craft several [[items]]. | ||
| − | + | __TOC__ | |
| − | + | ||
| − | + | ==Trivia== | |
| − | + | Aluminum plates used to be part of the crafting recipes below. | |
| − | | | + | '''[[Aluminum Ingot|Aluminum Plates have been replaced with Aluminum ingots in every crafting recipe (Click me for all recipes).]]''' |
| − | | | + | ===Crafting ingredient=== |
| − | | | + | {|class="mw-collapsible mw-collapsed wikitable sortable" |
| − | | | + | |- |
| − | + | ! Item | |
| − | {{Grid/Crafting Table | + | ! class="unsortable" | Crafting recipe |
| − | |A1= | + | |- |
| + | |style="text-align:center"|[[Healer]] | ||
| + | |{{Grid/Crafting Table | ||
| + | |A1=Aluminum Plate |B1=Iron Ingot |C1=Aluminum Plate | ||
|A2=Iron Ingot |B2=Diamond |C2=Iron Ingot | |A2=Iron Ingot |B2=Diamond |C2=Iron Ingot | ||
| − | |A3= | + | |A3=Aluminum Plate |B3=Iron Ingot |C3=Aluminum Plate |
|Output=Healer | |Output=Healer | ||
| − | | | + | |B1-link={{mclink|Iron_Ingot}}|A2-link={{mclink|Iron_Ingot}}|B2-link={{mclink|Diamond}}|C2-link={{mclink|Iron_Ingot}}|B3-link={{mclink|Iron_Ingot}} |
| − | |nobreak=y | + | |nobreak=y}} |
| − | }} | + | |- |
| − | {{Grid/Crafting Table | + | |style="text-align:center"|[[PC]] |
| − | |A1= | + | |{{Grid/Crafting Table |
| − | |A2= | + | |A1=Aluminum Plate |B1=Glass Pane |C1=Aluminum Plate |
| + | |A2=Aluminum Plate |B2=Redstone Lamp |C2=Aluminum Plate | ||
| + | |A3=Aluminum Plate |B3=Redstone |C3=Aluminum Plate | ||
| + | |Output=PC | ||
| + | |B1-link={{mclink|Glass_Pane}}|B2-link={{mclink|Redstone_Lamp}}|B3-link={{mclink|Redstone}} | ||
| + | |nobreak=n}} | ||
| + | |- | ||
| + | |style="text-align:center"|[[Infuser]] | ||
| + | |{{Grid/Crafting Table | ||
| + | |A1=Glass Bottle |B1=Amethyst |C1=Glass Bottle | ||
| + | |A2=Aluminum Plate |B2=Coal |C2=Aluminum Plate | ||
| + | |A3=Aluminum Plate |B3=Furnace |C3=Aluminum Plate | ||
| + | |Output=Infuser | ||
| + | |A1-link={{mclink|Glass_Bottle}}|C1-link={{mclink|Glass_Bottle}} | ||
| + | |B3-link={{mclink|Furnace}} | ||
| + | |nobreak=y}} | ||
| + | |- | ||
| + | |style="text-align:center"|[[Incense Burner]] | ||
| + | |{{Grid/Crafting Table | ||
| + | |A1=Aluminum Plate |B1=Iron Bars |C1=Aluminum Plate | ||
| + | |A2=Iron Bars |B2=Minecraft Charcoal |C2=Iron Bars | ||
| + | |A3=Aluminum Plate |B3=Iron Bars |C3=Aluminum Plate | ||
| + | |Output=Incense Burner | ||
| + | |B2-link={{mclink|Charcoal}} | ||
| + | |nobreak=y}} | ||
| + | |- | ||
| + | |style="text-align:center"|[[Fossil Cleaner]] | ||
| + | |{{Grid/Crafting Table | ||
| + | |A1=Aluminum Plate |B1=Aluminum Plate |C1=Aluminum Plate | ||
| + | |A2=Aluminum Plate |B2=Aluminum Plate |C2=Aluminum Plate | ||
|A3=Redstone |B3=Glass Pane |C3=Redstone | |A3=Redstone |B3=Glass Pane |C3=Redstone | ||
|Output=Fossil Cleaner | |Output=Fossil Cleaner | ||
| − | |B3-link={{mclink|Glass_Pane}} | + | |A3-link={{mclink|Redstone}}|B3-link={{mclink|Glass_Pane}}|C3-link={{mclink|Redstone}} |
| − | |nobreak=y | + | |nobreak=y}} |
| − | }} | + | |- |
| − | {{Grid/Crafting Table | + | |style="text-align:center"|[[Movement Plate]] |
| − | |A1= | + | |{{Grid/Crafting Table |
| − | |A2= | + | |B1=Lime Dye |
| − | |A3= |B3= |C3= | + | |A2=Redstone |B2=Redstone Lamp |C2=Redstone |
| + | |B3=Aluminum Plate | ||
| + | |Output=Movement Plate | ||
| + | |B1-link={{mclink|Lime_Dye}}|A2-link={{mclink|Redstone}}|B2-link={{mclink|Redstone_Lamp}}|C2-link={{mclink|Redstone}} | ||
| + | |nobreak=y}} | ||
| + | |- | ||
| + | |style="text-align:center"|[[Stick Plate]] | ||
| + | |{{Grid/Crafting Table | ||
| + | |A1=Soul Sand |B1=Lapis Lazuli |C1=Soul Sand | ||
| + | |A2=Redstone |B2=Redstone Lamp |C2=Redstone | ||
| + | |B3=Aluminum Plate | ||
| + | |Output=Stick Plate | ||
| + | |A1-link={{mclink|Soul_Sand}}|B1-link={{mclink|Lapis_Lazuli}}|C1-link={{mclink|Soul_Sand}}|A2-link={{mclink|Redstone}}|B2-link={{mclink|Redstone_Lamp}}|C2-link={{mclink|Redstone}} | ||
| + | |nobreak=y}} | ||
| + | |- | ||
| + | |style="text-align:center"|[[Gym Sign]] | ||
| + | |{{Grid/Crafting Table | ||
| + | |B2=Aluminum Plate | ||
| + | |A3=Aluminum Plate |B3=Rose Red |C3=Aluminum Plate | ||
| + | |Output=Gym Sign | ||
| + | |B3-link={{mclink|Rose_Red}} | ||
| + | |nobreak=y}} | ||
| + | |- | ||
| + | |style="text-align:center"|[[ItemFinder]] | ||
| + | |{{Grid/Crafting Table | ||
| + | |A1=Diamond |B1=Gold Ingot |C1=Diamond | ||
| + | |A2=Gold Ingot |B2=Redstone |C2=Gold Ingot | ||
| + | |A3=Aluminum Plate |B3=Glass Pane |C3=Aluminum Plate | ||
| + | |Output=ItemFinder | ||
| + | |A1-link={{mclink|Diamond}}|B1-link={{mclink|Gold_Ingot}}|C1-link={{mclink|Diamond}}|A2-link={{mclink|Gold_Ingot}}|B2-link={{mclink|Redstone}}|C2-link={{mclink|Gold_Ingot}}|B3-link={{mclink|Glass_Pane}} | ||
| + | |nobreak=y}} | ||
| + | |- | ||
| + | |style="text-align:center"|[[Cooking Pot]] | ||
| + | |{{Grid/Crafting Table | ||
| + | |B1=Cauldron | ||
| + | |B2=Aluminum Plate | ||
| + | |A3=Aluminum Plate |C3=Aluminum Plate | ||
| + | |Output=Cooking Pot | ||
| + | |nobreak=y}} | ||
| + | |- | ||
| + | |style="text-align:center"|[[Trade Monitor]] | ||
| + | |{{Grid/Crafting Table | ||
| + | |A1=Aluminum Plate |B1=Aluminum Plate |C1=Aluminum Plate | ||
| + | |A2=Aluminum Plate |B2=Glass Pane |C2=Aluminum Plate | ||
| + | |A3=Aluminum Plate |B3=Aluminum Plate |C3=Aluminum Plate | ||
| + | |Output=Trade Monitor | ||
| + | |B2-link={{mclink|Glass_Pane}} | ||
| + | |nobreak=y}} | ||
| + | |- | ||
| + | |style="text-align:center"|[[Trade Holder Right]] | ||
| + | |{{Grid/Crafting Table | ||
| + | |A2=Poké Ball |B2=Aluminum Plate |C2=Aluminum Plate | ||
| + | |A3=Aluminum Plate |B3=Aluminum Plate | ||
| + | |Output=Trade Holder Right | ||
| + | |nobreak=y}} | ||
| + | |- | ||
| + | |style="text-align:center"|[[Trade Holder Left]] | ||
| + | |{{Grid/Crafting Table | ||
| + | |A2=Aluminum Plate |B2=Aluminum Plate |C2=Poké Ball | ||
| + | |B3=Aluminum Plate |C3=Aluminum Plate | ||
| + | |Output=Trade Holder Left | ||
| + | |nobreak=y}} | ||
| + | |- | ||
| + | |style="text-align:center"|[[Trade Panel]] | ||
| + | |{{Grid/Crafting Table | ||
| + | |A1=Aluminum Plate |B1=Aluminum Plate |C1=Aluminum Plate | ||
| + | |A2=Redstone |B2=Redstone |C2=Redstone | ||
| + | |A3=Aluminum Plate |B3=Redstone |C3=Aluminum Plate | ||
| + | |Output=Trade Panel | ||
| + | |A2-link={{mclink|Redstone}}|B2-link={{mclink|Redstone}}|C2-link={{mclink|Redstone}}|B3-link={{mclink|Redstone}} | ||
| + | |nobreak=y}} | ||
| + | |- | ||
| + | |style="text-align:center"|[[Green Tank]] | ||
| + | |{{Grid/Crafting Table | ||
| + | |A1=Aluminum Plate |B1=Aluminum Plate |C1=Aluminum Plate | ||
| + | |A2=Emerald |B2=Fossil Machine |C2=Emerald | ||
| + | |A3=Obsidian |B3=Obsidian |C3=Obsidian | ||
| + | |Output=Green Tank | ||
| + | |A2-link={{mclink|Emerald}} |C2-link={{mclink|Emerald}} | ||
| + | |A3-link={{mclink|Obsidian}} |B3-link={{mclink|Obsidian}} |C3-link={{mclink|Obsidian}} | ||
| + | |nobreak=y}} | ||
| + | |- | ||
| + | |style="text-align:center"|[[Orange Tank]] | ||
| + | |{{Grid/Crafting Table | ||
| + | |A1=Aluminum Plate |B1=Aluminum Plate |C1=Aluminum Plate | ||
| + | |A2=Gold Ingot |B2=Fossil Machine |C2=Gold Ingot | ||
| + | |A3=Obsidian |B3=Obsidian |C3=Obsidian | ||
| + | |Output=Orange Tank | ||
| + | |A2-link={{mclink|Gold_Ingot}} |C2-link={{mclink|Gold_Ingot}} | ||
| + | |A3-link={{mclink|Obsidian}} |B3-link={{mclink|Obsidian}} |C3-link={{mclink|Obsidian}} | ||
| + | |nobreak=y}} | ||
| + | |- | ||
| + | |style="text-align:center"|[[Camera]] | ||
| + | |{{Grid/Crafting Table | ||
| + | |C1=Button | ||
| + | |A2=Aluminum Plate |B2=Glass Pane |C2=Aluminum Plate | ||
| + | |A3=Aluminum Plate |B3=Redstone Torch |C3=Aluminum Plate | ||
| + | |Output=Camera | ||
| + | |C1-link={{mclink|Button}} | ||
| + | |B2-link={{mclink|Glass_Pane}} | ||
| + | |B3-link={{mclink|Redstone_Torch}} | ||
| + | |nobreak=y}} | ||
| + | |- | ||
| + | |style="text-align:center"|[[Small TV]] | ||
| + | |{{Grid/Crafting Table | ||
| + | |A1=Aluminum Plate |B1=Aluminum Plate |C1=Aluminum Plate | ||
| + | |A2=Glass Pane |B2=Redstone Lamp |C2=Glass Pane | ||
| + | |A3=Aluminum Plate |B3=Redstone |C3=Aluminum Plate | ||
| + | |Output=Small TV | ||
| + | |A2-link={{mclink|Glass_Pane}} |C2-link={{mclink|Glass_Pane}} | ||
| + | |nobreak=y}} | ||
| + | |- | ||
| + | |style="text-align:center"|[[Cash Register]] | ||
| + | |{{Grid/Crafting Table | ||
| + | |A1=Redstone Lamp | ||
| + | |A2=Aluminum Plate |B2=Gold Nugget | ||
| + | |A3=Aluminum Plate |B3=Aluminum Plate |C3=Aluminum Plate | ||
| + | |Output=Cash Register | ||
| + | |nobreak=y}} | ||
| + | |- | ||
| + | |style="text-align:center"|[[Fossil Machine Top]] | ||
| + | |{{Grid/Crafting Table | ||
| + | |A2=Aluminum Plate |B2=Redstone |C2=Aluminum Plate | ||
| + | |A3=Aluminum Plate |B3=Aluminum Plate |C3=Aluminum Plate | ||
|Output=Fossil Machine Top | |Output=Fossil Machine Top | ||
| − | | | + | |B2-link={{mclink|Redstone}} |
| − | |nobreak=y | + | |nobreak=y}} |
| − | }} | + | |- |
| − | {{Grid/Crafting Table | + | |style="text-align:center"|[[Fossil Machine Base]] |
| − | + | |{{Grid/Crafting Table | |
| − | |A2= | + | |A2=Aluminum Plate |B2=Aluminum Plate |C2=Aluminum Plate |
| − | |A3= | + | |A3=Aluminum Plate |B3=Aluminum Plate |C3=Aluminum Plate |
|Output=Fossil Machine Base | |Output=Fossil Machine Base | ||
| − | | | + | |nobreak=y}} |
| − | |nobreak=y | + | |- |
| + | |style="text-align:center"|[[Cell Battery]] | ||
| + | |{{Grid/Crafting Table | ||
| + | |A1=Aluminum Plate|B1=Redstone|C1=Aluminum Plate | ||
| + | |A2=Aluminum Plate|B2=Redstone|C2=Aluminum Plate | ||
| + | |A3=Aluminum Plate|B3=Redstone|C3=Aluminum Plate | ||
| + | |Output=Cell Battery|nobreak=y | ||
}} | }} | ||
| − | {{Grid/Crafting Table | + | |- |
| − | |A1= | + | |style="text-align:center"|[[Dubious Disc]] |
| − | |A2= | + | |{{Grid/Crafting Table |
| − | |A3= | + | |A1=Aluminum Plate|B1=Eye of Ender|C1=Aluminum Plate |
| − | |Output= | + | |A2=Silicon|B2=Silicon|C2=Silicon |
| − | | | + | |A3=Aluminum Plate|B3=Redstone|C3=Aluminum Plate |
| − | + | |Output=Dubious Disc|nobreak=y | |
| + | |B1-link={{mclink|Eye_of_Ender}} | ||
}} | }} | ||
| − | {{Grid/Crafting Table | + | |- |
| − | |A1= | + | |style="text-align:center"|[[Metal Coat]] |
| − | |A2= | + | |{{Grid/Crafting Table |
| − | |A3= | + | |A1=Iron Ingot|B1=Aluminum Plate|C1=Iron Ingot |
| − | |Output= | + | |A2=Aluminum Plate|B2=Block of Iron|C2=Aluminum Plate |
| − | | | + | |A3=Iron Ingot|B3=Aluminum Plate|C3=Iron Ingot |
| − | | | + | |Output=Metal Coat|nobreak=y |
| + | |B2-link={{mclink|Block_of_Iron}} | ||
}} | }} | ||
| − | {{Grid/Crafting Table | + | |- |
| − | |A1= | + | |style="text-align:center"|[[Soothe Bell]] |
| − | |A2= | + | |{{Grid/Crafting Table |
| − | |A3= |B3= |C3= | + | |A1=String|B1=String |
| − | |Output= | + | |A2=Aluminum Plate|B2=Gold Nugget|C2=Aluminum Plate |
| − | + | |A3=Aluminum Plate|B3=Aluminum Plate|C3=Aluminum Plate | |
| − | |nobreak=y | + | |Output=Soothe Bell|nobreak=y |
}} | }} | ||
| − | {{Grid/Crafting Table | + | |- |
| − | |A1= | + | |style="text-align:center"|[[Up-Grade]] |
| − | |A2= | + | |{{Grid/Crafting Table |
| − | |A3= |B3= | + | |A1=Aluminum Plate|B1=Aluminum Plate|C1=Aluminum Plate |
| − | |Output= | + | |A2=Silicon|B2=Silicon|C2=Silicon |
| − | + | |A3=Aluminum Plate|B3=Aluminum Plate|C3=Aluminum Plate | |
| + | |Output=Up-Grade | ||
|nobreak=y | |nobreak=y | ||
}} | }} | ||
| − | + | |} | |
| − | + | ||
| − | + | ===Hammering=== | |
| − | + | Prior to 9.0.0, aluminum plates crafting involved placing an [[aluminium ingot]] on an [[anvil]] and a [[hammer]] could then be used on it. Pictured below are the four stages of an aluminium ingot being hammered into an aluminium plate on an anvil. | |
| − | |||
| − | |||
| − | |||
| − | |||
| − | |||
| − | |||
| − | |||
| − | |||
| − | |||
| − | |||
| − | |||
| − | |||
| − | |||
| − | |||
| − | |||
| − | |||
| − | |||
| − | |||
| − | |||
| − | |||
| − | Pictured below are the four stages of an aluminium ingot being hammered into an aluminium plate on an anvil. | ||
<gallery> | <gallery> | ||
Aluminum_stages1.png | Aluminum_stages1.png | ||
| Line 105: | Line 249: | ||
Aluminum_stages4.png | Aluminum_stages4.png | ||
</gallery> | </gallery> | ||
| + | |||
| + | ==Obtaining== | ||
| + | ===Pokémon [[drops]]=== | ||
| + | {{DropPokémonH}} | ||
| + | {{DropPokémon|Bronzor|50.0|1}} | ||
| + | {{DropPokémon|Bronzong|100.0|1-2}} | ||
| + | {{DropPokémon|Klinklang|100.0|2-3}} | ||
| + | {{DropPokémon|Magneton|100.0|1-3}} | ||
| + | {{DropPokémon|Skarmory|100.0|1-2}} | ||
| + | {{DropPokémon|Togedemaru|100.0|1-3}} | ||
| + | {{DropPokémonF}} | ||
| + | |||
| + | [[Category:Items]] | ||
Latest revision as of 11:29, 31 May 2022
Prior to 9.0.1, aluminum plates could be used to craft several items.
Trivia
Aluminum plates used to be part of the crafting recipes below. Aluminum Plates have been replaced with Aluminum ingots in every crafting recipe (Click me for all recipes).
Crafting ingredient
Hammering
Prior to 9.0.0, aluminum plates crafting involved placing an aluminium ingot on an anvil and a hammer could then be used on it. Pictured below are the four stages of an aluminium ingot being hammered into an aluminium plate on an anvil.


Obtaining
Pokémon drops
| Pokémon | Chance | Quantity |
|---|---|---|
| Bronzor | 50% | 1 |
| Bronzong | 100% | 1-2 |
| Klinklang | 100% | 2-3 |
| Magneton | 100% | 1-3 |
| Skarmory | 100% | 1-2 |
| Togedemaru | 100% | 1-3 |