NodeCraft
Difference between revisions of "Hammers"
From Pixelmon Wiki
m (Standardised format) |
|||
| Line 137: | Line 137: | ||
|} | |} | ||
Note: Manufacture time is based on the time taken to manufacture the item and retrieve it by using the anvil as soon as it is finished. Retrieving the object by continuing to hammer is slightly slower. | Note: Manufacture time is based on the time taken to manufacture the item and retrieve it by using the anvil as soon as it is finished. Retrieving the object by continuing to hammer is slightly slower. | ||
| + | |||
| + | ==Obtaining== | ||
===Crafting=== | ===Crafting=== | ||
Hammers can be made similarly to any tool. Two {{mc|Stick|sticks}} go in the middle and bottom middle for the handle, and the empty slots in the first two rows need to be filled with the material of the desired hammer. | Hammers can be made similarly to any tool. Two {{mc|Stick|sticks}} go in the middle and bottom middle for the handle, and the empty slots in the first two rows need to be filled with the material of the desired hammer. | ||
| − | {{Grid/Crafting Table | + | {|class="mw-collapsible mw-uncollapsed wikitable sortable" |
| + | |- | ||
| + | ! Item | ||
| + | ! Ingredients | ||
| + | ! class="unsortable" | Crafting recipe | ||
| + | |- | ||
| + | |style="text-align:center"|[[Wood Hammer (item)|Wood Hammer]] | ||
| + | |[[Wood Planks]] +<br>{{mc|Stick}} | ||
| + | |{{Grid/Crafting Table | ||
|A1=Oak Wood Planks |B1=Oak Wood Planks |C1=Oak Wood Planks | |A1=Oak Wood Planks |B1=Oak Wood Planks |C1=Oak Wood Planks | ||
|A2=Oak Wood Planks |B2=Stick |C2=Oak Wood Planks | |A2=Oak Wood Planks |B2=Stick |C2=Oak Wood Planks | ||
| − | + | |B3=Stick | |
| − | |Output=Wood Hammer|Output-link=Wood Hammer (item) | + | |Output=Wood Hammer |
| − | + | |Output-link=Wood Hammer (item) | |
| + | |nobreak=y | ||
|B2-link={{mclink|Stick}}|B3-link={{mclink|Stick}} | |B2-link={{mclink|Stick}}|B3-link={{mclink|Stick}} | ||
}} | }} | ||
| − | {{Grid/Crafting Table | + | |- |
| + | |style="text-align:center"|[[Stone Hammer]] | ||
| + | |[[Cobblestone]] +<br>{{mc|Stick}} | ||
| + | |{{Grid/Crafting Table | ||
|A1=Cobblestone |B1=Cobblestone |C1=Cobblestone | |A1=Cobblestone |B1=Cobblestone |C1=Cobblestone | ||
|A2=Cobblestone |B2=Stick |C2=Cobblestone | |A2=Cobblestone |B2=Stick |C2=Cobblestone | ||
| − | + | |B3=Stick | |
|Output=Stone Hammer | |Output=Stone Hammer | ||
| − | + | |nobreak=y | |
|B2-link={{mclink|Stick}}|B3-link={{mclink|Stick}} | |B2-link={{mclink|Stick}}|B3-link={{mclink|Stick}} | ||
}} | }} | ||
| − | {{Grid/Crafting Table | + | |- |
| + | |style="text-align:center"|[[Aluminum Hammer]] | ||
| + | |[[Aluminum Ingot]] +<br>{{mc|Stick}} | ||
| + | |{{Grid/Crafting Table | ||
|A1=Aluminum Ingot |B1=Aluminum Ingot |C1=Aluminum Ingot | |A1=Aluminum Ingot |B1=Aluminum Ingot |C1=Aluminum Ingot | ||
|A2=Aluminum Ingot |B2=Stick |C2=Aluminum Ingot | |A2=Aluminum Ingot |B2=Stick |C2=Aluminum Ingot | ||
| − | + | |B3=Stick | |
|Output=Aluminum Hammer | |Output=Aluminum Hammer | ||
| − | + | |nobreak=y | |
|B2-link={{mclink|Stick}}|B3-link={{mclink|Stick}} | |B2-link={{mclink|Stick}}|B3-link={{mclink|Stick}} | ||
}} | }} | ||
| − | {{Grid/Crafting Table | + | |- |
| + | |style="text-align:center"|[[Iron Hammer]] | ||
| + | |[[Iron Ingot]] +<br>{{mc|Stick}} | ||
| + | |{{Grid/Crafting Table | ||
|A1=Iron Ingot |B1=Iron Ingot |C1=Iron Ingot | |A1=Iron Ingot |B1=Iron Ingot |C1=Iron Ingot | ||
|A2=Iron Ingot |B2=Stick |C2=Iron Ingot | |A2=Iron Ingot |B2=Stick |C2=Iron Ingot | ||
| − | + | |B3=Stick | |
|Output=Iron Hammer | |Output=Iron Hammer | ||
| − | + | |nobreak=y | |
|B2-link={{mclink|Stick}}|B3-link={{mclink|Stick}} | |B2-link={{mclink|Stick}}|B3-link={{mclink|Stick}} | ||
}} | }} | ||
| − | {{Grid/Crafting Table | + | |- |
| + | |style="text-align:center"|[[Gold Hammer]] | ||
| + | |[[Gold Ingot]] +<br>{{mc|Stick}} | ||
| + | |{{Grid/Crafting Table | ||
|A1=Gold Ingot |B1=Gold Ingot |C1=Gold Ingot | |A1=Gold Ingot |B1=Gold Ingot |C1=Gold Ingot | ||
|A2=Gold Ingot |B2=Stick |C2=Gold Ingot | |A2=Gold Ingot |B2=Stick |C2=Gold Ingot | ||
| − | + | |B3=Stick | |
|Output=Gold Hammer | |Output=Gold Hammer | ||
| − | + | |nobreak=y | |
|B2-link={{mclink|Stick}}|B3-link={{mclink|Stick}} | |B2-link={{mclink|Stick}}|B3-link={{mclink|Stick}} | ||
}} | }} | ||
| − | {{Grid/Crafting Table | + | |- |
| + | |style="text-align:center"|[[Diamond Hammer]] | ||
| + | |[[Diamond]] +<br>{{mc|Stick}} | ||
| + | |{{Grid/Crafting Table | ||
|A1=Diamond |B1=Diamond |C1=Diamond | |A1=Diamond |B1=Diamond |C1=Diamond | ||
|A2=Diamond |B2=Stick |C2=Diamond | |A2=Diamond |B2=Stick |C2=Diamond | ||
| − | + | |B3=Stick | |
|Output=Diamond Hammer | |Output=Diamond Hammer | ||
|nobreak=y | |nobreak=y | ||
|B2-link={{mclink|Stick}}|B3-link={{mclink|Stick}} | |B2-link={{mclink|Stick}}|B3-link={{mclink|Stick}} | ||
}} | }} | ||
| − | {{Grid/Crafting Table | + | |- |
| + | |style="text-align:center"|[[Ruby Hammer]] | ||
| + | |[[Ruby]] +<br>{{mc|Stick}} | ||
| + | |{{Grid/Crafting Table | ||
|A1=Ruby|B1=Ruby|C1=Ruby | |A1=Ruby|B1=Ruby|C1=Ruby | ||
|A2=Ruby|B2=Stick|C2=Ruby | |A2=Ruby|B2=Stick|C2=Ruby | ||
| Line 195: | Line 224: | ||
|B2-link={{mclink|Stick}}|B3-link={{mclink|Stick}} | |B2-link={{mclink|Stick}}|B3-link={{mclink|Stick}} | ||
}} | }} | ||
| − | {{Grid/Crafting Table | + | |- |
| + | |style="text-align:center"|[[Sapphire Hammer]] | ||
| + | |[[Sapphire]] +<br>{{mc|Stick}} | ||
| + | |{{Grid/Crafting Table | ||
|A1=Sapphire|B1=Sapphire|C1=Sapphire | |A1=Sapphire|B1=Sapphire|C1=Sapphire | ||
|A2=Sapphire|B2=Stick|C2=Sapphire | |A2=Sapphire|B2=Stick|C2=Sapphire | ||
| Line 203: | Line 235: | ||
|B2-link={{mclink|Stick}}|B3-link={{mclink|Stick}} | |B2-link={{mclink|Stick}}|B3-link={{mclink|Stick}} | ||
}} | }} | ||
| − | {{Grid/Crafting Table | + | |- |
| + | |style="text-align:center"|[[Amethyst Hammer]] | ||
| + | |[[Amethyst]] +<br>{{mc|Stick}} | ||
| + | |{{Grid/Crafting Table | ||
|A1=Amethyst|B1=Amethyst|C1=Amethyst | |A1=Amethyst|B1=Amethyst|C1=Amethyst | ||
|A2=Amethyst|B2=Stick|C2=Amethyst | |A2=Amethyst|B2=Stick|C2=Amethyst | ||
| Line 211: | Line 246: | ||
|B2-link={{mclink|Stick}}|B3-link={{mclink|Stick}} | |B2-link={{mclink|Stick}}|B3-link={{mclink|Stick}} | ||
}} | }} | ||
| − | {{Grid/Crafting Table | + | |- |
| + | |style="text-align:center"|[[Crystal Hammer]] | ||
| + | |[[Crystal]] +<br>{{mc|Stick}} | ||
| + | |{{Grid/Crafting Table | ||
|A1=Crystal|B1=Crystal|C1=Crystal | |A1=Crystal|B1=Crystal|C1=Crystal | ||
|A2=Crystal|B2=Stick|C2=Crystal | |A2=Crystal|B2=Stick|C2=Crystal | ||
| Line 219: | Line 257: | ||
|B2-link={{mclink|Stick}}|B3-link={{mclink|Stick}} | |B2-link={{mclink|Stick}}|B3-link={{mclink|Stick}} | ||
}} | }} | ||
| − | {{Grid/Crafting Table | + | |- |
| + | |style="text-align:center"|[[Fire Stone Hammer]] | ||
| + | |[[Fire Stone]] +<br>{{mc|Stick}} | ||
| + | |{{Grid/Crafting Table | ||
|A1=Fire Stone|B1=Fire Stone|C1=Fire Stone | |A1=Fire Stone|B1=Fire Stone|C1=Fire Stone | ||
|A2=Fire Stone|B2=Stick|C2=Fire Stone | |A2=Fire Stone|B2=Stick|C2=Fire Stone | ||
| Line 227: | Line 268: | ||
|B2-link={{mclink|Stick}}|B3-link={{mclink|Stick}} | |B2-link={{mclink|Stick}}|B3-link={{mclink|Stick}} | ||
}} | }} | ||
| − | {{Grid/Crafting Table | + | |- |
| + | |style="text-align:center"|[[Water Stone Hammer]] | ||
| + | |[[Water Stone]] +<br>{{mc|Stick}} | ||
| + | |{{Grid/Crafting Table | ||
|A1=Water Stone|B1=Water Stone|C1=Water Stone | |A1=Water Stone|B1=Water Stone|C1=Water Stone | ||
|A2=Water Stone|B2=Stick|C2=Water Stone | |A2=Water Stone|B2=Stick|C2=Water Stone | ||
| Line 235: | Line 279: | ||
|B2-link={{mclink|Stick}}|B3-link={{mclink|Stick}} | |B2-link={{mclink|Stick}}|B3-link={{mclink|Stick}} | ||
}} | }} | ||
| − | {{Grid/Crafting Table | + | |- |
| + | |style="text-align:center"|[[Leaf Stone Hammer]] | ||
| + | |[[Leaf Stone]] +<br>{{mc|Stick}} | ||
| + | |{{Grid/Crafting Table | ||
|A1=Leaf Stone|B1=Leaf Stone|C1=Leaf Stone | |A1=Leaf Stone|B1=Leaf Stone|C1=Leaf Stone | ||
|A2=Leaf Stone|B2=Stick|C2=Leaf Stone | |A2=Leaf Stone|B2=Stick|C2=Leaf Stone | ||
| Line 243: | Line 290: | ||
|B2-link={{mclink|Stick}}|B3-link={{mclink|Stick}} | |B2-link={{mclink|Stick}}|B3-link={{mclink|Stick}} | ||
}} | }} | ||
| − | {{Grid/Crafting Table | + | |- |
| + | |style="text-align:center"|[[Thunder Stone Hammer]] | ||
| + | |[[Thunder Stone]] +<br>{{mc|Stick}} | ||
| + | |{{Grid/Crafting Table | ||
|A1=Thunder Stone|B1=Thunder Stone|C1=Thunder Stone | |A1=Thunder Stone|B1=Thunder Stone|C1=Thunder Stone | ||
|A2=Thunder Stone|B2=Stick|C2=Thunder Stone | |A2=Thunder Stone|B2=Stick|C2=Thunder Stone | ||
| Line 251: | Line 301: | ||
|B2-link={{mclink|Stick}}|B3-link={{mclink|Stick}} | |B2-link={{mclink|Stick}}|B3-link={{mclink|Stick}} | ||
}} | }} | ||
| − | {{Grid/Crafting Table | + | |- |
| + | |style="text-align:center"|[[Sun Stone Hammer]] | ||
| + | |[[Sun Stone]] +<br>{{mc|Stick}} | ||
| + | |{{Grid/Crafting Table | ||
|A1=Sun Stone|B1=Sun Stone|C1=Sun Stone | |A1=Sun Stone|B1=Sun Stone|C1=Sun Stone | ||
|A2=Sun Stone|B2=Stick|C2=Sun Stone | |A2=Sun Stone|B2=Stick|C2=Sun Stone | ||
| Line 259: | Line 312: | ||
|B2-link={{mclink|Stick}}|B3-link={{mclink|Stick}} | |B2-link={{mclink|Stick}}|B3-link={{mclink|Stick}} | ||
}} | }} | ||
| − | {{Grid/Crafting Table | + | |- |
| + | |style="text-align:center"|[[Moon Stone Hammer]] | ||
| + | |[[Moon Stone]] +<br>{{mc|Stick}} | ||
| + | |{{Grid/Crafting Table | ||
|A1=Moon Stone|B1=Moon Stone|C1=Moon Stone | |A1=Moon Stone|B1=Moon Stone|C1=Moon Stone | ||
|A2=Moon Stone|B2=Stick|C2=Moon Stone | |A2=Moon Stone|B2=Stick|C2=Moon Stone | ||
| Line 267: | Line 323: | ||
|B2-link={{mclink|Stick}}|B3-link={{mclink|Stick}} | |B2-link={{mclink|Stick}}|B3-link={{mclink|Stick}} | ||
}} | }} | ||
| − | {{Grid/Crafting Table | + | |- |
| + | |style="text-align:center"|[[Dawn Stone Hammer]] | ||
| + | |[[Dawn Stone]] +<br>{{mc|Stick}} | ||
| + | |{{Grid/Crafting Table | ||
|A1=Dawn Stone|B1=Dawn Stone|C1=Dawn Stone | |A1=Dawn Stone|B1=Dawn Stone|C1=Dawn Stone | ||
|A2=Dawn Stone|B2=Stick|C2=Dawn Stone | |A2=Dawn Stone|B2=Stick|C2=Dawn Stone | ||
| Line 275: | Line 334: | ||
|B2-link={{mclink|Stick}}|B3-link={{mclink|Stick}} | |B2-link={{mclink|Stick}}|B3-link={{mclink|Stick}} | ||
}} | }} | ||
| − | {{Grid/Crafting Table | + | |- |
| + | |style="text-align:center"|[[Dusk Stone Hammer]] | ||
| + | |[[Dusk Stone]] +<br>{{mc|Stick}} | ||
| + | |{{Grid/Crafting Table | ||
|A1=Dusk Stone|B1=Dusk Stone|C1=Dusk Stone | |A1=Dusk Stone|B1=Dusk Stone|C1=Dusk Stone | ||
|A2=Dusk Stone|B2=Stick|C2=Dusk Stone | |A2=Dusk Stone|B2=Stick|C2=Dusk Stone | ||
| Line 283: | Line 345: | ||
|B2-link={{mclink|Stick}}|B3-link={{mclink|Stick}} | |B2-link={{mclink|Stick}}|B3-link={{mclink|Stick}} | ||
}} | }} | ||
| + | |} | ||
| + | |||
[[Category:Items]] | [[Category:Items]] | ||
Revision as of 15:50, 2 March 2022
Hammers are tools used to turn Poké Ball discs into Poké Ball lids, iron discs into iron bases, and aluminum ingots into aluminum plates. One use of the hammer changes its target by one stage; three uses are needed to complete the transformation of an item.
Comparison
| Hammer | Durability | # of items | Manufacture time (lid) | Manufacture time (plate) | Damage in combat |
|---|---|---|---|---|---|
| 60 | 20 | 26.25 seconds | 78.75 seconds | 1 | |
| 132 | 44 | 9 seconds | 24 seconds | 1.5 | |
| 200 | 66 | 4.5 seconds | 11.25 seconds | 2 | |
| 252 | 84 | 4.5 seconds | 11.25 seconds | 2 | |
| 33 | 11 | 3.9 seconds | 7.8 seconds | 1 | |
| 522 | 174 | 1.65 seconds | 4.95 seconds | 2.5 | |
| 300 | 100 | 3.9 seconds | 7.8 seconds | 2.5 | |
| 300 | 100 | 3.9 seconds | 7.8 seconds | 2.5 | |
| 300 | 100 | 3.9 seconds | 7.8 seconds | 2.5 | |
| 300 | 100 | 3.9 seconds | 7.8 seconds | 2.5 | |
| 522 | 174 | 1.5 seconds | 4.5 seconds | 3 | |
| 522 | 174 | 1.5 seconds | 4.5 seconds | 3 | |
| 252 | 84 | 3.9 seconds | 7.8 seconds | 2.5 | |
| 522 | 174 | 1.5 seconds | 4.5 seconds | 1.5 | |
| 522 | 174 | 1.5 seconds | 4.5 seconds | 1.5 | |
| 522 | 174 | 1.5 seconds | 4.5 seconds | 1.5 | |
| 522 | 174 | 1.5 seconds | 4.5 seconds | 1.5 | |
| 522 | 174 | 1.5 seconds | 4.5 seconds | 1.5 |
Note: Manufacture time is based on the time taken to manufacture the item and retrieve it by using the anvil as soon as it is finished. Retrieving the object by continuing to hammer is slightly slower.
Obtaining
Crafting
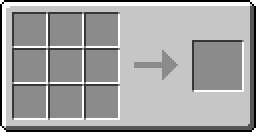
Hammers can be made similarly to any tool. Two sticks go in the middle and bottom middle for the handle, and the empty slots in the first two rows need to be filled with the material of the desired hammer.